General
The content on this page was translated automatically.
Contents
- Send e-mails
- Send e-mails (web access)
- Display and open e-mails
- Answering and forwarding e-mails
- Answering and forwarding e-mails (web access)
- Mark messages as important and request a read receipt
- Request read confirmation (web access)
- Autocomplete
- Save draft
- Attach files, graphics, links and images
Send e-mails
To open a new, empty e-mail message, you must first switch to the E-mail module (the small letter symbol at the bottom left). You now have several options here:
- Click on "New e-mail" via the "Start" tab.
- use the key combination "Control" and "N".

The new e-mail message is opened here in a separate window.
In the "Message" tab, you will find all the possibilities and options you need to edit an e-mail. Below this menu you will find all the input fields for a new message.
If you want to send the e-mail to several people, separate the e-mail addresses with a semicolon.
You also have the option of adding e-mail addresses via your address books. To do this, click directly on the "To" button.

As you can see in the following image, you have 2 address lists. One is the "Global address list", which is provided by your IT department and cannot be changed, and the other is your own "Contacts" address list.

You can also search for people in the search field, which is highlighted in blue in the following illustration. It is advisable to search by first name or surname.
Click on the desired person to select them first. You now have the following options:
- If you want to specify the person as the recipient, click on the "To" button marked in red in the following image.
- If you want to send the email to the person but do not expect a reply from them, click on the "Cc" button.
- If you also do not want the person to see the email addresses of the other recipients, click on the "Bcc" button.

Once you have entered all the desired persons, confirm with "OK".
In the next step, you should add a meaningful subject to your e-mail message.
After you have composed the e-mail, check again whether you have selected the recipient and whether you have chosen a meaningful subject. Then click on the "Send" button.

Send e-mails (web access)
To create a new e-mail, click on the "New" button at the top.

You can now start editing your new email.
In the "To" input field, enter the addressee(s) of your e-mail; if you want to use a contact from your address book or an address list, click on the "To" button.

To add an addressee from your address book, click on the "Plus button" next to the contact or contact group. Once you have added one or more addressees, confirm with the "Save" button.

Display and open e-mails
In the left-hand column, you will see your e-mail accounts with the corresponding mailboxes. If there are new/unread messages in your mailbox, this is indicated by a number next to the respective folder.

Please click on the folder to view your messages in the middle column. Then click on the message in the middle column so that you can view the content in the right-hand column.
Answering and forwarding e-mails
The icons for "Reply" and "Forward" are located above the header of a message.
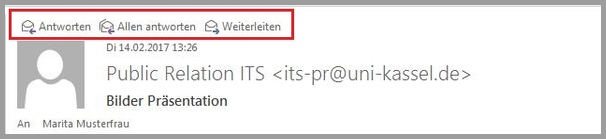
Depending on which function you would like to use, please click on one of the symbols. A window will then open in which you can type in an answer.

Under "Undock" you can open your message in an extra window and cancel the process under "Discard" (1.).
If you have saved several e-mail accounts under Outlook, you can select an e-mail account from which you would like to send your message under the arrow next to "From". (2.)
Answering and forwarding e-mails (web access)
To the right of the message header you will find an arrow button which you can use to access the options for the message.

After you have clicked on "Reply" or "Forward", a window will open in which you can create a reply.
Mark messages as important and request a read receipt
When writing a new message, you can integrate markers such as a read receipt to be informed when the recipient has received and opened the message.
To do this, please select the "Markers" function in the message dialog box menu. A dialog window then opens in which you can make various settings such as priority and read/receipt confirmation.


Request read confirmation (web access)
To find out whether your recipient has read your message, you can request a read confirmation. Click on the button with the three dots above your message and then on "Show message options".

In the newly opened dialog, check the box next to "Request read confirmation".

Autocomplete
If you have already sent emails to a specific recipient or if this recipient is contained in one of your address books, you can use the auto-complete function.
After entering the first letter, recipients will be suggested for you to choose from.
If you want to delete the email address from the suggestion list, you can use the icon highlighted in red in the following illustration.

Save draft
There are two ways to save an e-mail.
Click on the floppy disk icon via the quick access menu

Select the "Save" menu item via the "File" tab.

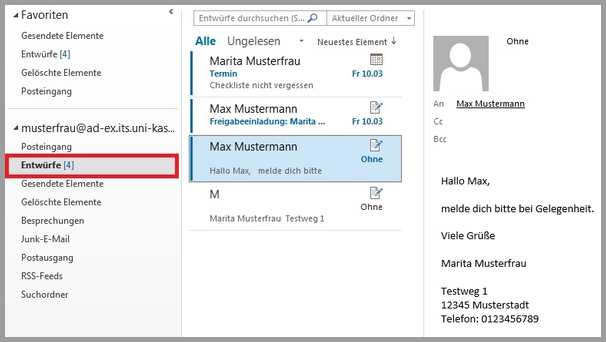
You will find the emails saved as drafts in the "Draft" folder. Here you can edit the email again in the reading pane or open it in a separate window by double-clicking on it.
Attach files, graphics, links and images
You can use Outlook to quickly access your documents and add them to an e-mail message.
To do this, switch to the "Insert" group via the "Message" ribbon tab. Here you will find the "Attach file" button. Click on it once.
The maximum data size that you can attach to a message
is 64 MB

You can access your most recently used elements in the upper area. Click on a file to attach it to the e-mail.

You also have the menu item "Search this PC". This allows you to access network drives and folders. To do this, click on the button and the File Explorer will open.

Clicking on the button opens the file explorer and you have the option of accessing your drives and selecting specific files.