Create appointment and meeting
The content on this page was translated automatically.
Contents
Create appointment (Windows)
You can create a new appointment as follows:
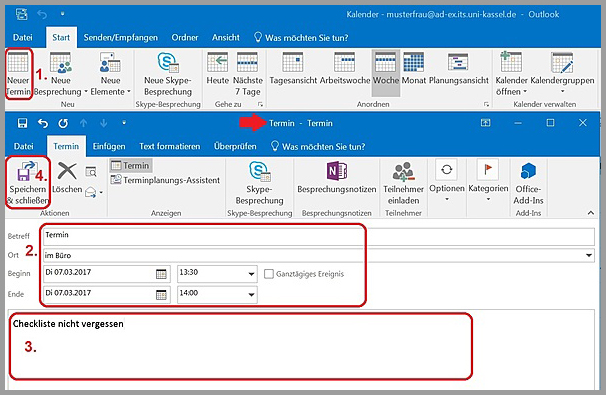
- Under the "Start" tab, click on "New appointment"
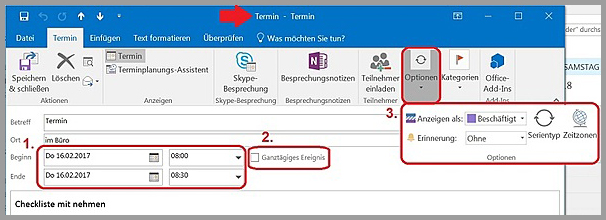
A window opens in which you can enter the required information, see example: - "Subject": e.g. appointment
"Location": e.g. in your office
"Start": Select date, time via drop-down menu
"End": Select date, time via drop-down menu - "Notes field": Information about the appointment
- Under the "Appointment" tab, click "Save & close"
The appointment is then displayed in the calendar on the day and time.
Create new meeting
To create a meeting, please proceed as follows:
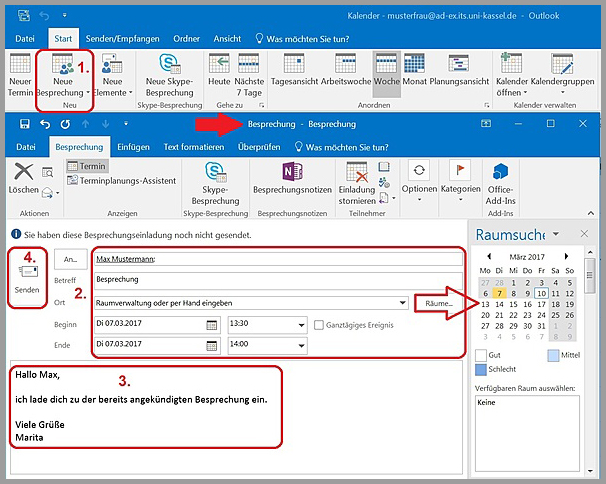
- In the "Start" tab, please click on "New meeting"
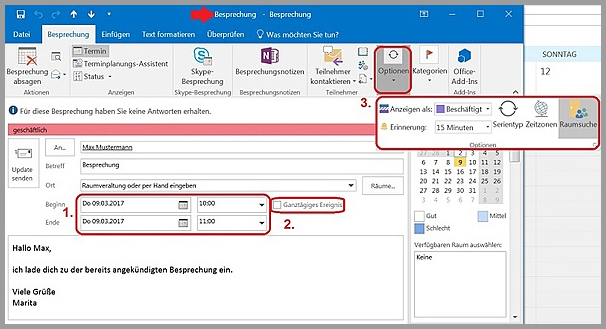
A new window will open. Enter the relevant information there, see example: - "To": E-mail address (from address book or enter manually)
"Subject": Meeting
"Location": If linked to the room allocation, you have the option of reserving a room. On the right-hand side of the calendar you can see whether the room is still free on the day in question.
"Start": Select date, time via calendar and drop-down menu
"End": Select date, time via calendar and drop-down menu - "Note field": Message to the person
- "Send": to complete the process
After sending, the meeting will be displayed in your calendar.
Change appointment or meeting
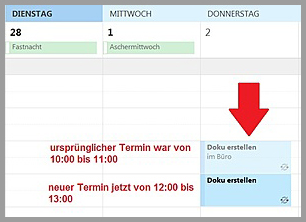
You can move a created appointment or meeting in the calendar.
- "Change appointment": click on the appointment and hold down the button. Then move the appointment to another day of the week.
Change content and series type in the appointment
Double-click to open the appointment or meeting.
1. adjust the contents, e.g. start and end of the appointment.
2. select the duration of the appointment for the whole day, then click on "All-day event"
3. under "Options" you can set the "Series type": e.g. change from single to series appointments (arrows).
In the last step, click on "Save and close" for the appointment or "Send update" for the
meeting.
Use or rename categories
Categories can be assigned to each appointment or meeting (e.g. business, private, out of office, etc.). The "Appointment" example is used here to show how categories are used. The same procedure applies to meetings.
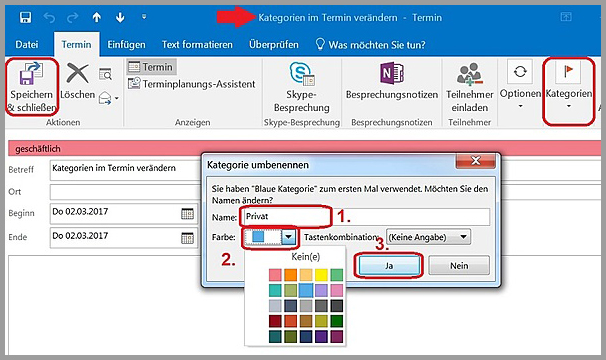
Double-click to open the appointment window. Please click on categories and proceed as follows:
- Rename category if necessary, e.g. Private
- Select a color from the color palette
- Confirm entries with "Yes".
Then click on "Save & close".
This procedure does not apply to appointment series. In this case, the appointment only needs to be clicked once in the calendar and then categorized.
Use categories (web access)
Categories can be assigned to each appointment or meeting (e.g. business, private, out of office, etc.).
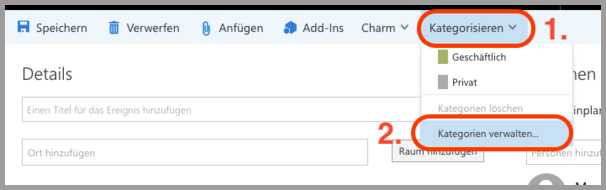
To assign a category to an appointment, click on Categorize in the menu bar at the top and then select the desired category.
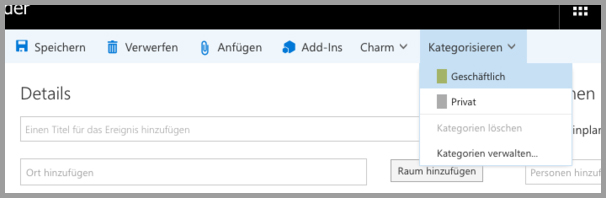
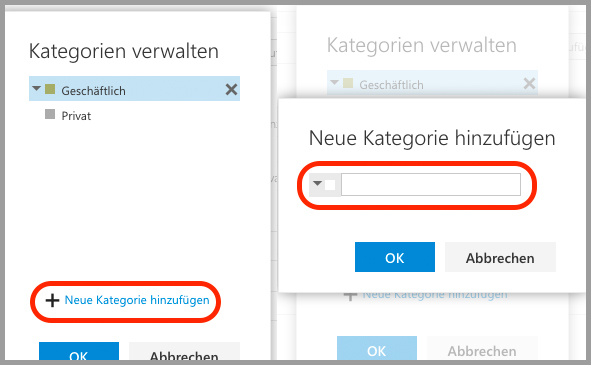
If you want to create a new category for your appointment, click on Categorize in the top menu bar and then on Manage categories.
In the dialog box, click on "Add new category" and then enter a title. To the left of the text field, you can select a color for your category.