Accounts for external users (without UniAccount)
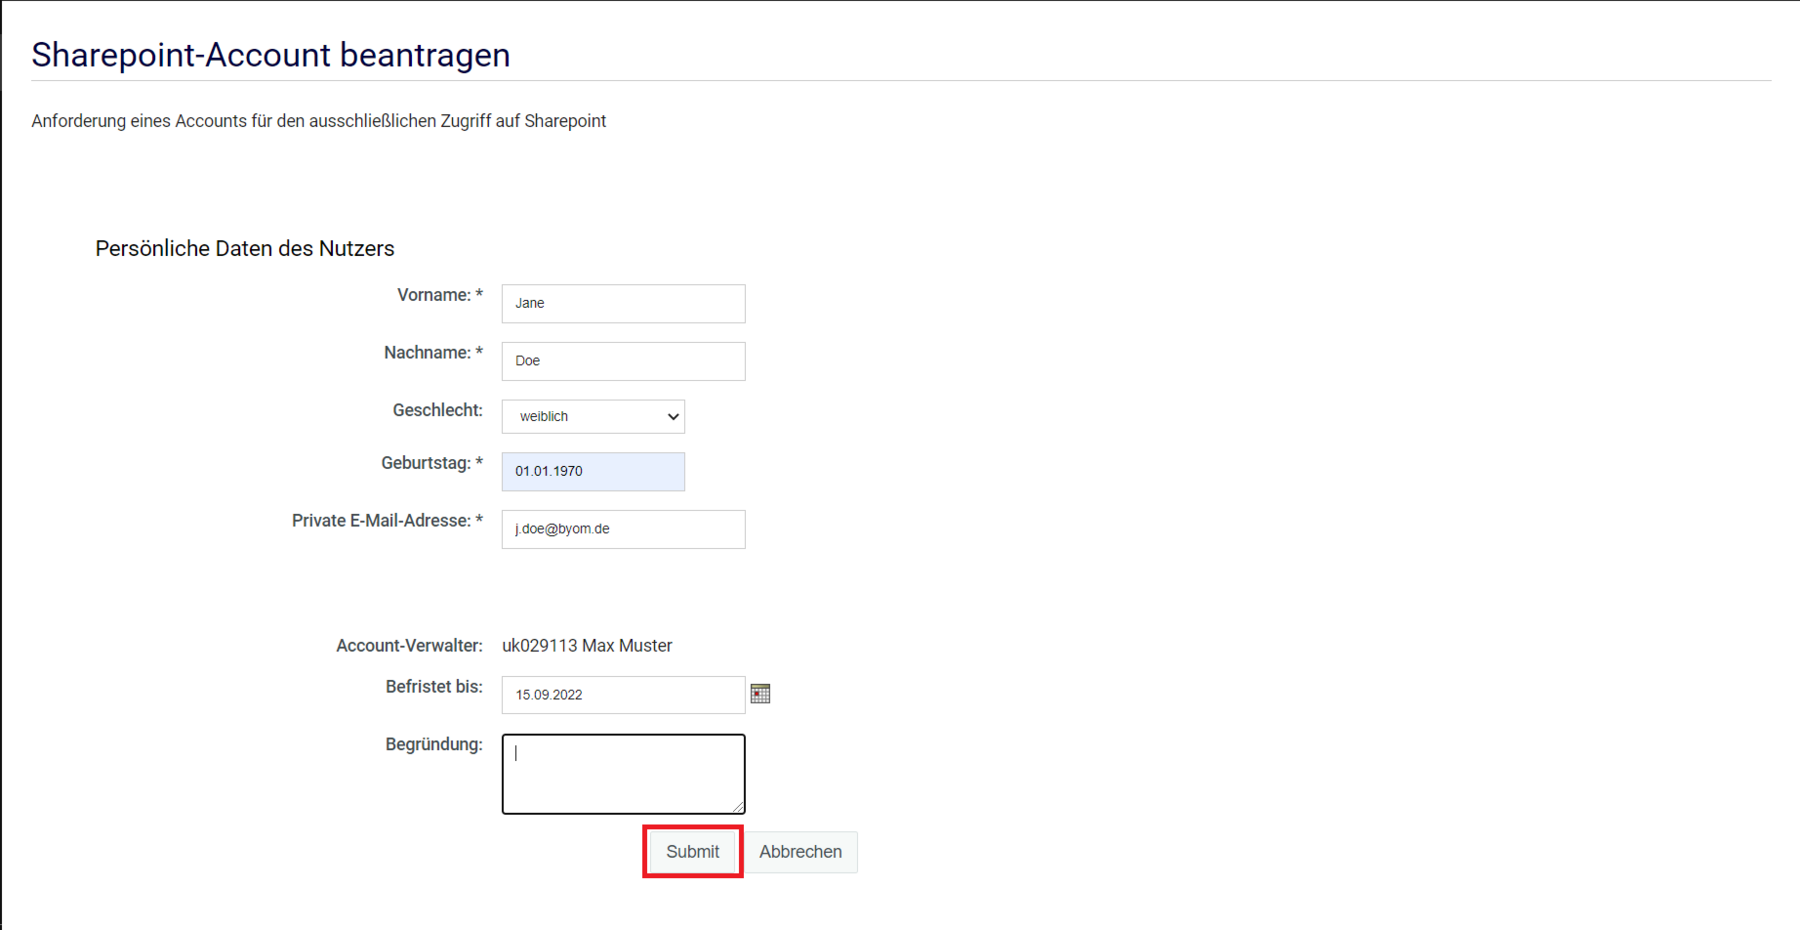
To create a SharePoint account, you need the following details of the external person:
- First name
- Last name
- Date of birth
- e-mail address
This information will later be required by the external person during account activation.
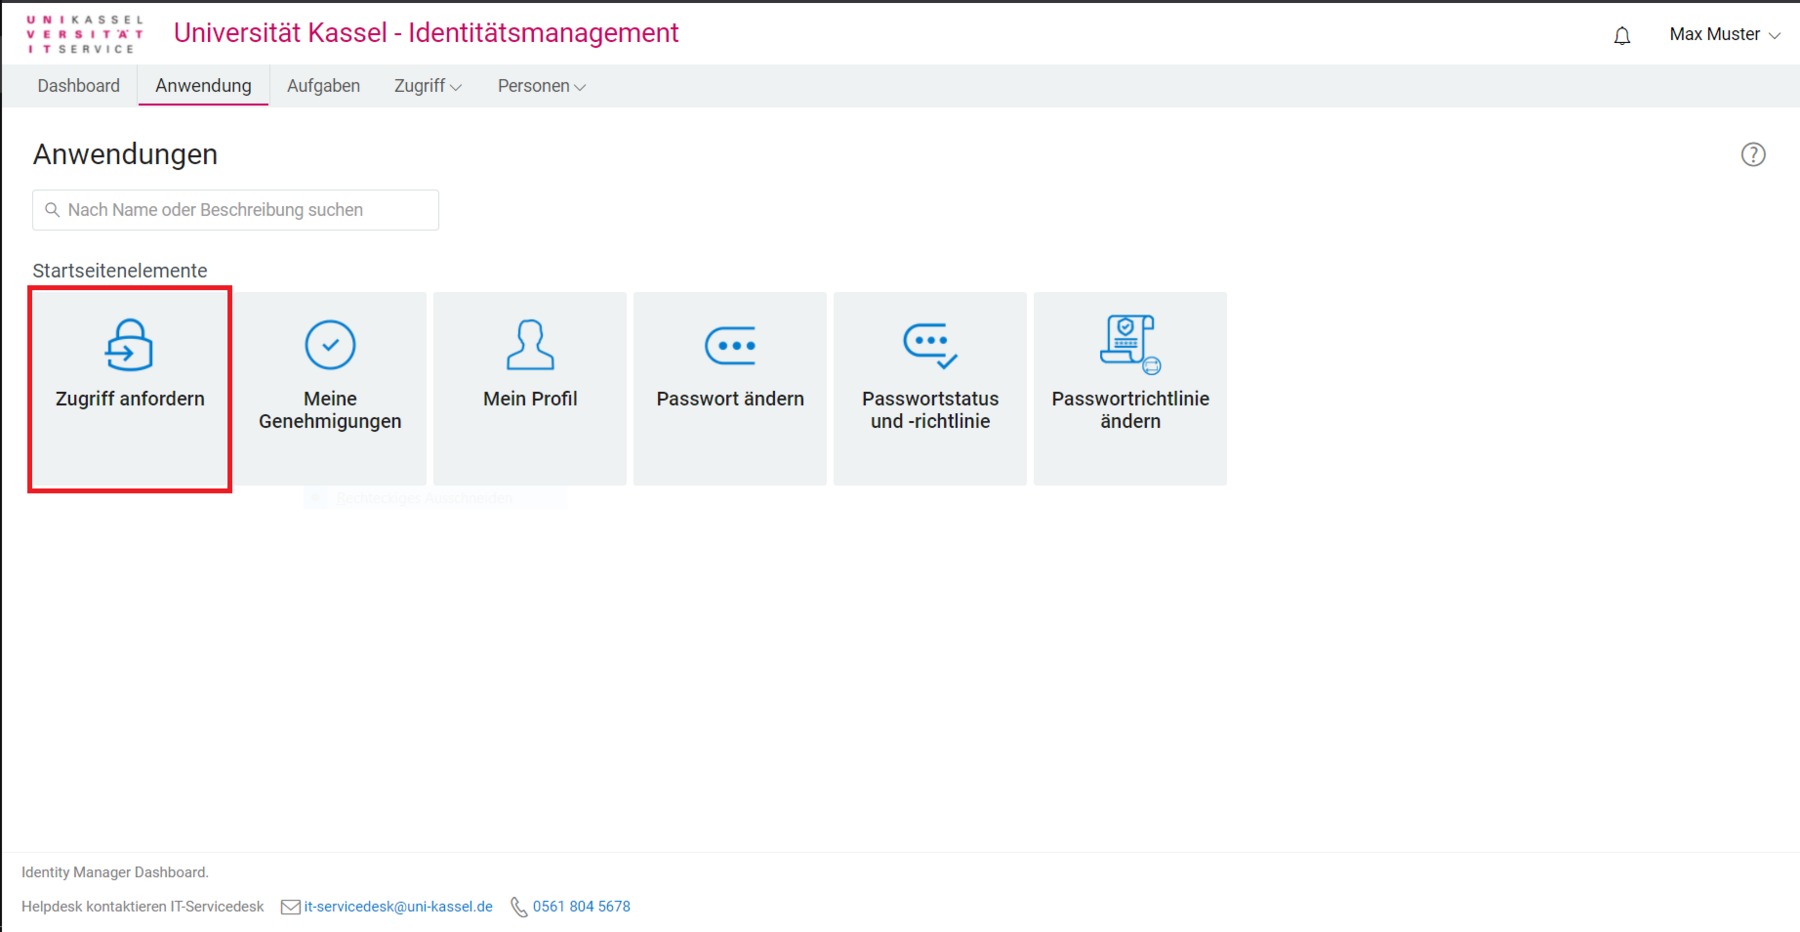
Create a SharePoint account in Identity Management (IDM)
To create an account, please call up Identity Management (IDM) and log in with your UniAccount <ukxxxxxx> and the corresponding password.
Accept the IT user regulations by ticking the appropriate box and click on "Request access".
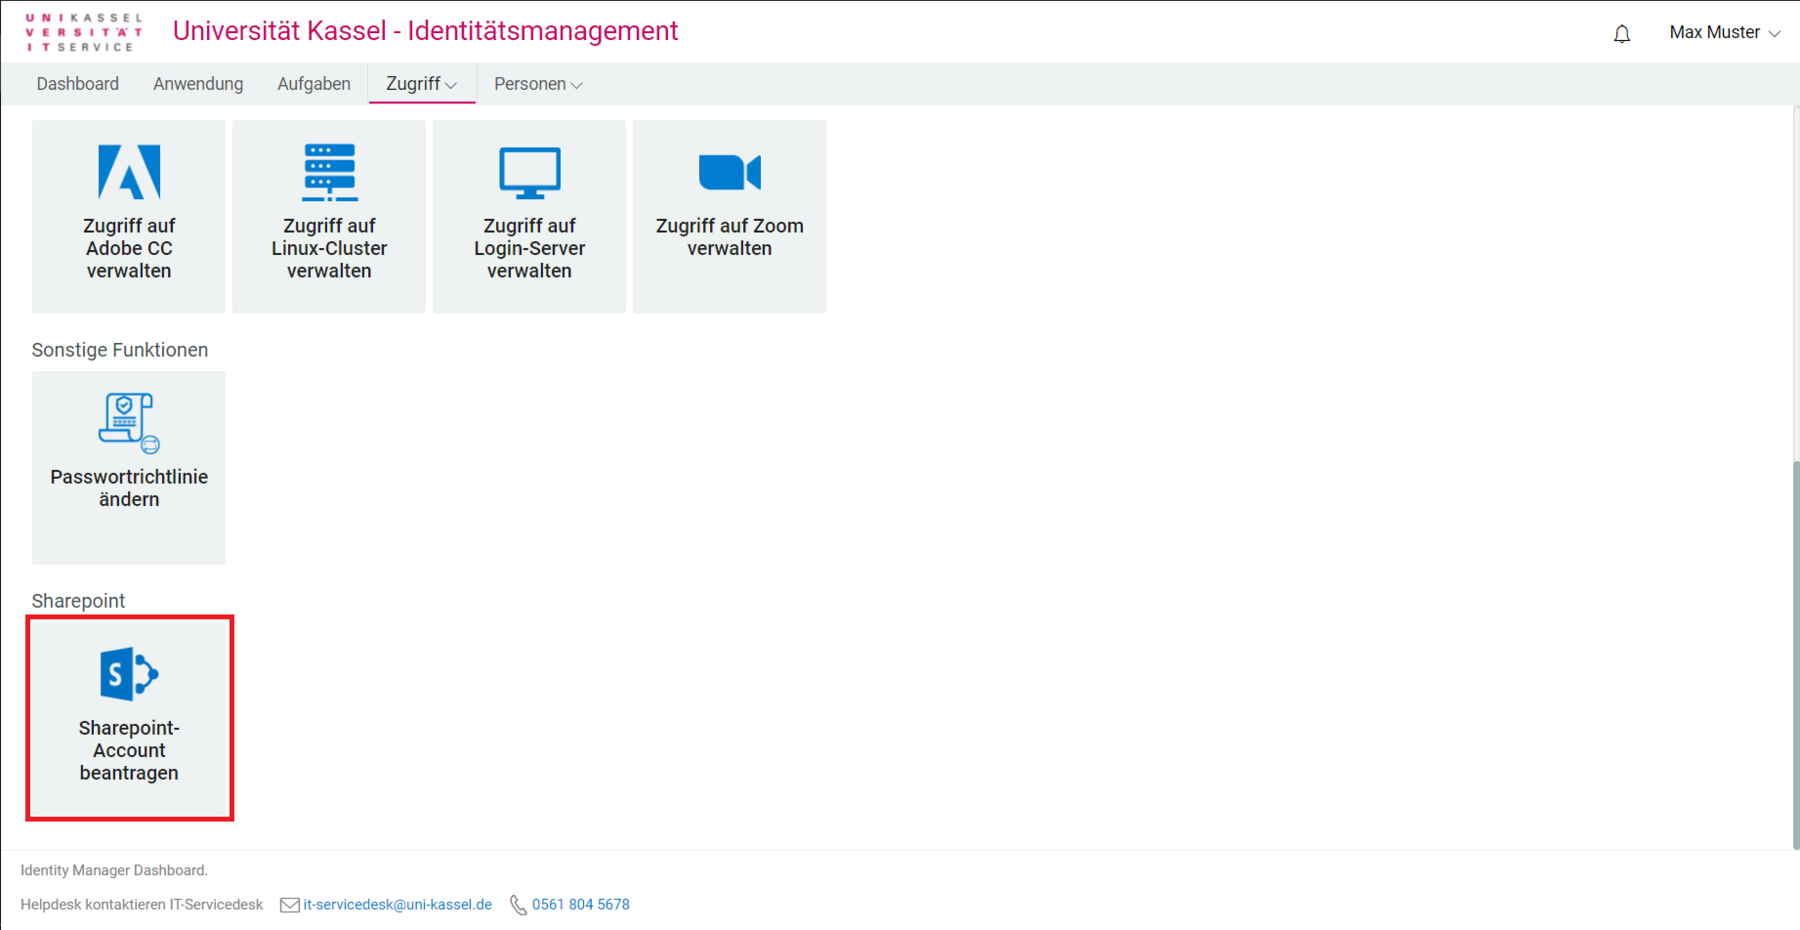
The tile is only displayed to employees of the University of Kassel.
Scroll to the "Request SharePoint account" section and click on it. A new window will open.
If nothing happens after this action, your web browser is probably blocking the pop-up window that was supposed to open. Please make sure that your web browser allows the opening of pop-up windows for userapp.uni-kassel.de .
In Mozilla Firefox, for example, you will see a message and an option to allow the pop-up window directly below the address bar.
Now enter the required data (e.g. first name and surname [...]) of the external person and click on "Submit".
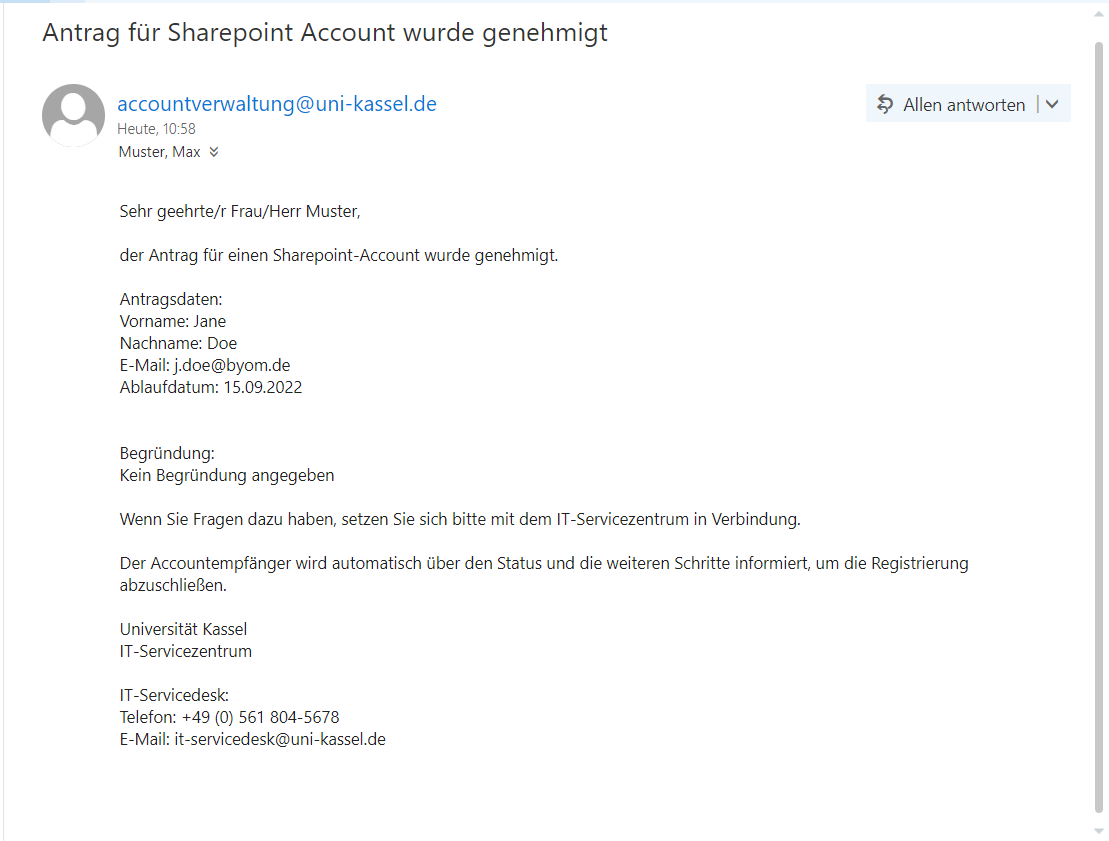
Your request will be checked and then approved by the IT Service Center (ITS). You will then receive a confirmation by e-mail.
Activation and confirmation of the SharePoint account
The user of the newly created SharePoint account also receives a confirmation email with further information.
They will also be asked to activate this account in Identity Management (IDM ) with the activation code <56xxxx>. During activation, the user of the new SharePoint account sets the personal password.
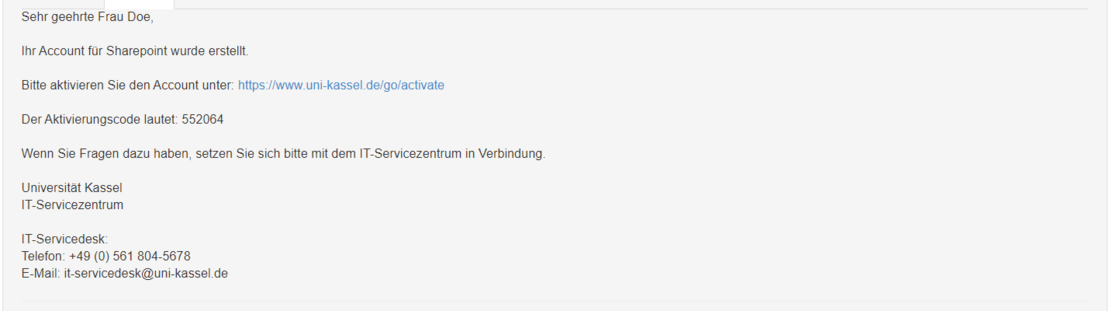
Once the new external SharePoint account has been successfully activated, you will receive a confirmation email with the relevant information about the new account.
Among other things, this email contains the new account name <e.g. SP0000xx>. You can use this access data to grant the external person the required authorizations on your SharePoint site.
From this point on, the external account can be actively used.

Once the first external account has been activated, a new button appears in your user app (IDM): "Manage SharePoint accounts". Here you can manage the SharePoint accounts of your users (see Manage accounts IDM).
If nothing happens after this action, your web browser is probably blocking the pop-up window that should actually open. Please make sure that your web browser allows the opening of pop-up windows for userapp.uni-kassel.de .
Administration of the SharePoint account in Identity Management (IDM)
Query the status of an external account
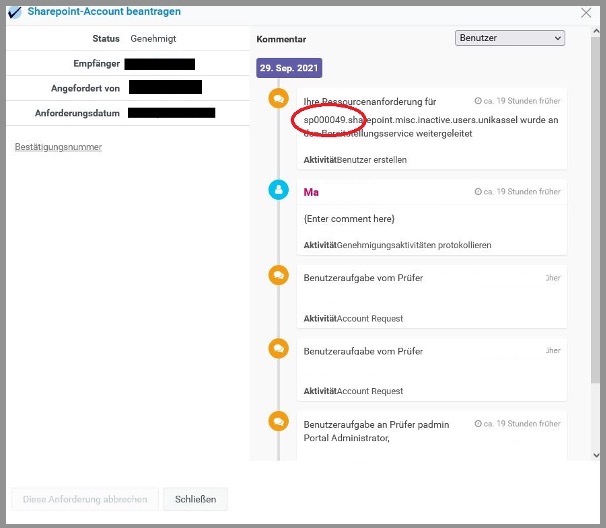
After creating an external account, you can check the processing status of your order at any time.
To do this, click on "Access" in the header bar and then select "Request history".

A list of all your requests is displayed in the request history.
Here you can see the current processing status and the newly created external SharePoint account.
Revise data of an external account and request deletion
As soon as the first external account has been created, the "Manage SharePoint accounts" button appears in Identity Management (IDM). You can use this button to view and edit existing external accounts

In the overview of SharePoint accounts, click on the name of the person whose data you want to edit.
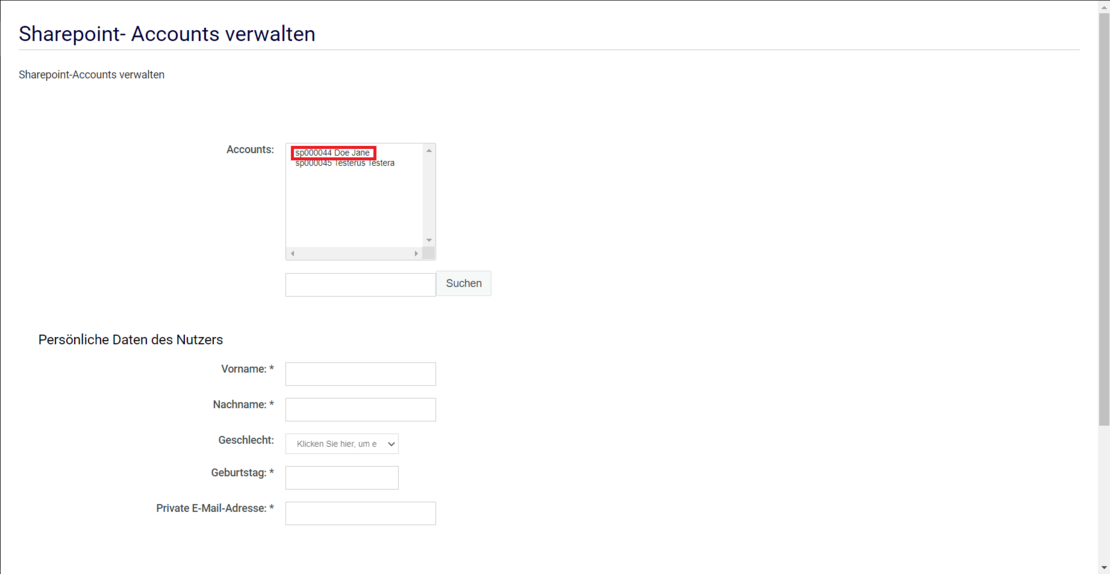
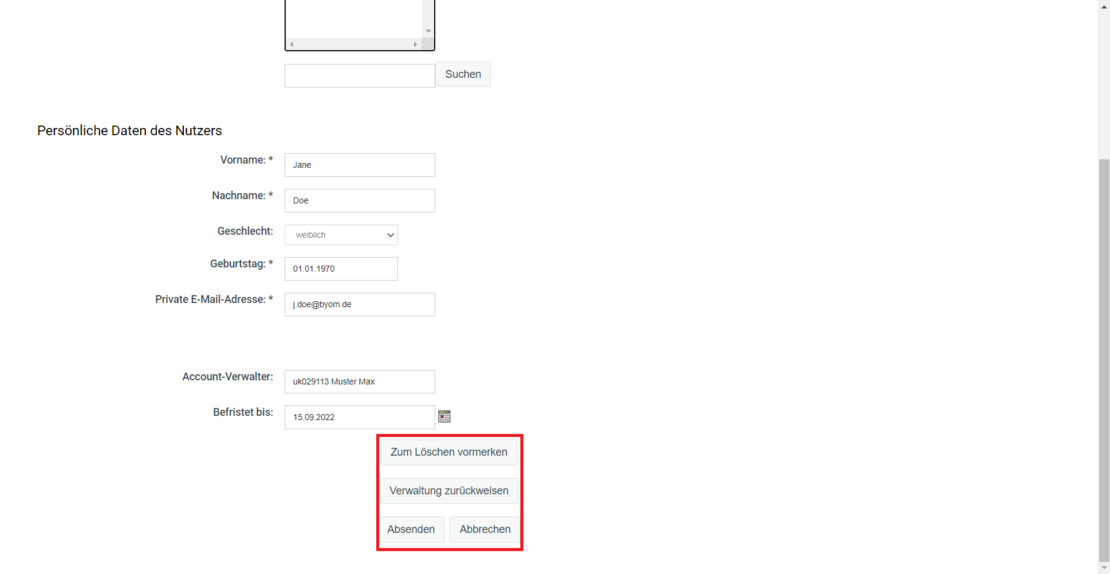
An editing window opens in which you can change the desired account information (e.g. name, e-mail address or expiration date).
Confirm the changes with "Submit" to save the updated data.
To mark an account for deletion, select the corresponding option in the editing window.
Alternatively, you can set the expiration date to an earlier date if the account is to be deactivated earlier.
Management of the SharePoint account
Manage users and groups in SharePoint
To create authorization for specific users, please proceed as follows:
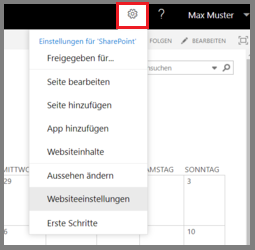
Click on the cogwheel symbol at the top right. A list will open, select "Website settings" from the list.
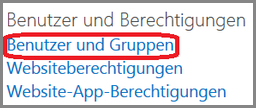
In the website settings under Users and authorizations, click on "Users and groups".
The creation of authorizations is carried out using an example for a member in the Documentation group. The same procedure applies to the Visitor and Owner roles.
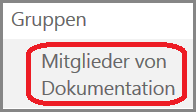
On the left-hand side, you will see the groups (e.g. Members of Documentation, Visitors or Owners).
Click on the desired group, e.g. "Members of Documentation" if you want to add people who are allowed to edit documents.
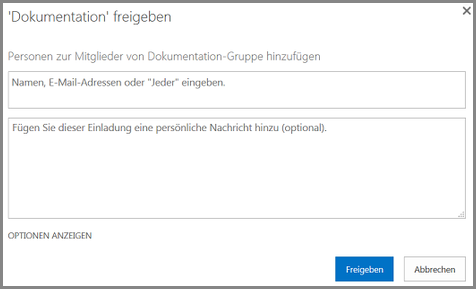
Add new member in SharePoint
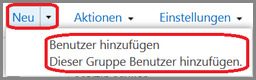
Click on "New" and select "Add user" from the list that appears.
A dialog box opens in which you can share the area (e.g. "Documentation") with one or more users.
Then enter the account received according to the following pattern <its-ad\ukxxxxxxxx>.
Optionally, you can add a personal message to the invitation to explain the context of the invitation.
Finally, click on "Share" to grant the authorization.
Here you can mark an account for deletion or shorten the expiration date to an earlier date. The account will be automatically deleted later. Only then will it also lose access to the SharePoint site(s). If access to the account is to be terminated immediately, it must be deleted by the SiteOwner on the SharePoint site.
Here you indicate that you no longer want to or can no longer manage the account.
The account remains active on the SharePoint site, but no longer has an administrator.
The account can only be assigned to a new administrator by internal SharePoint support when the account is automatically requested to change its password by e-mail. A direct assignment from one administrator to another is not possible
Go-Link of this page: https://www.uni-kassel.de/go/externer-sharepointaccount