Instructions DaKS
Overview
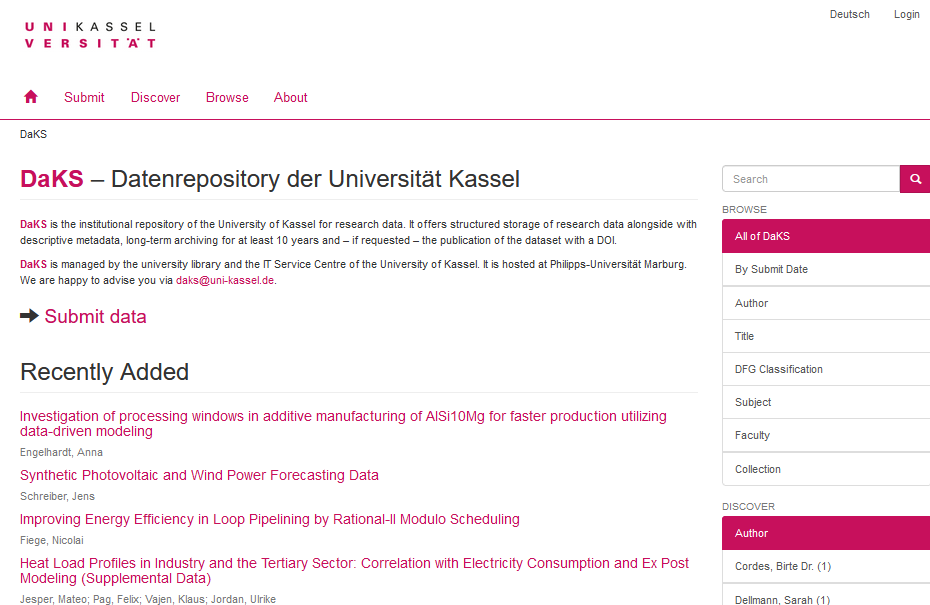
On the home page (Fig. 1), you can search the entire holdings or browse by criteria without logging in. Published research data of the repository are visible under 'Recently Added'.
Log in
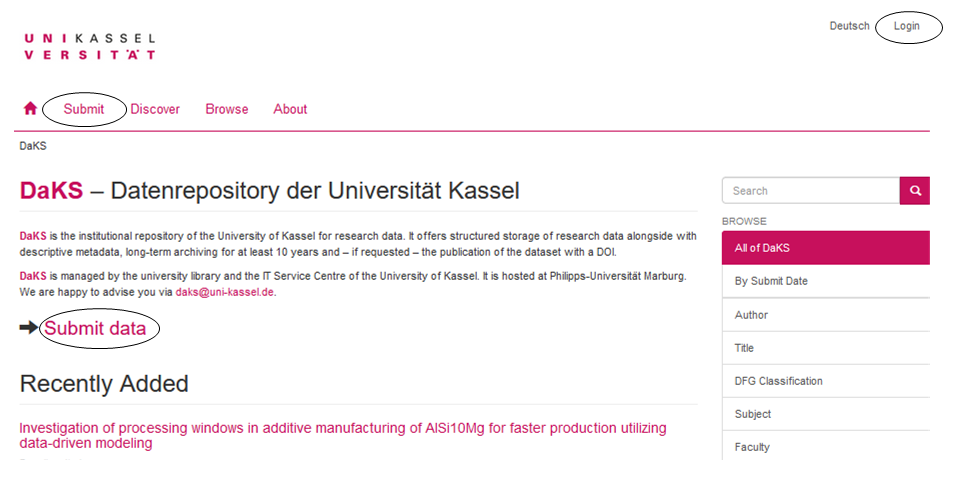
Before you can submit data, you must log in (Fig. 2). This is done either via "Login" in the upper right corner or via the links "Submit data", or "Submit".
In the following you need to select your facility.
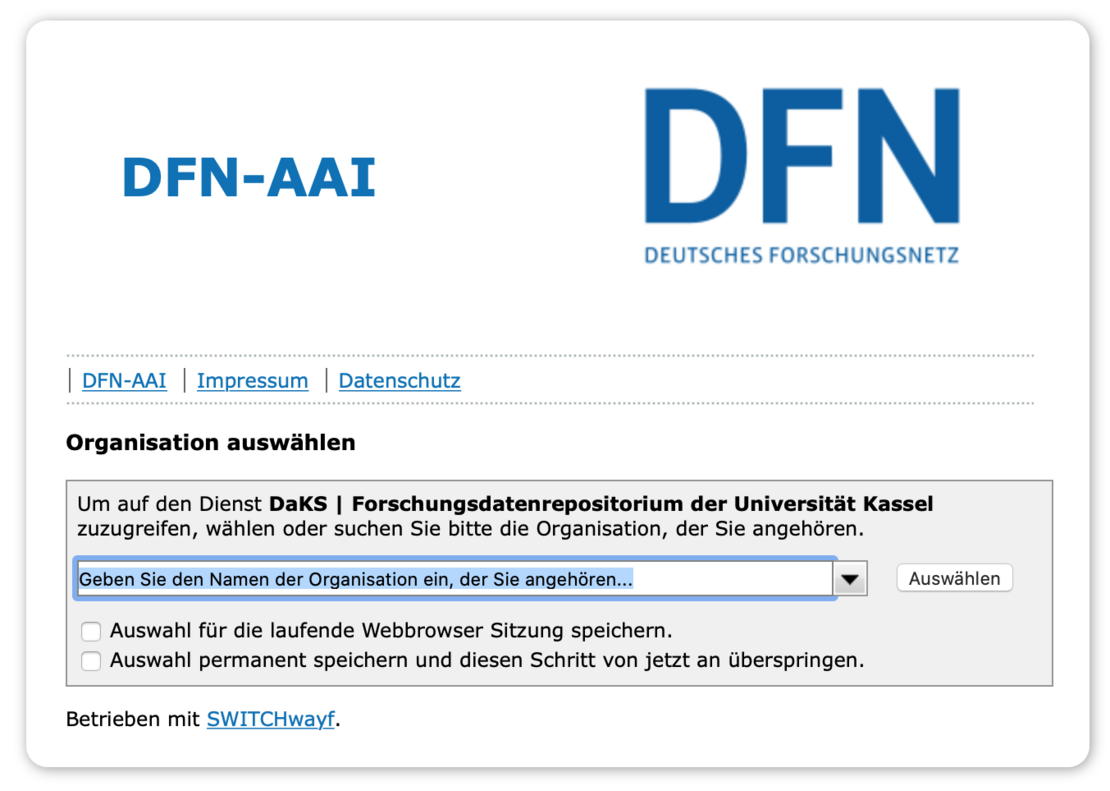
If desired, select one of the two options below for future logins. (The text translates to:
Save selection for the current web browser session.
Save selection permanently and skip this step from now on.)
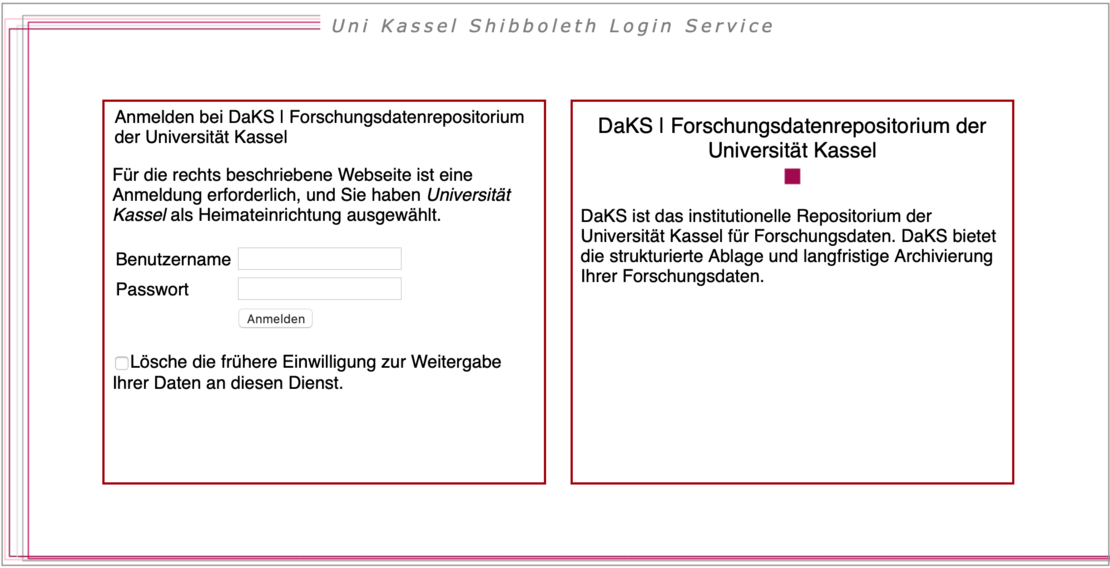
On the following page (Fig. 4) you log in with your Uni Kassel account.
First login
If you are logging in for the first time, you must agree to the transmission of data to the service (Fig.5). Under "An den Dienst zu übermittelnde Informationen" (translates to: Information to be sent to the service) all information that will be sent to the service is listed.
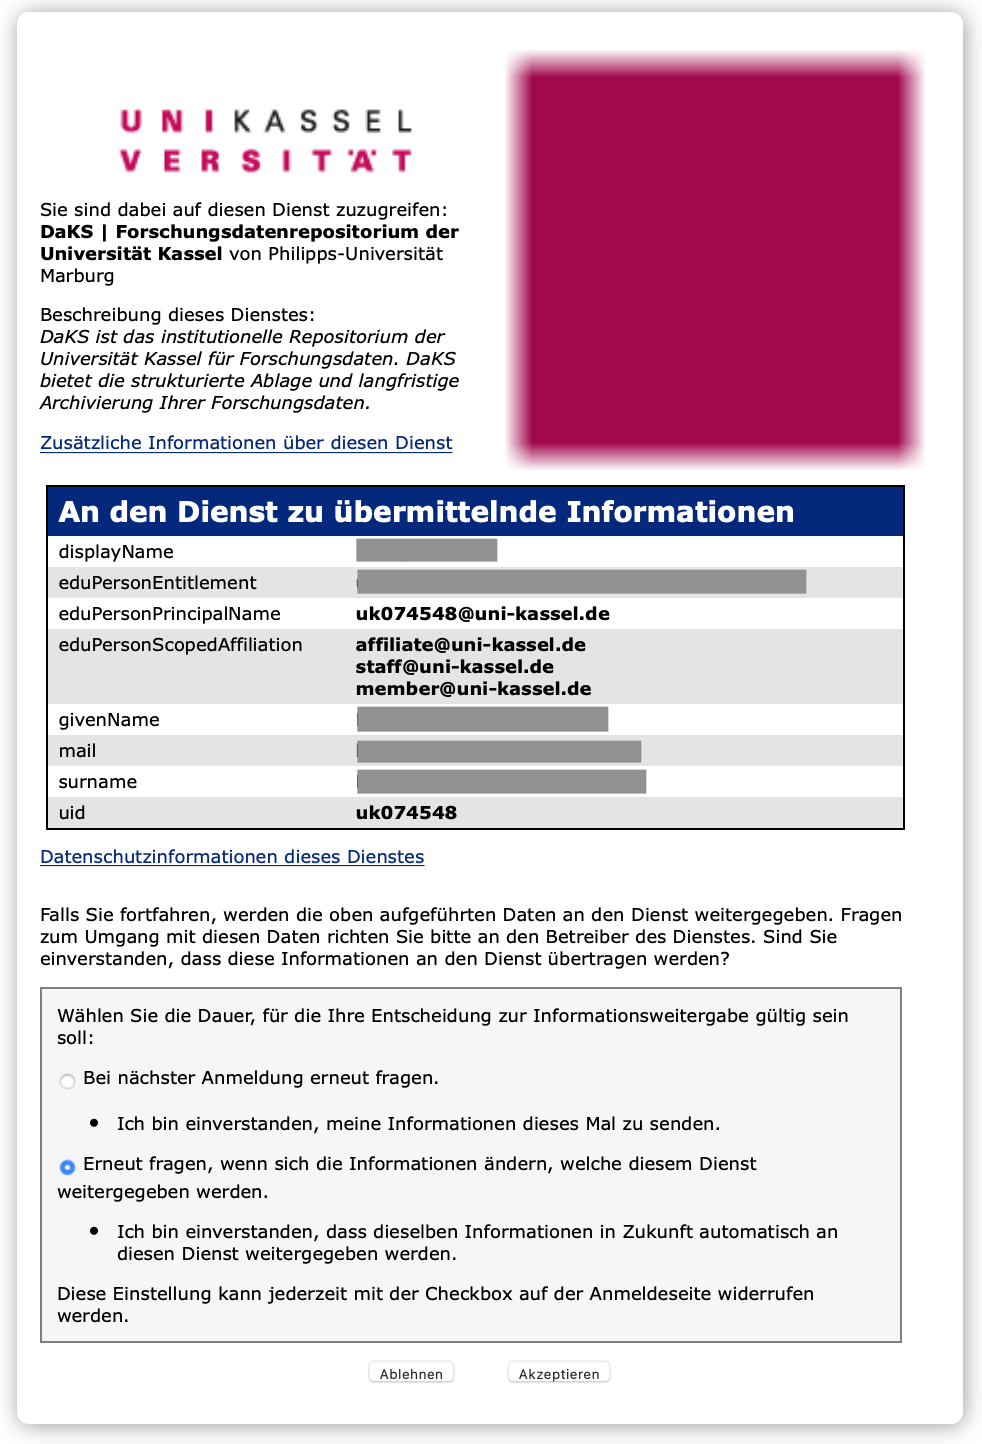
Choose whether you give this consent only once, then you will be asked again the next time you log in.
Or select the option that renewed consent is only required as soon as the data to be transmitted changes (recommended).
Submit data
You will be taken back to the repository home page or directly to the selection page for the collection you wish to submit to (Fig. 6).
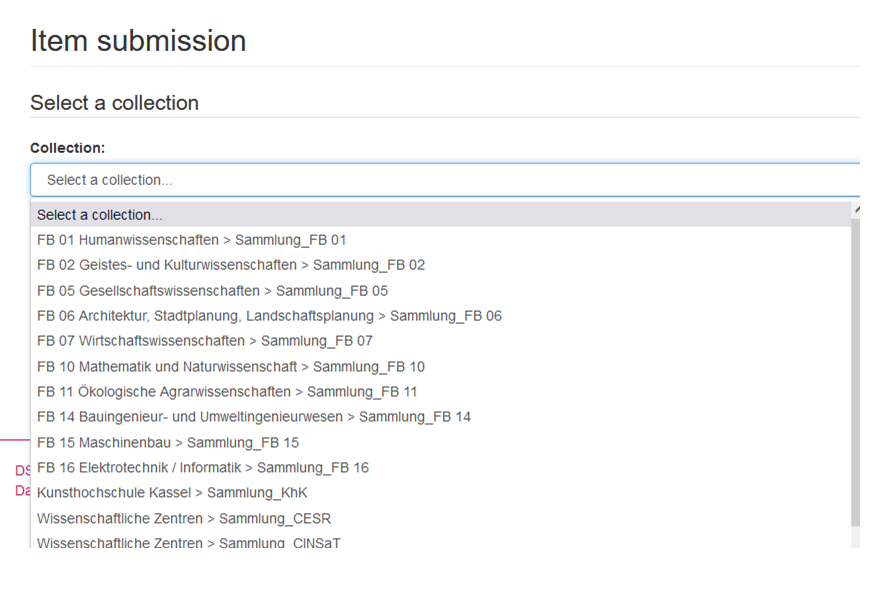
Please select a department / institute here.
Describe document I
The green tabs on the following page (Fig. 7) show the progress of the process. You can interrupt the submission at any time and complete or discard it at a later time. To do this, select the "Save / Cancel" button at the bottom of the page.

The description of the data, i.e. the entry of metadata, serves to make your data more searchable / findable and visible (i.e. FAIR). Mandatory fields are marked with an asterisk (*).
Enter the title of the data in the first section (Fig. 7). This is a so-called repeatable field, so if you want to assign an alternative (further) title, press the "Add" button and then enter the alternative title as well.
For example, if the data to be uploaded are supplemental data for a text publication, a title according to the following scheme is suitable:"Title of text publication (supplemental data / dataset)" or "Paper-Title [data set]".
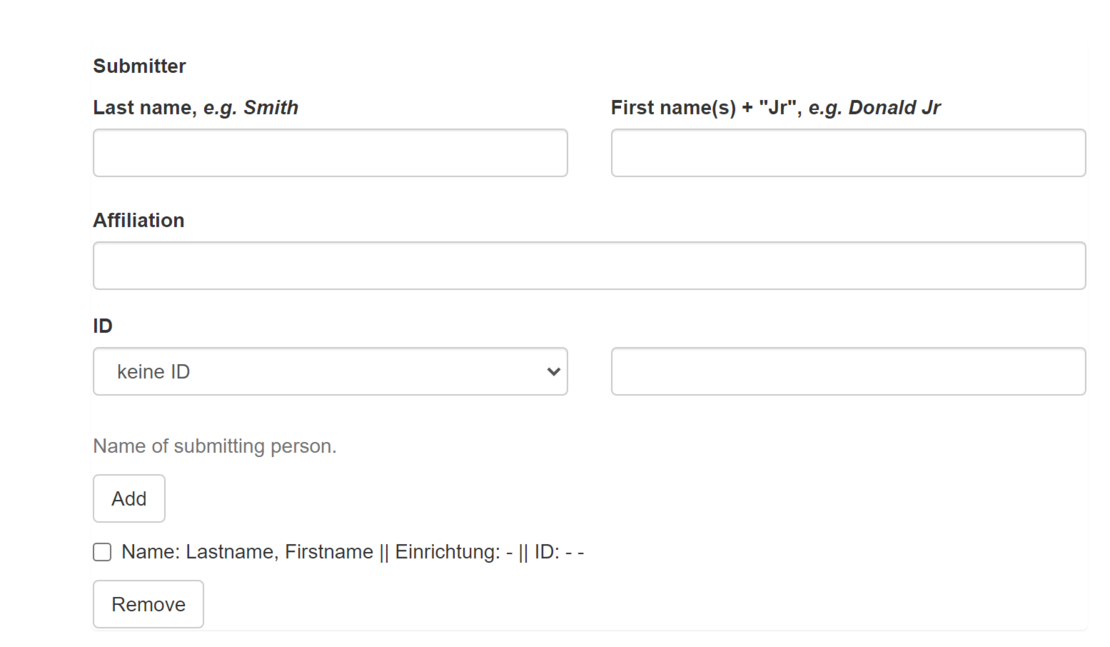
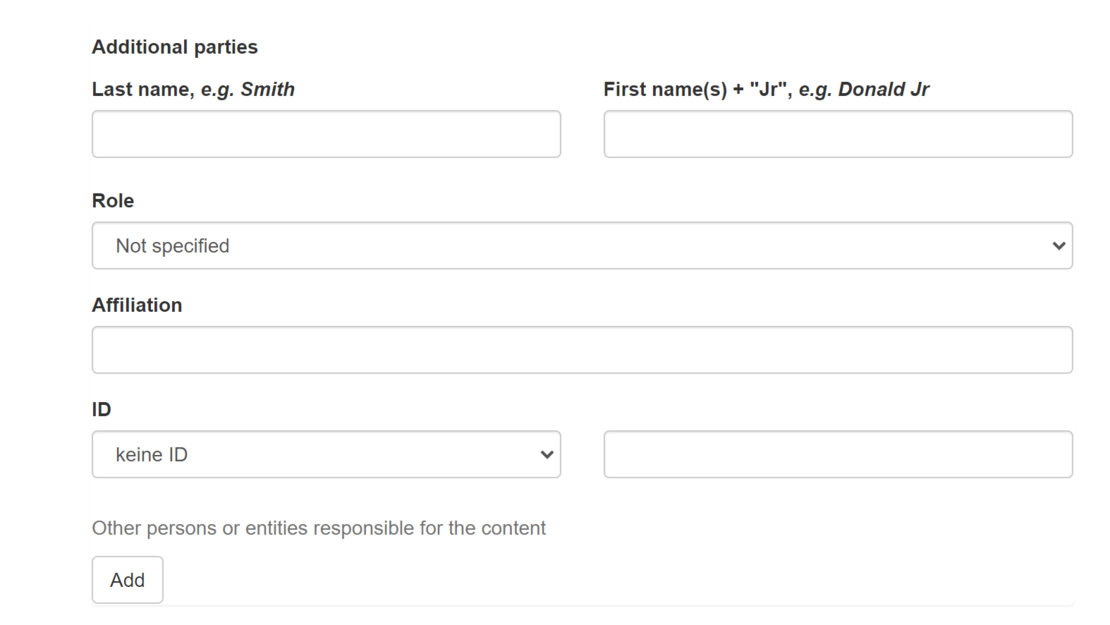
This is followed (Fig. 8) by the details of the submitting person, other participants (Fig. 9) such as members of the research group or the person responsible for the collection/curation. These are also repeatable fields.
Note: Here, the "submitting person" corresponds to the "corresponding author" and not necessarily to the person who actually uploads the data.
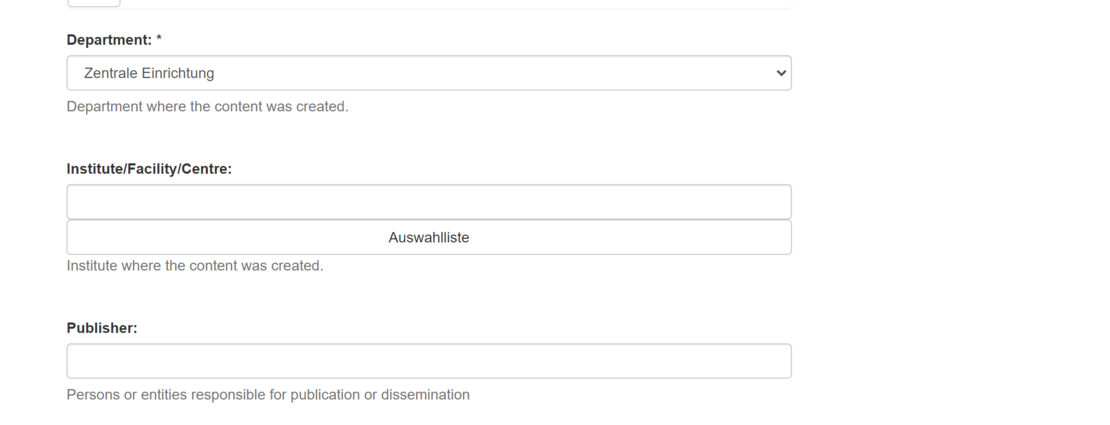
Subsequently, you can use selection menus (Fig. 10) to specify the department and the institute or the institution or center in which the data was generated. An editor can also be named here.
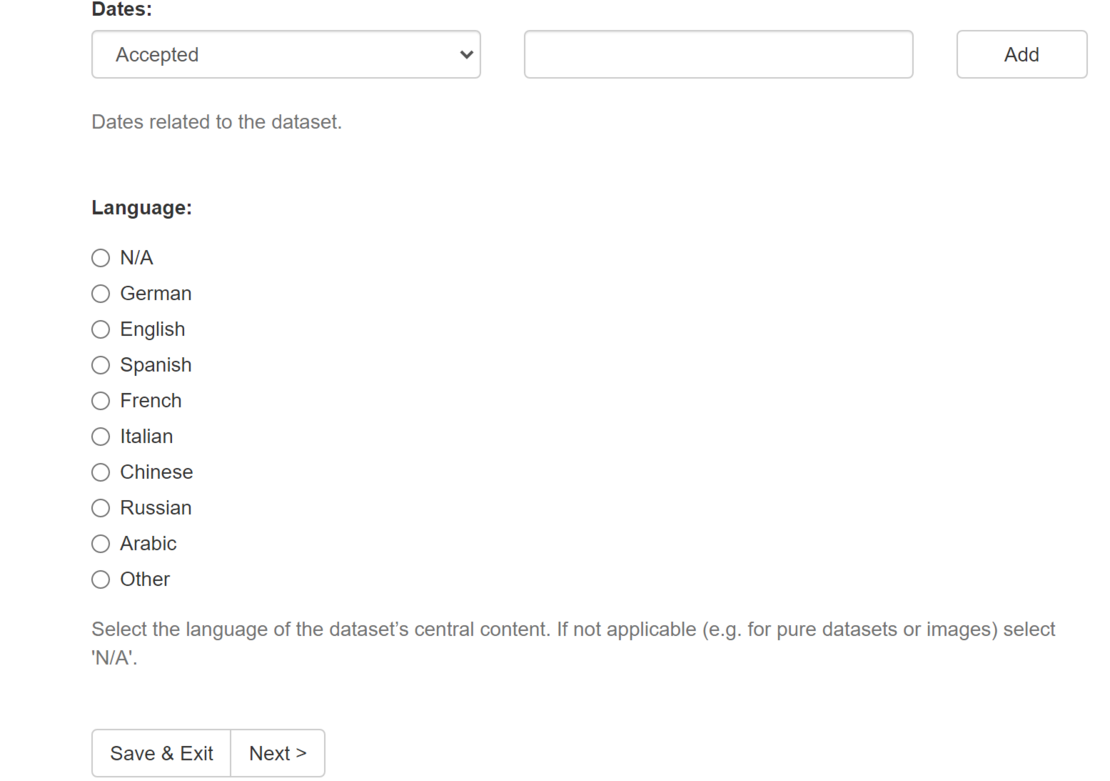
In the section below (Fig. 11) you can enter dates related to the record, if necessary, as well as specify the language. Below that, you will find the buttons to save (and continue with the submission at a later time), cancel the submission or move to the next page ("Next").
Describe document II
The information on the following page is in principle self-explanatory, and only the specification of the document type and the DFG subject are mandatory. If you wish to submit different document types, multiple selection is possible here (Fig. 12).

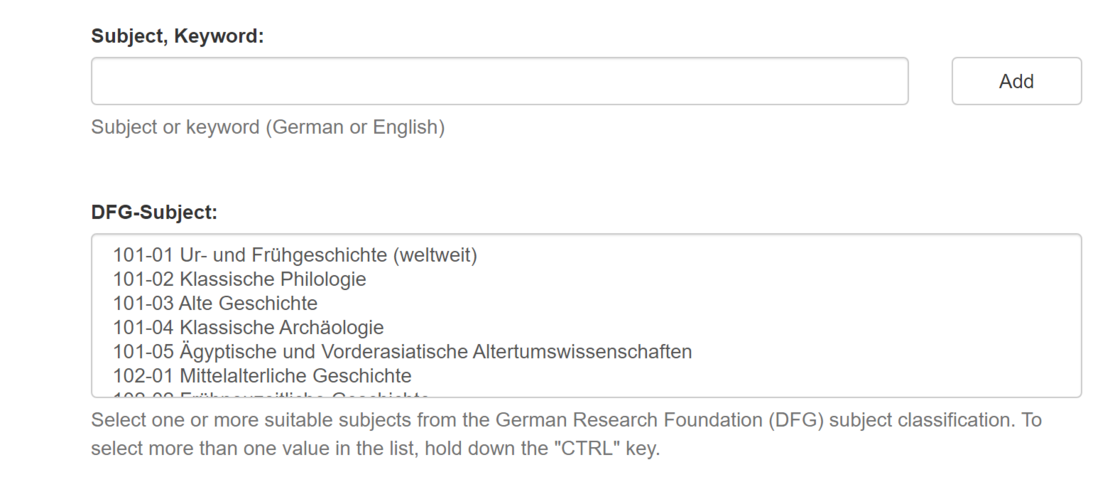
Below that, you have the option of assigning keywords (Fig. 13). Please note that you have to add each keyword individually, again using the "Add" button.
In the DFG Subject section you can specify the research area, again multiple selection is possible - just hold down the Ctrl key.
If other resources are linked to the dataset to be submitted, e.g. the dataset is already cited, it is a data supplement, or it is a source to another publication, you can enter this using the Type of relationship button (Fig. 14). To do this, simply select the corresponding item in the drop-down menu.
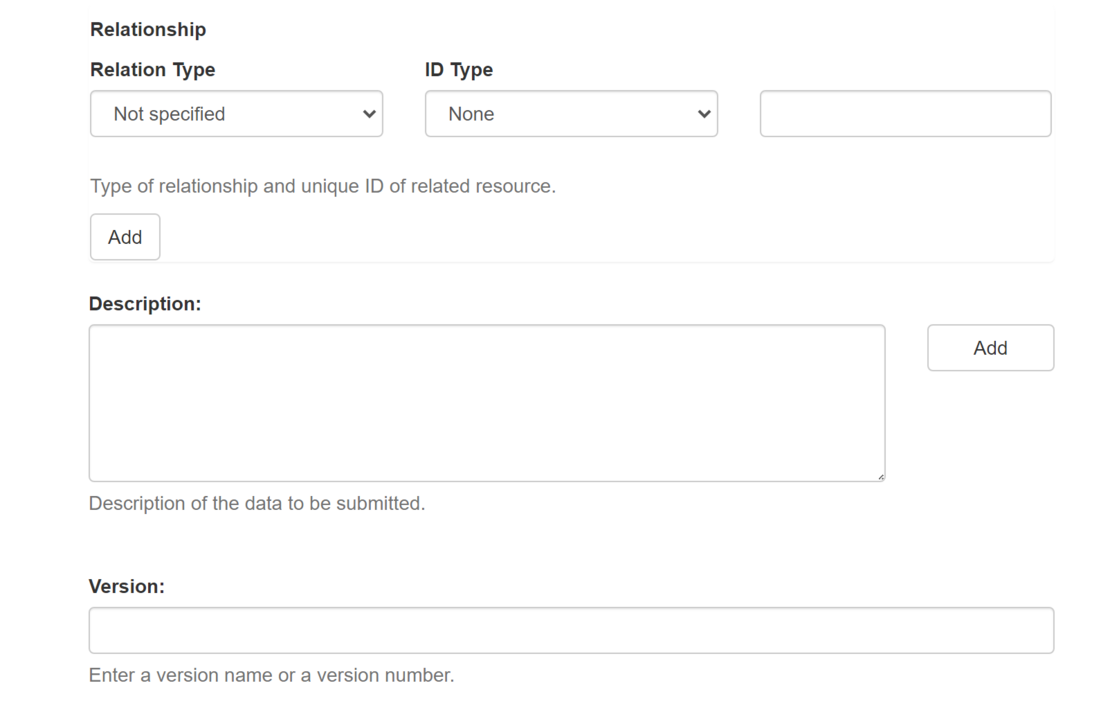
Description: If required, you can summarize the data or list the methods used.
Version: If required, enter the file version here in the form of a name or number.
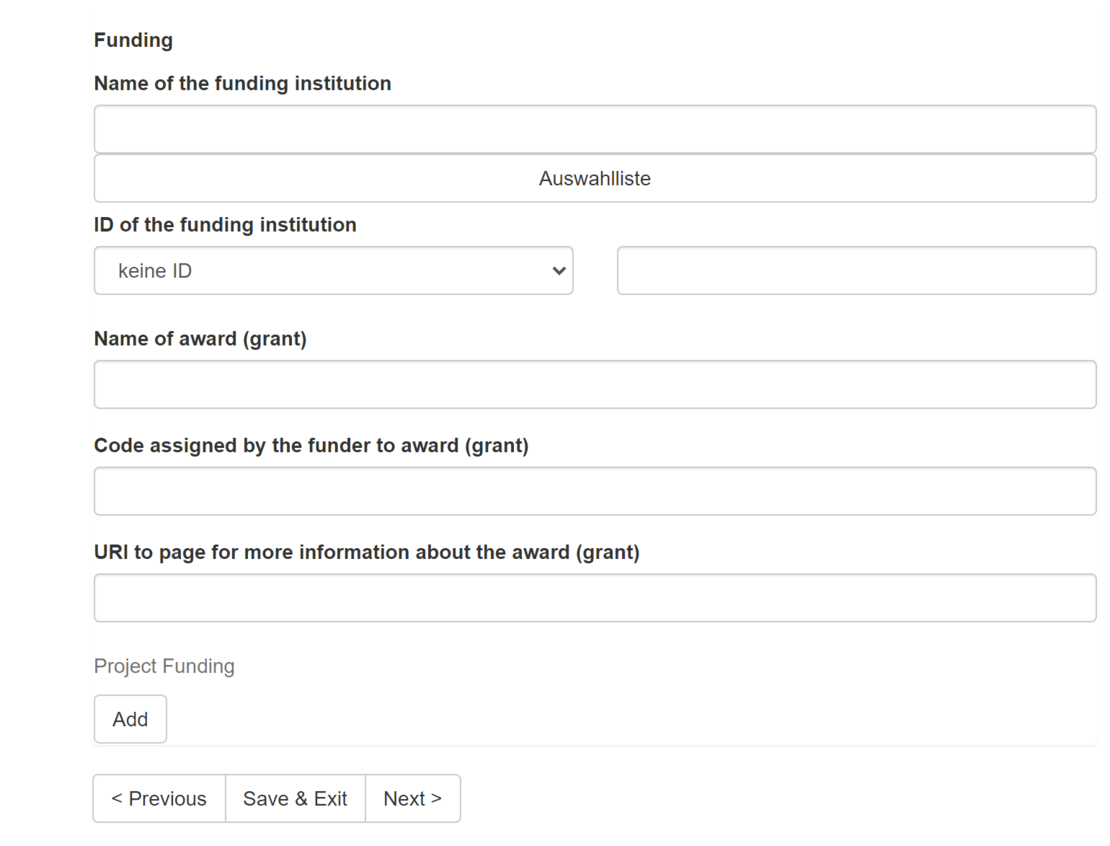
Funding (Fig. 15): If your project or the resulting data has been funded, you can also indicate this.
Choosing a license
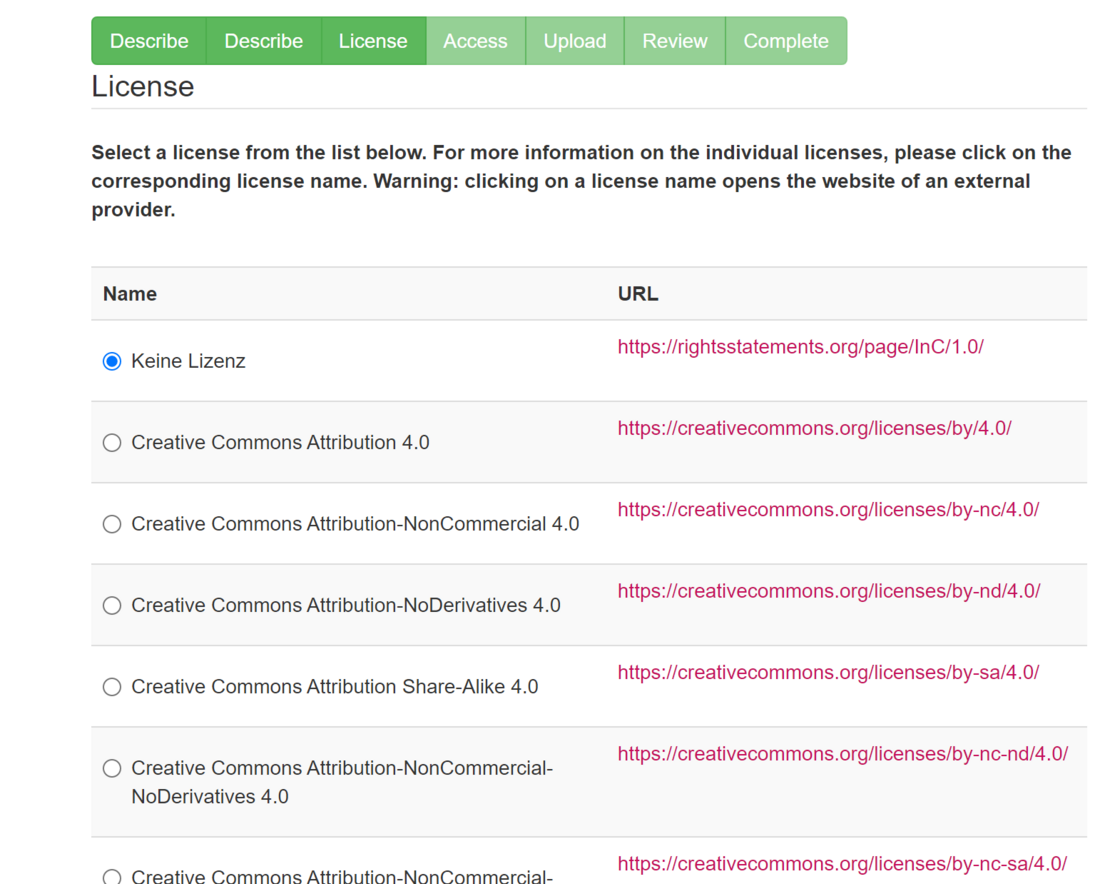
The following page is used to assign a license (Fig. 16). You will find a link to a web page with explanations next to each license, so that is omitted at this point.
Setting access rights
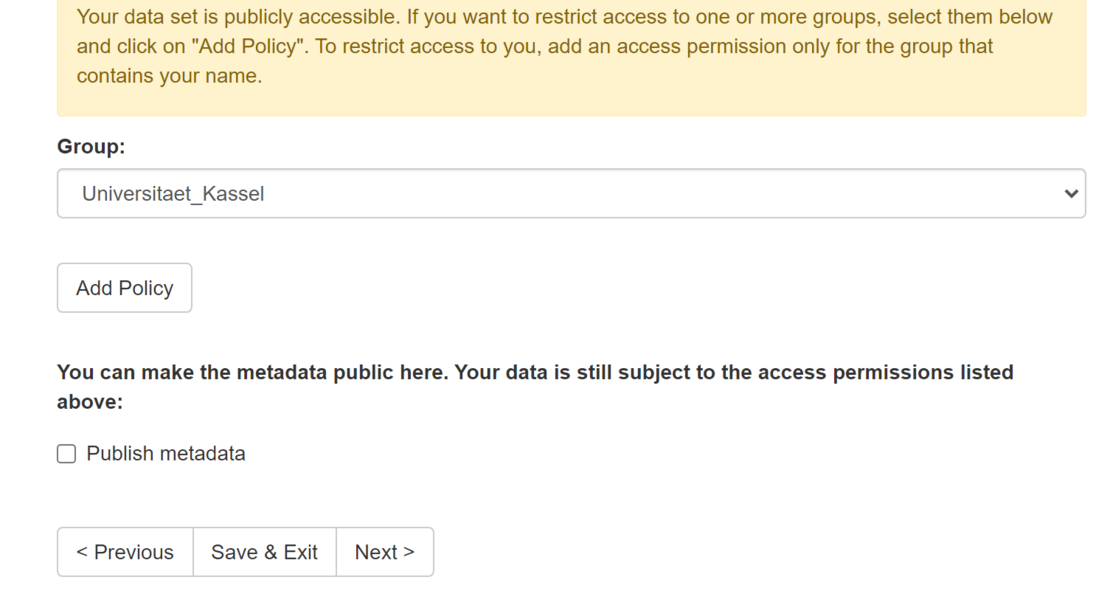
This step is used to define which persons (so called groups*) should have access to the uploaded files and their metadata (Fig. 17). The default setting is that the data and its metadata are released for all other persons after upload.
If you want to restrict access to the uploaded items to one or more groups, select them below and click Add Policy. You can also have a custom group created, for example to share records only with members of your WG. To do so, please contact us at: forschungsdaten[at]uni-kassel[dot]de.
To restrict access to you, add an access permission for the group that contains only your name.
If your data is restricted, you can still publish its metadata. Interested parties can request the data from you using the "request" function.
Please note the following: For the assignment of a DOI publicly accessible metadata is mandatory!
Once you add an access permission, it will appear instead of the sentence: "No group policies have been set up for this item."
*By default, the groups are:
- "Administrator" - all administrators
- "Anonymous" - this group includes everyone who calls DaKS
- "UKAdmins" - this group includes only administrators of the University of Kassel
- "Universitaet_Kassel" - this group includes all members of the University of Kassel
Finally, please note the following: Prerequisite for the assignment of a DOI is publicly accessible metadata! Here you have to put a check mark in the corresponding field if you want this.
File upload
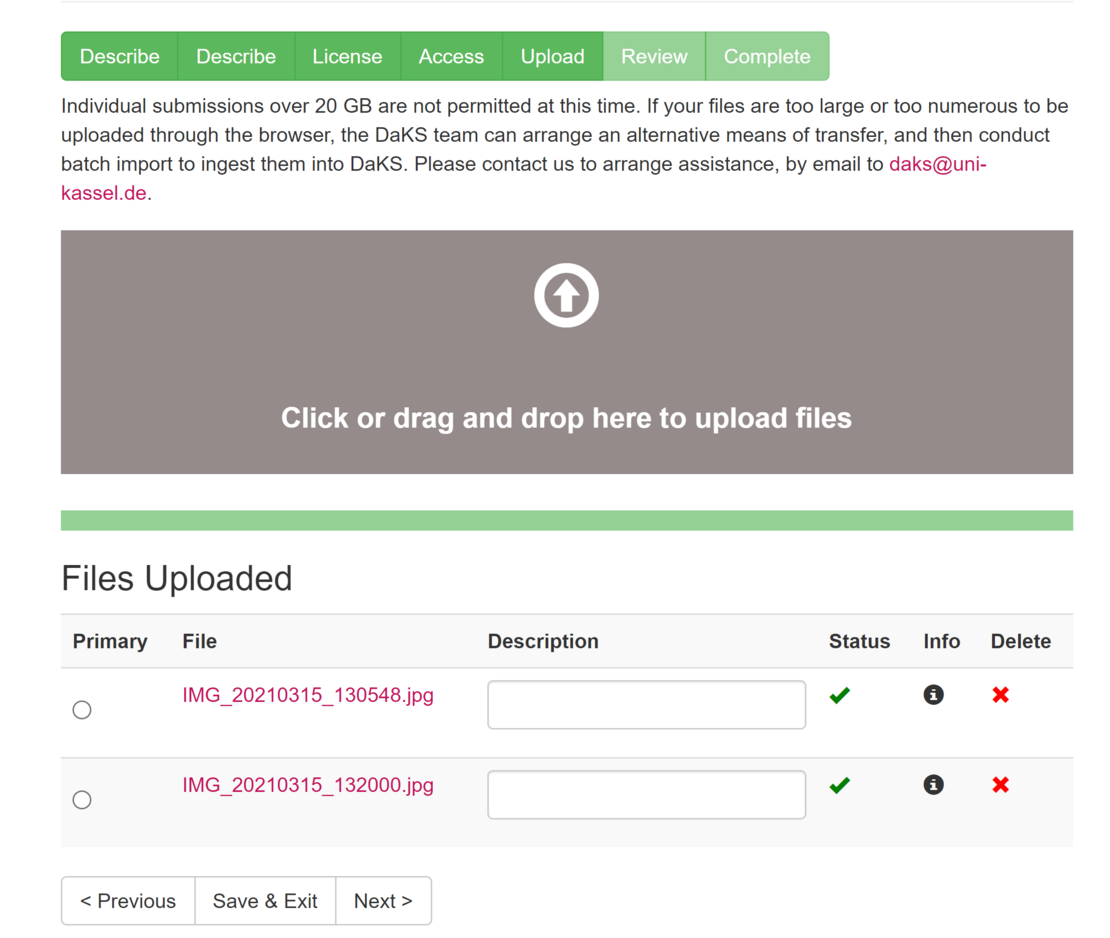
Now you can upload your data from your computer (or devices connected to it) to DaKS. You can do this simply by dragging and dropping, alternatively a classic "Browse" window will open when you click in the gray upload area (Fig. 18).
Regarding file formats, please refer to our handout on recommended file formats for submission to HeFDI repositories (German version).
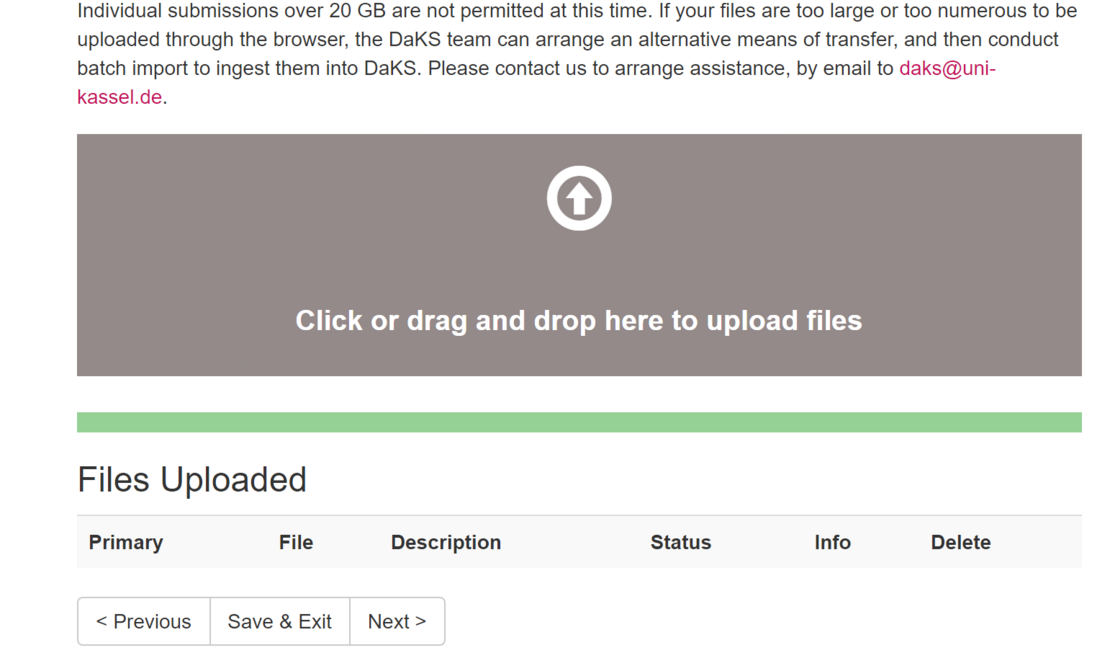
After the upload you will see the list of your files (Fig. 19). You can add a description or delete the files.
Review and submit
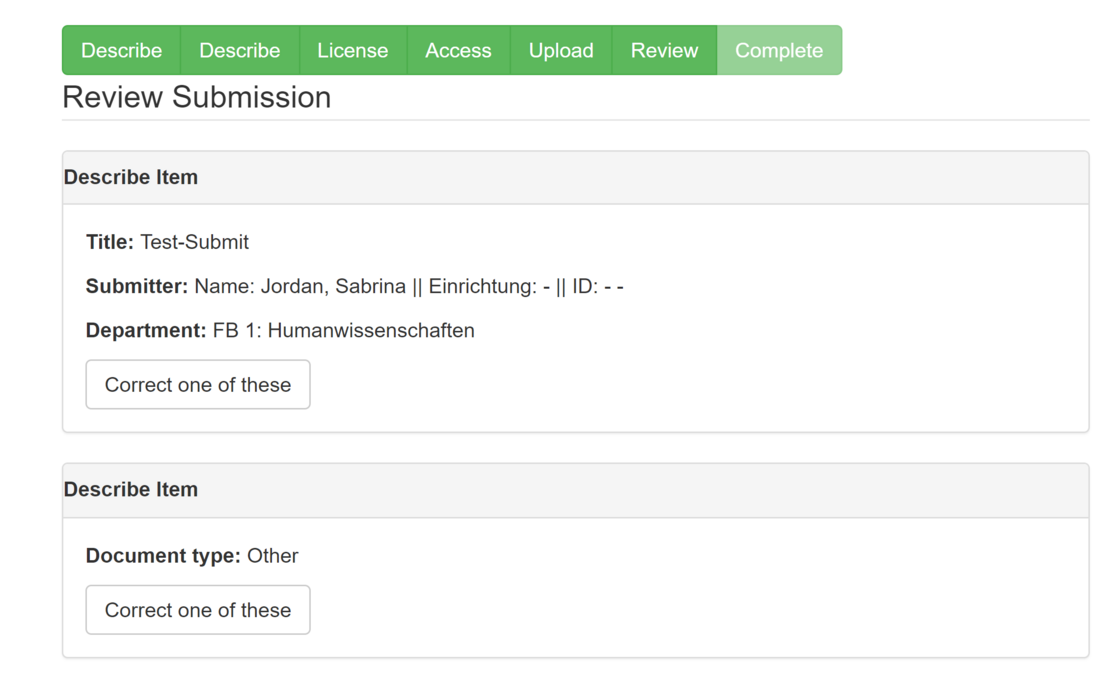
In the last step (Fig. 20) you can check your submission and correct the entries if necessary.
To complete the submission, you must accept the user agreement (Fig. 21).

Unless otherwise noted, all texts on this site and its subpages are licensed under a Creative Commons Attribution 4.0 International License.
