Introduction & Instructions
Campus Events consists of two components: the event platform (also known as the "front end") and the administration interface (also known as the "back end").
- Frontend (Event Platform): On the website https://veranstaltungen.uni-kassel.de, all users can view events, find out more details, and register for events.
- Backend (Administration Interface): This section is accessible only to administrators with special permissions. Here, events can be created, edited, and managed. Administrators also have access to participant data and orders.
For more information on accessing and using Campus Events, visit https://www.uni-kassel.de/go/campus-events-info.
Contents
- Front End (Event Platform)
- Front End – Logging In and Registering for an Event
- Frontend – My Profile
- Backend (Administration Interface)
- Create Events
- Basic Configuration
- Classification
- About the Event
- Additional Event Information
- Event-Specific Details
- Event Registration Type
- Configuring the Login Type
- Participant Information
- Course Content (Certificate) - Master Data
- Search Engine Optimization (SEO)
- E-ticket
- Notifications about new registrations
- Reminder emails
- System Emails
- Webhooks
- Sending group emails to more than 100 people
- Overview of Participants with a Traffic-Light System
- Filtering Summary Tables
- Typo3 (Snippets)
Front End (Event Platform)
The Campus Events front end is available at https://veranstaltungen.uni-kassel.de. Here you'll find all the events that are being offered.
Front End – Logging In and Registering for an Event
There are two ways to register for an event.
Guest Registration
It’s also possible to register for an event without an account (guest registration) if the event has been configured that way by the organizer. To do this, enter an email address when registering for the event. You’ll find the registration page on the event details page after searching for an event in the frontend.
With an Account
You can register using a university account or a personal account (if guest registration is permitted). To do so, enter your university account during the registration process, or—if you are not a university member—your personal email address and a password.
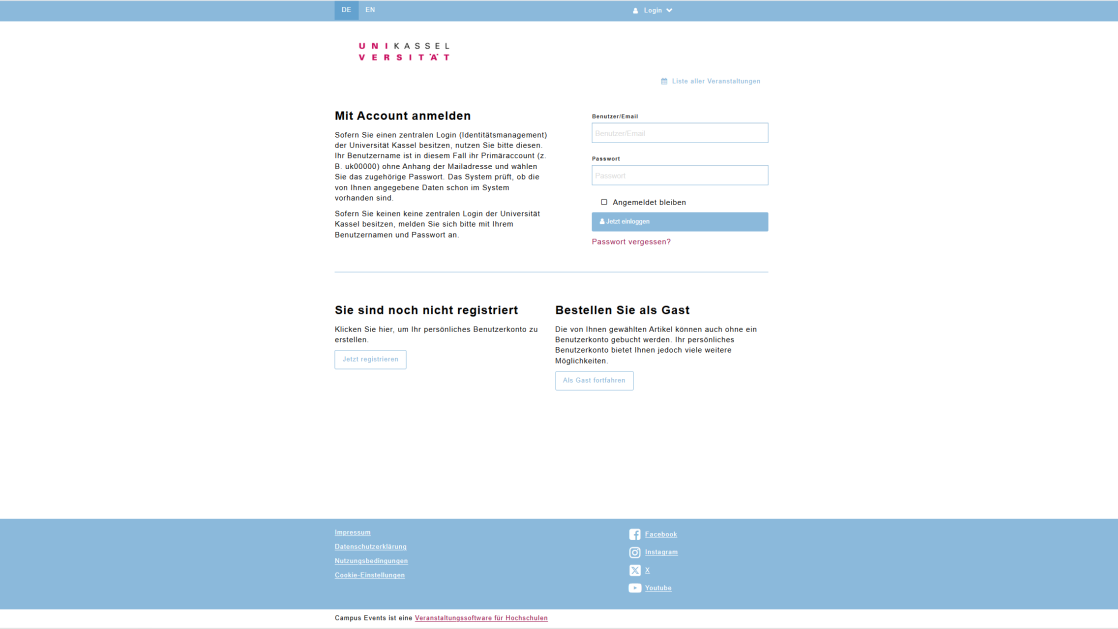

When you register, you'll have a user account with many benefits, such as an overview of the events you've booked.
If your login information is already stored in your cookies, your details will be automatically filled in.
The option to log in as a guest must be configured for the event. For more information, see this guide under [Backend → Create Event].
Frontend – My Profile
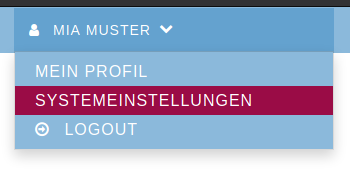
You can now access your personal profile by clicking on your name in the upper-right corner and then clicking "My Profile."
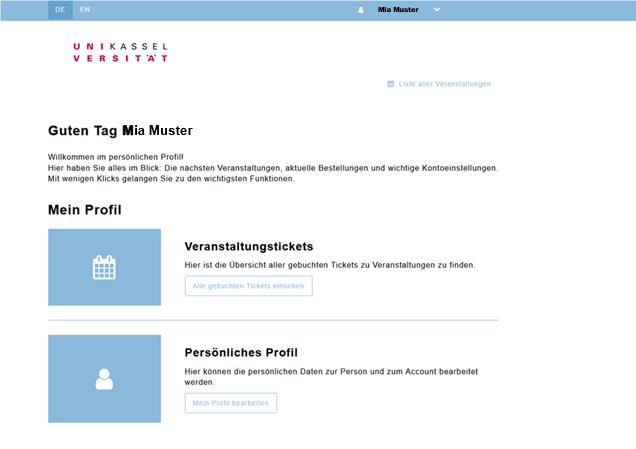
Front-end users can delete their accounts on their own in their profile. This can be done under “My Profile → Personal Profile → Edit My Profile.” Tickets and orders will remain intact. Attendance receipts and certificates will also remain intact.
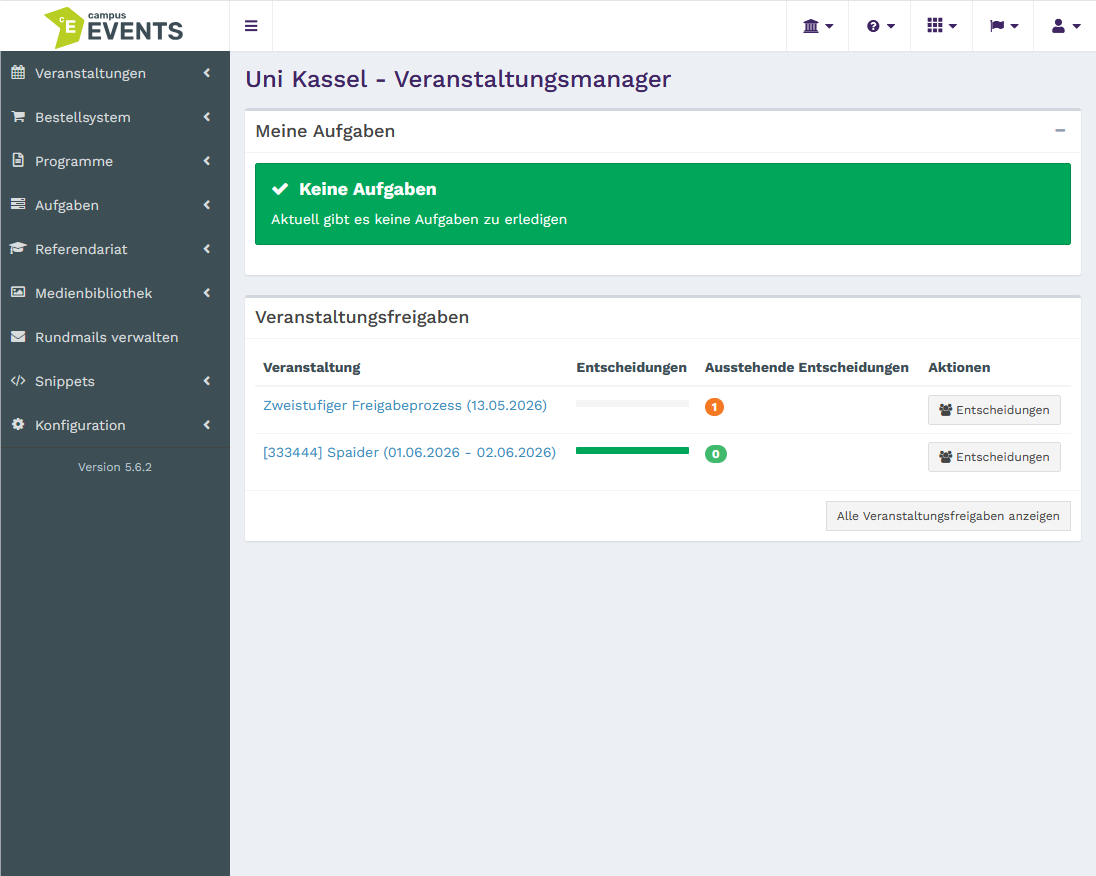
Backend (Administration Interface)
In the administration interface (backend), you can manage your existing events and easily create new ones.
To access the backend, log in at https://veranstaltungen.uni-kassel.de using your UniAccount. To do this, click “Login” in the top right corner and enter the login credentials for your (primary) account. Then click on your name in the top-right corner and select “System Settings.”
If the “System Settings” option does not appear after clicking on your name, your account does not have the necessary permissions.
You can find the online form to enable your UniAccount for access to the backend under Campus Events - Access Request.
Create Events
Step 1 - Create Master Data
Before you create an event, it’s possible and helpful to store certain information centrally, such as sponsors, venues, filter categories, moderators, contact persons, or partners. This centrally stored data (known as master data) helps prevent duplication. Once, for example, a sponsor—such as “Sponsor X”—has been entered, you and other users (unless you’ve restricted access) can reuse this data when creating future events. Check on the left-hand side under “Events” -> “Master Data” to see if you can edit these items. There you will also see all subcategories of master data. If you do not have editing permissions, please send an email to veranstaltungen[at]uni-kassel[dot]de.
Step 2 – Create an Event
To do this, click “Events” under “Events” in the Admin Dashboard, then click “New” in the top-right corner. To create an event, you must fill out certain required fields. Some details are optional and can be added as needed.

Centralized Management of Event Elements
Before you create an event, you must enter certain information centrally, such as sponsors or partners. This centrally stored data helps prevent duplication. Once a sponsor—such as “Sponsor X”—has been added, you and other users can reuse this information when creating future events. Check on the left-hand side under “Master Data” to see if you can edit these items. If you do not have editing permissions, please send an email to veranstaltungen[at]uni-kassel[dot]de.
Use the menu bar to access the features you need, such as master data. You will only see menu items for which you have the appropriate permissions. If certain menu items needed to control features are missing, please submit a ticket.
Basic Configuration
Here, you enter general information, such as the exact name of the event.
The URL segment can be specified, but is optional. If it is not specified, it will be generated automatically.

Classification
Under "Event Format," you can select the format in which the event will take place (e.g., in-person event, online event, etc.).
Under “Event Visible Until,” you can specify the time period before or after which the event should be visible on the front end.
Approvals can only be added after the event has been saved at least once.

About the Event
Under “About the Event,” you can describe the event and add images and labels. If no description is provided, the description will be displayed in abbreviated form.
The upload fields in the sections “Event Images,” “Information and Downloads,” “Certificates in the Event Form,” “Certificate Master Data,” “Certificate Background,” and “Certificate Programs” have been replaced with references to the Sonata media library. New media files are enabled by default and are therefore visible on the front end.

Additional Event Information
Under “Additional Event Details,” you can link master data records to the event or create new ones if they do not already exist. (See the section “Create an Event / Step 1”) It is also possible to enter additional information regarding the master data. However, this information is only displayed within the event itself—such as the heading that can be created above the moderator area.
Master data can also be viewed under Events → Events → Master Data.

Event-Specific Details
Individual event details are pieces of information about the event that can be managed purely for organizational purposes in the backend or displayed for informational purposes in the frontend.

Event Registration Type
In this section, you can choose between the various registration methods for the events.
To view the specific configuration of the registration type and the participant details, the registration type must already have been selected!
If the event type “Order with Shopping Cart” is used, custom participant details can be restricted to selected price categories. To do this, the event must first be saved with the event type “Order with Shopping Cart” and with the specified price categories. Only then can participant details be restricted to these saved price categories.
| Registration Type for the Event | Configuring the Registration Type | Participant Information | Additional options under Event Registration Type |
|---|---|---|---|
| None (display the event only) | No options | No options | No options |
| Quick registration for individual participants (free of charge only and without a shopping cart) |
|
| No options |
| Order with Shopping Cart |
|
|
|
| By email |
| No options |
|
| Via external website |
| No options |
|
Quick Registration for Individual Participants
For this type of free registration for an event, only the participant’s email address is required. This means that the email address is the only required field (see Participant Information), although additional required fields can be added. If the participant does not have a UniAccount—as is the case with guest registration—they will receive a confirmation email. To complete the registration, simply click on the link in the email.
Please note that the reservation is only valid if the link is clicked within 24 hours. Otherwise, the ticket expires. This procedure helps prevent misuse and allows the organizer to quickly notify you of any changes.
You can find the “Allow guest orders” option under “Registration Type Configuration.”
Order with Shopping Cart
The “Order with Shopping Cart” option is used when there is a fee for the event. If you select this option, an invoice will be automatically sent to participants upon registration. This invoice will also be automatically forwarded to our Finance Department for processing.
Additional fields will appear where you can specify the seller, the price category, and the price. If you cannot find the correct options, please contact us via Campus Events - Support Request.
Before selecting this registration type, please provide us with the following information via the Campus Events – Support Request ticket system: seller’s name, address, and invoice number.
Before selecting this registration type, please notify the Finance Department.
By email
In this case, registration does not take place through Campus Events and is also available to external participants. The option to register as a guest can be enabled or disabled in the settings.
Registrations via an external website
If you do not want to manage registrations for your event through Campus Events, Campus Events offers a simple solution for doing so via an external website.
To do this, select "via external website" under "Event Type."

Configuring the Login Type
This section will only be displayed if you have selected a registration method under “Event Registration Type”!
Depending on which registration type is selected, you can enter registration-related information here. The screenshot shows the configuration for the “Quick Registration” registration type.

Participant Information
This section will only be displayed if you have selected a registration method under “Event Registration Type”!
In this section, you can specify which fields are required, optional, or disabled for participants. This is relevant during event registration.
Please update the participant data after the event. You can do this by updating who participated or passed, and by anonymizing the participant data.
Note: All backend administrators are required to anonymize participant data after 15 months!
Please keep in mind that later on, in the registration process, you will only see the participant information you selected here—for example, for table name tags.
Using “New Record,” you can add individual participant details that you previously created in the master data / participant details.
Course Content (Certificate) - Master Data
This feature allows you to create and save certificates and grades for participants whom you have previously added to the master data (see the "Create an Event" section, Step 1).

Search Engine Optimization (SEO)
Here, you can take steps to increase the visibility of your event in web search engine results.

E-ticket
An e-ticket is a digital ticket in PDF format. It includes a QR code for admission.
The “Event Registration Type” determines whether tickets can be created in this section. With the registration types “None,” “By Email,” and “Via External Website,” e-tickets cannot be created in this format.

Notifications about new registrations
With this setting, the designated recipient will receive email notifications about new registrations.

Reminder emails
Under the "Message" tab, you can either create messages individually or select a template from the message templates you previously created under Configuration / Email / Message Templates (if you have the necessary permissions).
Under the “Sending” tab, you can specify who will be notified. Here, you can also set how long after the reference date the notification will be sent.
Reminder emails can only be added after the event has been saved at least once.

System Emails
System emails can only be configured by us in the ITS. If you would like to make permanent changes to system emails, please submit a ticket.

Webhooks
This section is currently being edited.
Sending group emails to more than 100 people
If you want to send a group email to more than 100 recipients, please note that, due to system limitations, not all emails can be sent at once.
Therefore, large volumes of emails are sent in blocks of 100 at 15-minute intervals .
For example, if you send 150 emails, the status will initially show as "100/150." The remaining emails will then be sent 15 minutes later.
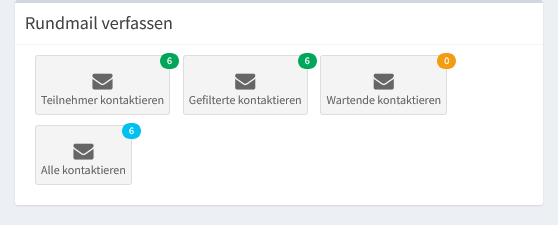
To create a mass email, please open the event draft and navigate to the “Participants” section. At the very bottom of the page, you’ll find the “Compose Mass Email” option:
Contact options:
Contact participants
Send a mass email to event participants (all email addresses in the participant list will be contacted).
Contact filtered participants
: Send a mass email only to the selected participants who match the applied filter.
Contact those on the waiting list
Send a group email only to participants on the waiting list.
Send a mass email toall event participants and people on the waitlist (regardless of the filter).
In accordance with personal data protection regulations, you can anonymize the data of all (potential) recipients of a mass email. To anonymize the personal data of all (potential) recipients of a mass email, click “Anonymize Recipients” in the “Actions” column for the relevant mass email and confirm if necessary.
Overview of Participants with a Traffic-Light System
In the event list under Events -> Events, in the "Participants" column, you'll find a traffic-light system. This system lets you see at a glance which events still have too few participants (minimum number of participants) and which events can take place.
The list view of events displays the minimum number of participants, which are color-coded as follows:
- red = minimum number of participants not reached or more participants than the set maximum
- green = More participants than the minimum number: the event will take place
- orange = Maximum number of participants reached: consider arranging a larger room if necessary
Overview for the admin: Number of participants for all events.

Event from April 10, 2019, to April 11, 2019: The minimum number of participants (20) has been reached. Currently, 25 participants are registered. Just 5 more registrations and the minimum number of 30 participants will be reached.
People who want to attend an event even though all spots are filled can add their names to a waitlist if this feature is enabled for the event. You can find this feature when creating or editing an event under “Registration Type Configuration.”
In the events view, you can check the boxes in the first column. At the bottom of the page, you can perform actions on the selected events (Publish, Hide, Copy). If you check the box next to “All Items,” all events currently filtered will be selected. Please note that this action will also select items on subsequent pages.
Filtering Summary Tables
For all types of overview tables (e.g., events, participant overview), you can create and save filters to filter the table’s entries. You can add criteria to the filter by selecting a category in the top-right corner under “Add/Remove Criteria.” This category will then be displayed. To delete it, you can remove it using the same method, or click the trash can icon to the right of the item you want to delete.
To save a filter, click “Saved Filters” -> “Save Current Filter.” There, you’ll have access to the filters you’ve saved.

For filter categories (e.g., email), you can specify which action should be applied. You can select the action in the first field of the selected filters (e.g., contains, does not contain, is equal to, is not equal to, starts with, ends with).
Typo3 (Snippets)
The integration of the dates and events maintained in Campus Events is handled via snippets that you configure yourself and add to your TYPO3 website.
Data is transferred in the background via an interface. The website can update the data at any time using the free TYPO3 extension.
Information about the events is displayed in summary form on the website.
More detailed information about participation or registration for events is then provided in Campus Events.