Assign group priorities to parallel groups of an event
For some courses, there are several parallel groups with different dates and teachers. As not all students can automatically be assigned to their preferred group due to the maximum number of participants, a priority system is used to assign students to groups. This priority system can be used to assign so-called group priorities for a course with several parallel groups. You use the group priorities to determine the order of your preferences from high to low, i.e. 1st choice, 2nd choice, etc.
At a glance: The most important steps
- Call up event
- Open dropdown next to each desired parallel group and select priority
- Check entries
- Click on "Register/deregister now"
- Check confirmation and status
Important:Module prioritization(formerly PRIOS) is currently suspended due to the system changeover and will not be available again until the winter semester 2026/27 at the earliest. Find out about your department's regulations in good time.
What does "priority" mean?
The system automatically allocates the available places based on your details:
- Priority 1 = preferred group (first choice),
- Priority 2 = second choice if priority 1 does not work,
- Priority 3 = third choice and
- Groups that you do not want to occupy are left at "Do not occupy".
You can only assign one priority for each parallel group. The same priority level cannot be assigned twice (i.e. do not mark two groups as "Priority 1" at the same time).
Ways to prioritize
You do not necessarily have to navigate to the enrollment page via the study planner. You can also access the prioritization page in the following ways:
- Study planner (Menu > My studies > Study planner), open the course and click on the booking symbol (door with green arrow).
- Module plan (Menu > My studies > Module plan), open the module, click on the course title and select "Zur Belegung".
- Course catalog (Menu > Course offerings > Show course catalog) click on the course - important:not on the parallel group - and use the booking symbol in the detailed view.
- Timetable (Menu > My studies > Timetable), click on a reserved course and navigate from there via the details page to the booking.
No matter which way you enter, you will always end up on the same booking page with the priority dropdowns.
Step-by-step: How to assign priorities
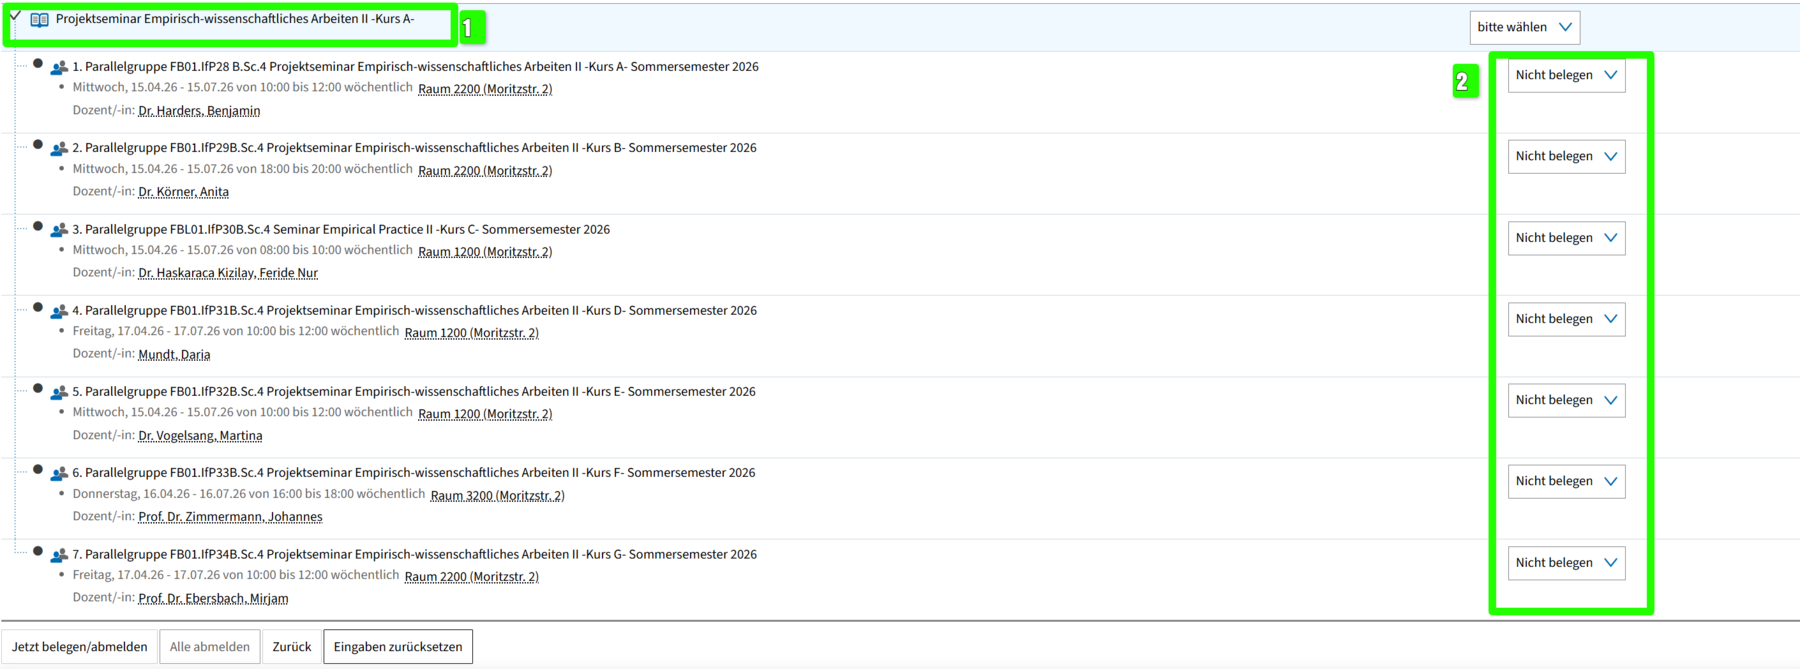
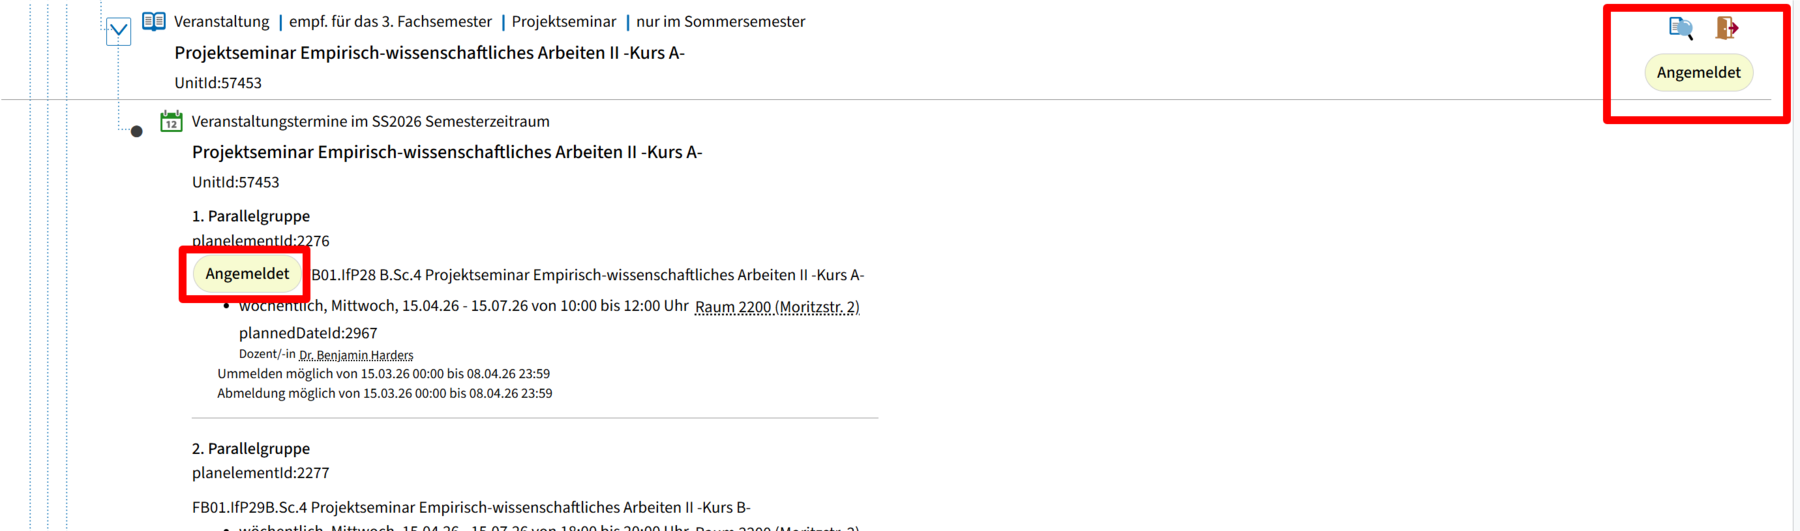
Step 1: Navigate to the event
Navigate to the desired course in eCampus, for example via Menu > My studies > Study planner. You will see the course listed with its parallel groups. At the top right next to the course title, you will find a drop-down menu that initially displays "please select".
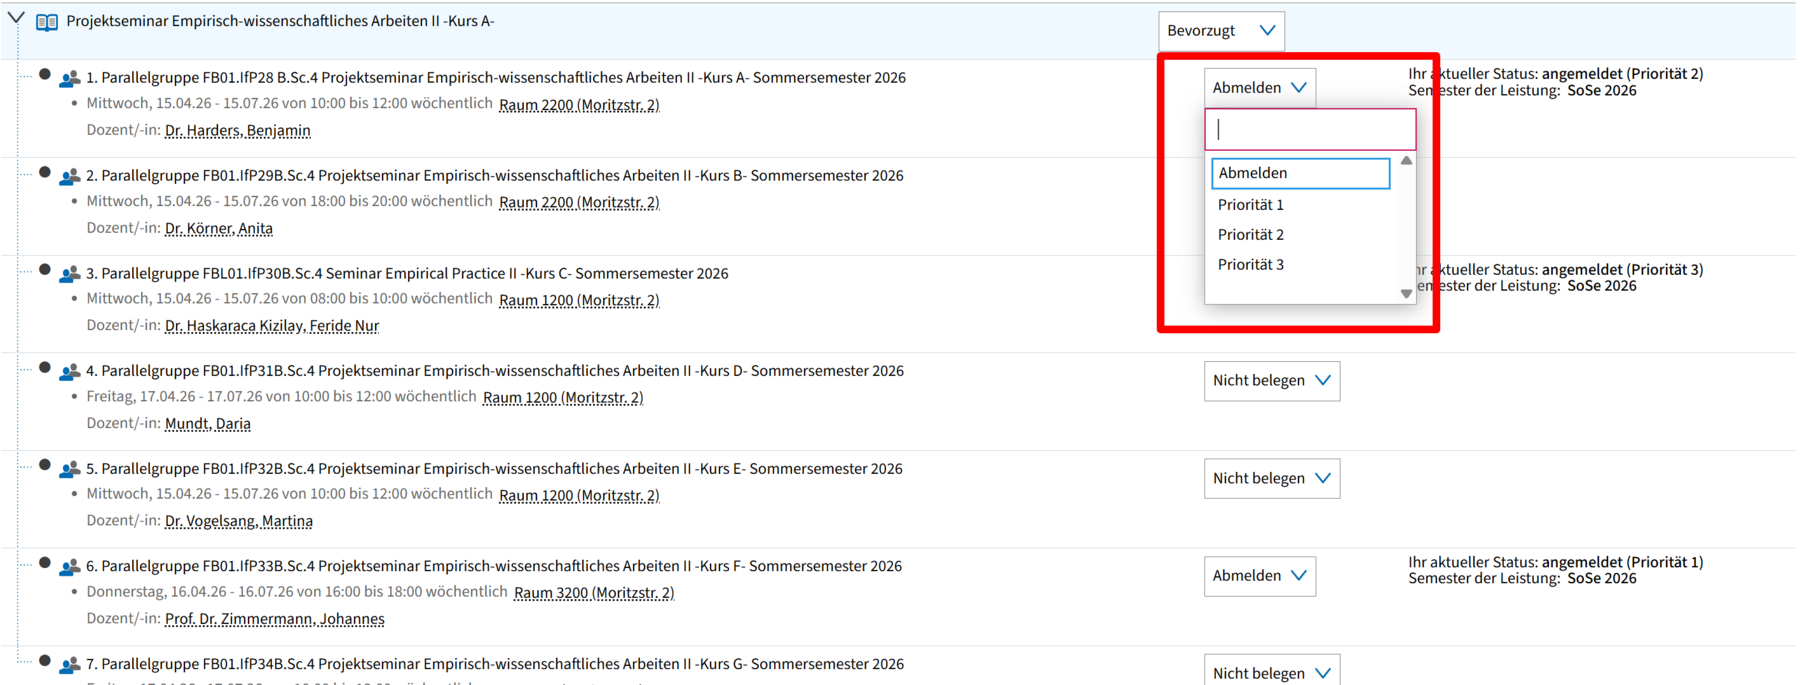
Step 2: Assign priorities via dropdown
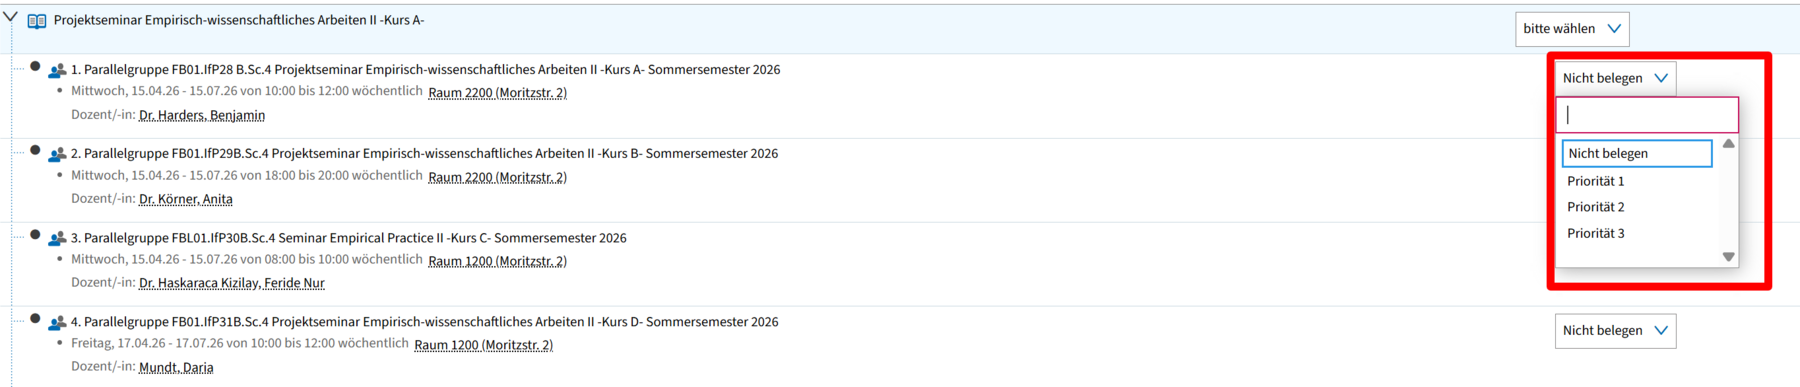
There is a drop-down field next to each parallel group. The default setting is "Do not occupy". Click on the drop-down field next to the parallel group you want to assign. A menu opens with the options "Do not assign", "Priority 1", "Priority 2" and "Priority 3".
Select the desired priority for this group. Repeat this for the other parallel groups that you want to specify as alternatives.
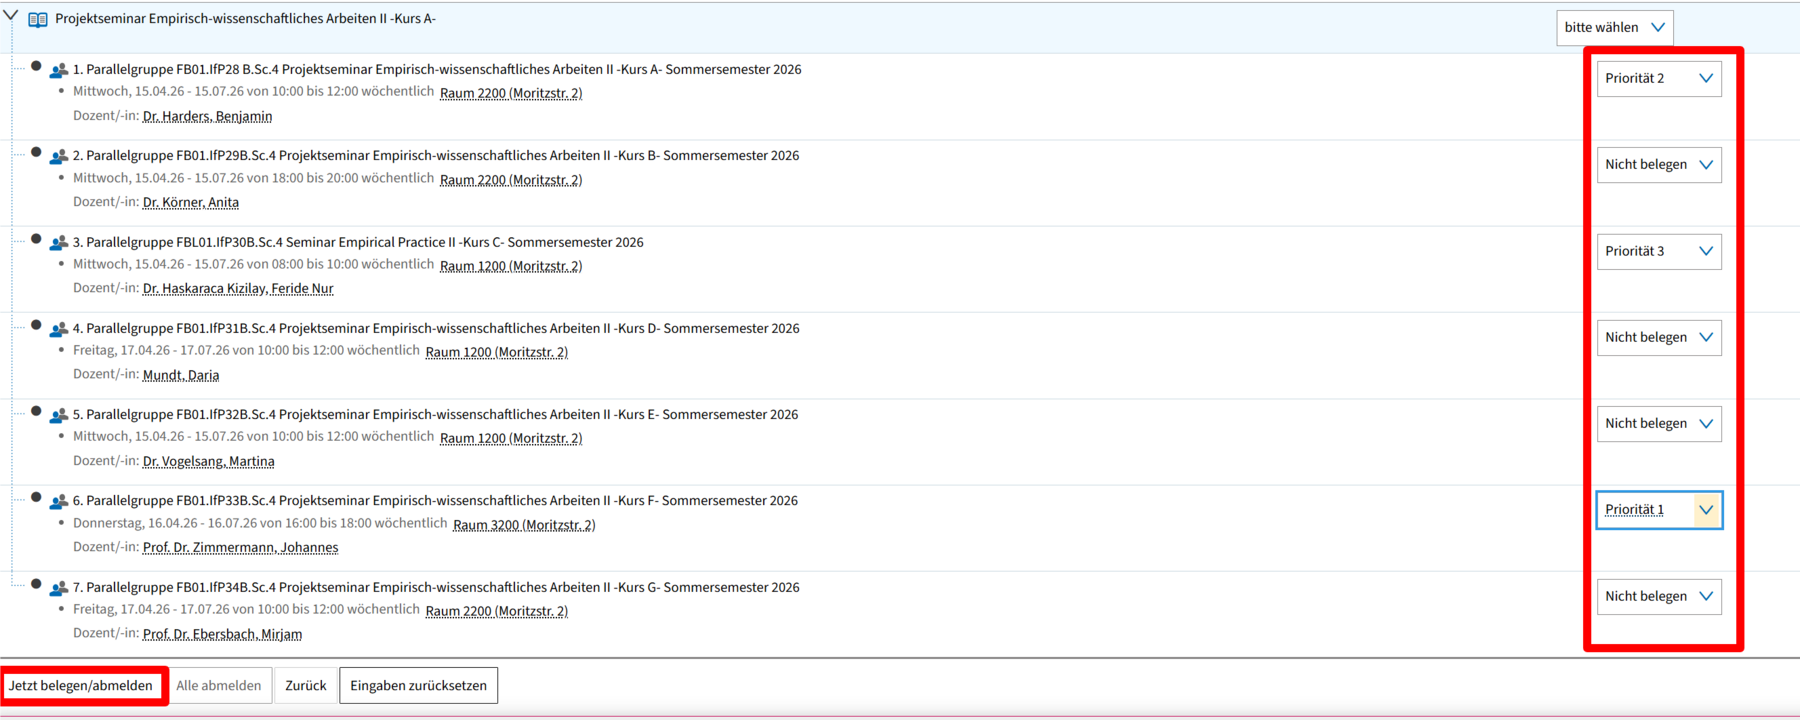
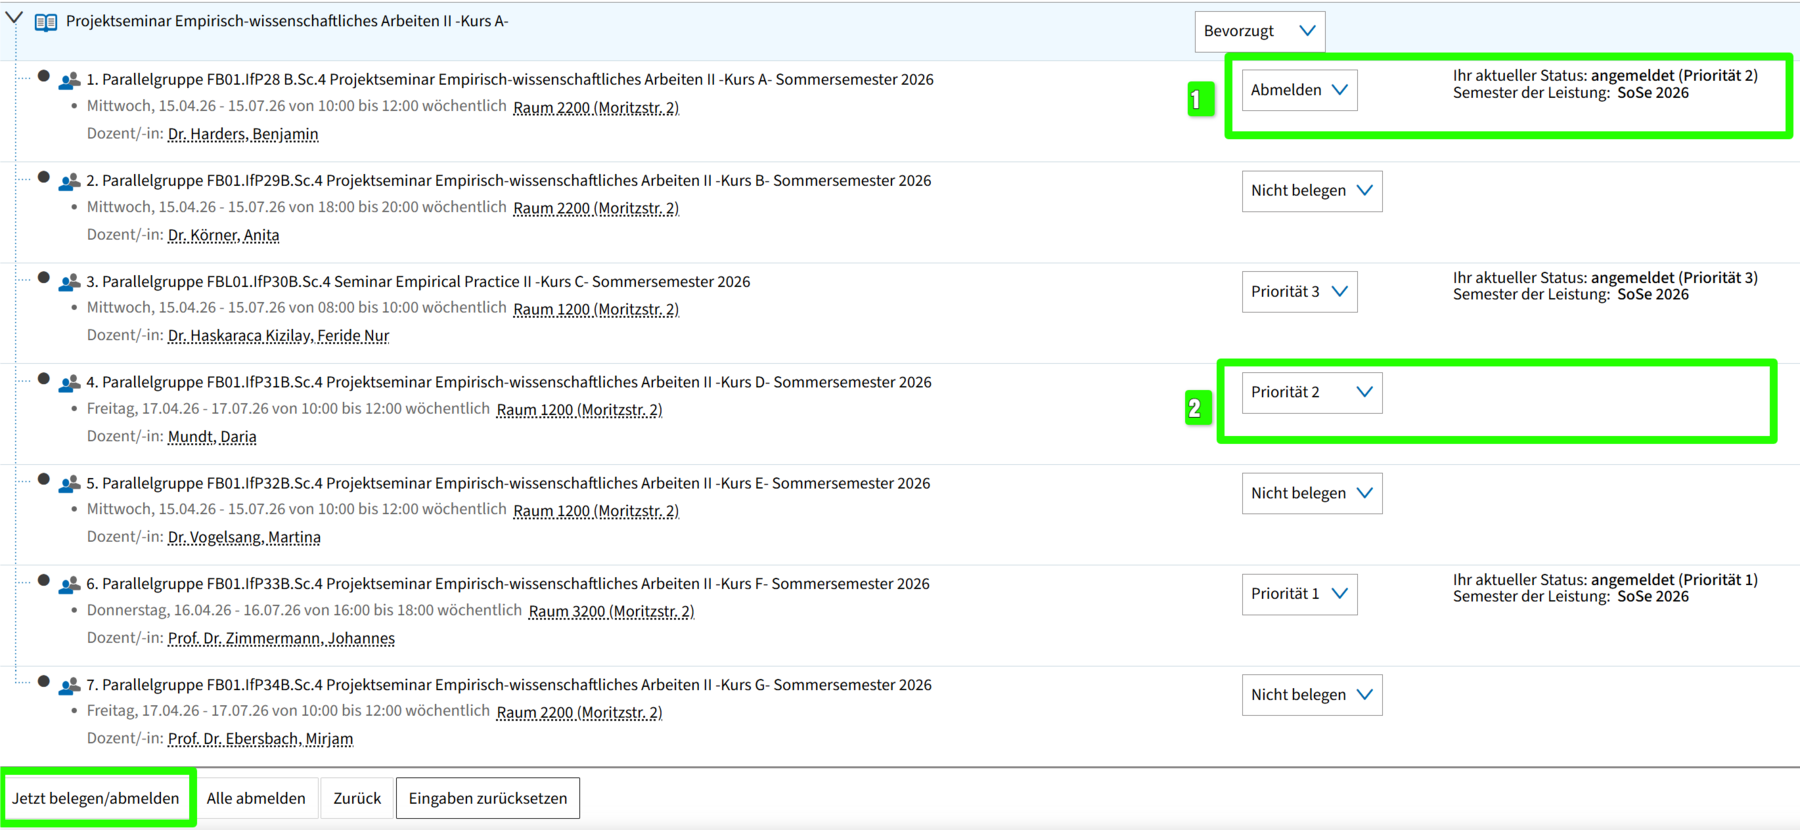
Step 3: Check entries
After you have set your priorities, you can see in the overview which group has been given which priority (example in the screenshot on the right: the 1st parallel group is given priority 2, the 3rd parallel group priority 3 and the 6th parallel group priority 1, while all others are set to "Do not assign").
Check your entries carefully before you continue. Make sure that you have not assigned a priority level twice. Now click on the "Assign/deregister now" button at the bottom to submit your priority requests.
Important: Your selection will only be saved and sent to the system once you have clicked on "Book/deregister now". Your entries will not take effect until you have submitted them!
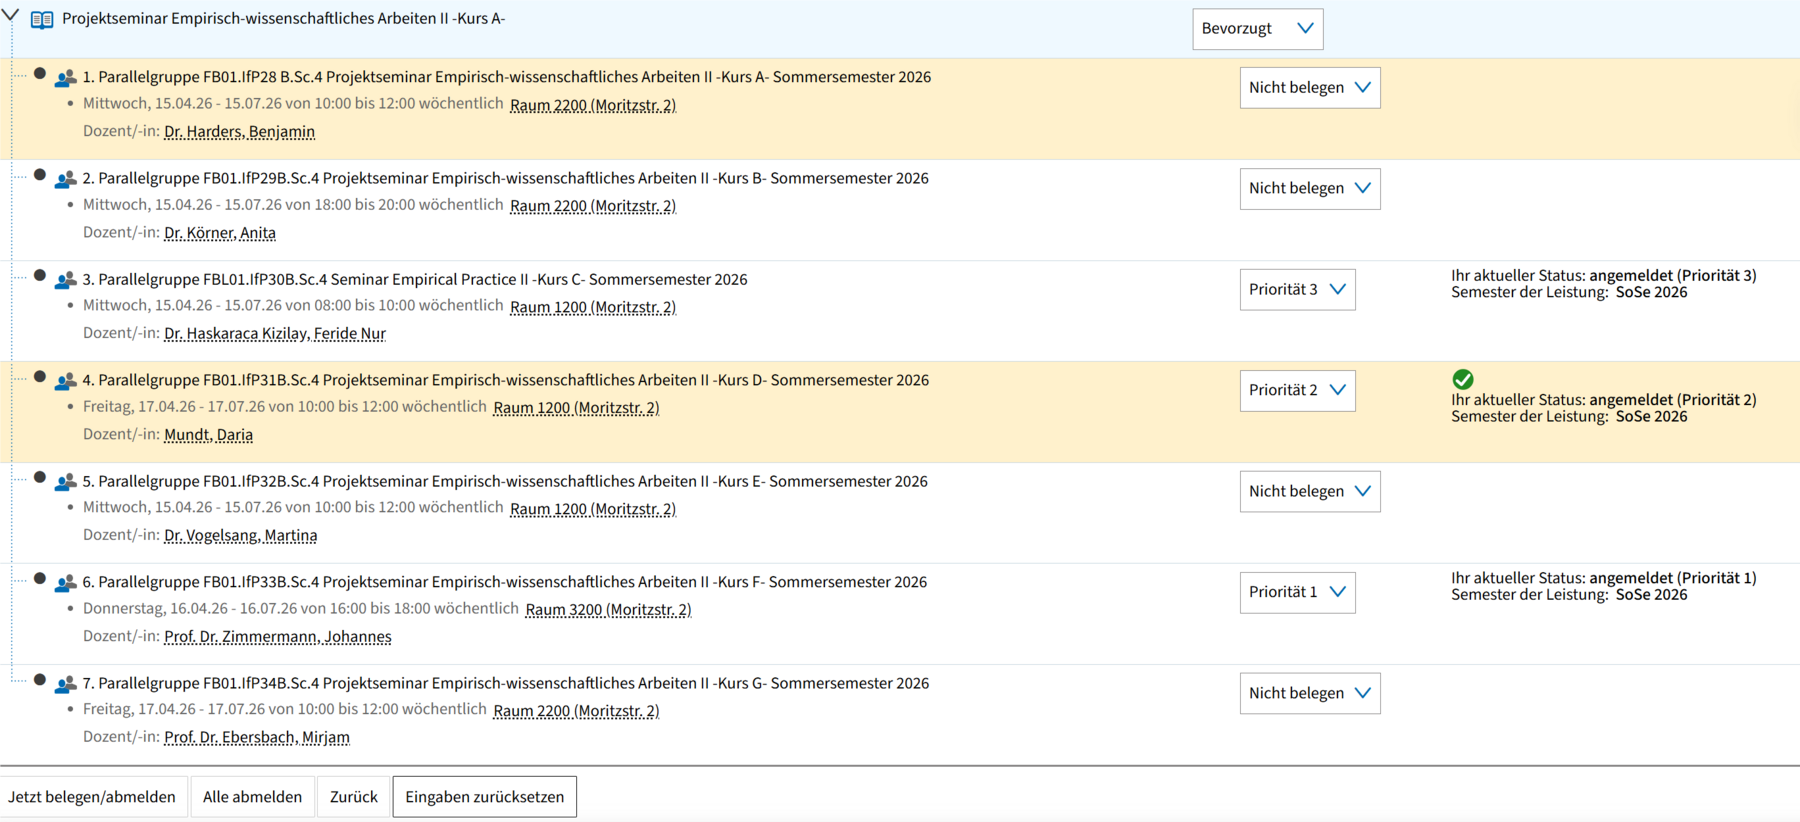
Step 4: Check confirmation and status
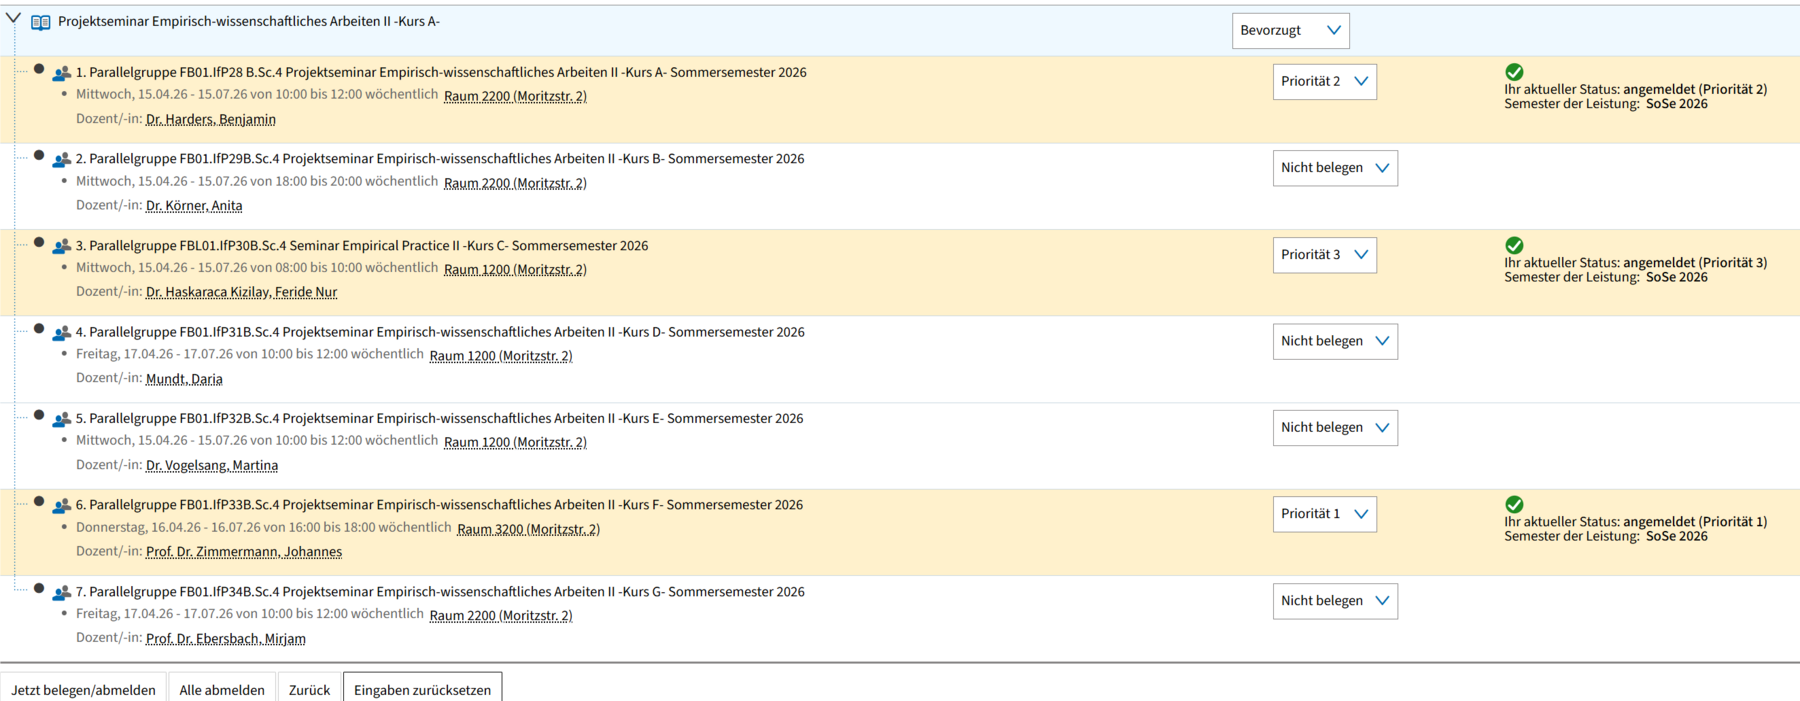
After successful submission, you will see the note "Your current status: registered (priority X) - Semester of performance: SoSe 2026" to the right of the corresponding parallel groups.
In addition, a green symbol with the text "Registered" appears at the top right of the course title.
You can now also see that you have registered for the parallel groups in the study planner, for example.
From here, you can also navigate back to the priority assignment (to change your priorities again or to deregister). To do this, click on the door marked red in the screenshot with the small red arrow. You can also display the event details using the symbol with the magnifying glass next to the door.
Change priorities retrospectively
As long as the booking period is still running, you can adjust your priorities at any time. To do this, proceed in the same way as for the initial allocation and navigate to the booking page again using one of the methods mentioned above. The dropdowns now show you your currently set priorities (e.g. "Priority 2" or "Log out" instead of "Do not occupy").
Click on the dropdown next to the group whose priority you want to change and select a new level. If you would like to give another group the priority level that has now become available, adjust this selection accordingly. If you want to completely unsubscribe from a group, select "Unsubscribe" in the dropdown.
Do not forget: Then click on "Assign/unsubscribe now" at the bottom so that your changes are actually saved. Without this click, all changes will be discarded.
Reset all priorities at once
If you want to delete all your priorities at once and start again, click on the "Cancel all" button at the bottom. This will reset all dropdowns to "Do not assign" and you can start assigning priorities again. Then remember to save your new selection with "Assign/Unassign now".
The "Reset entries" button is also available. This only undoes the changes made in the current session without deleting any assignments that have already been saved. The difference between the two buttons is therefore as follows:
- "Reset entries" only discards unsaved changes from the current session and
- "Log out all" deletes all saved assignments and priorities completely.
Note: What happens after the booking deadline?
At the end of the booking period, places are allocated, usually within 1-2 days, based on the priority requests received, i.e. registrations are converted into admissions where possible. You will then be allocated to the parallel group with the highest possible priority where a place is still available. You can see the outcome of the allocation process in the course planner under the respective status of the course once the process has been completed.
Go-Link of this page: https://www.uni-kassel.de/go/gruppenprioritäten-belegen