next.hessenbox under Windows
The content on this page was translated automatically.
On this page you can find out how to download and set up the desktop client for next.hessenbox under Windows.
Installation
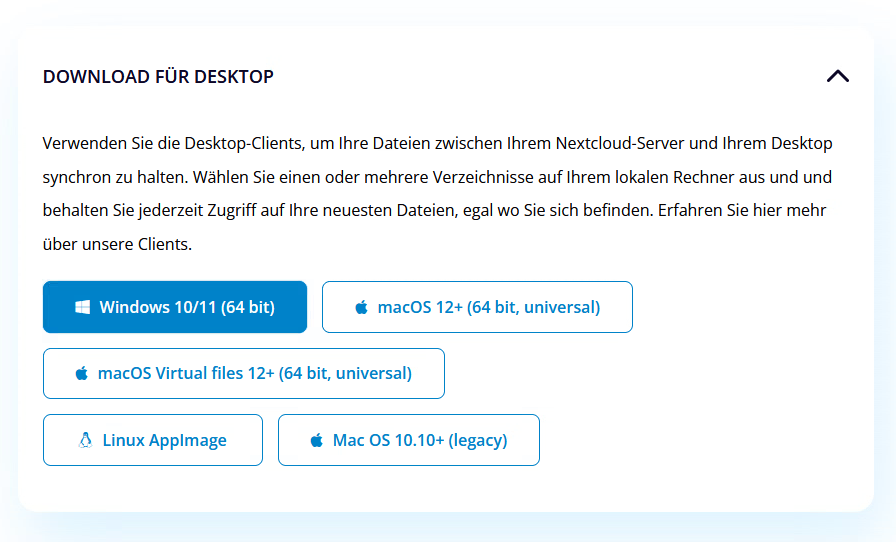
You can download the latest client for the next.hessenbox at the following link: https://nextcloud.com/de/install/.
You will be redirected to the website where you can find the correct version for your operating system.
Now please download the client version for your Windows operating system by clicking on the corresponding button and follow the installation steps of the program shown.
Registration and setup
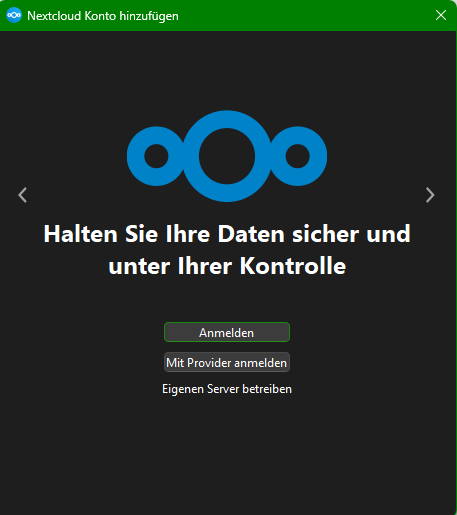
After you have completed the installation and opened the client, you will see the view shown below. Please click on "Log in" here.
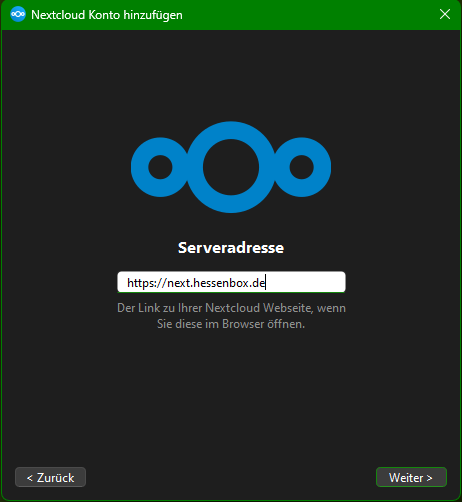
Then enter the following server address:<https://next.hessenbox.de>
Then please click on "Next".
The view in the window should now change and a browser window will open at the same time.
If this does not happen automatically, you can either click on "Copy link" and automatically paste the copied link into your browser or click on "Reopen browser" to reopen your browser.
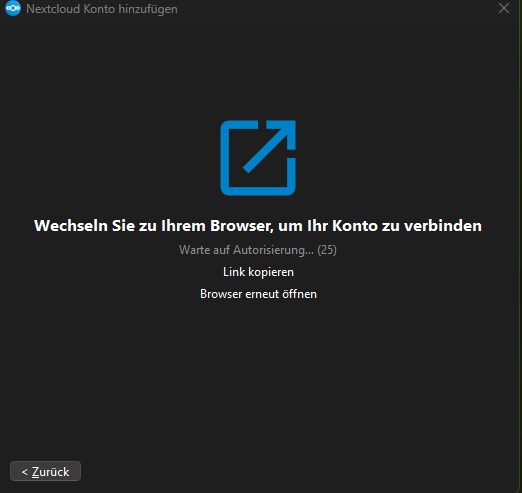
Once your browser has opened, you will be asked to log in. You will also be shown which desktop is trying to log in. Please make sure that the details match your login details so that you do not give anyone else access to your data.
If everything is correct, please click on "Log in".
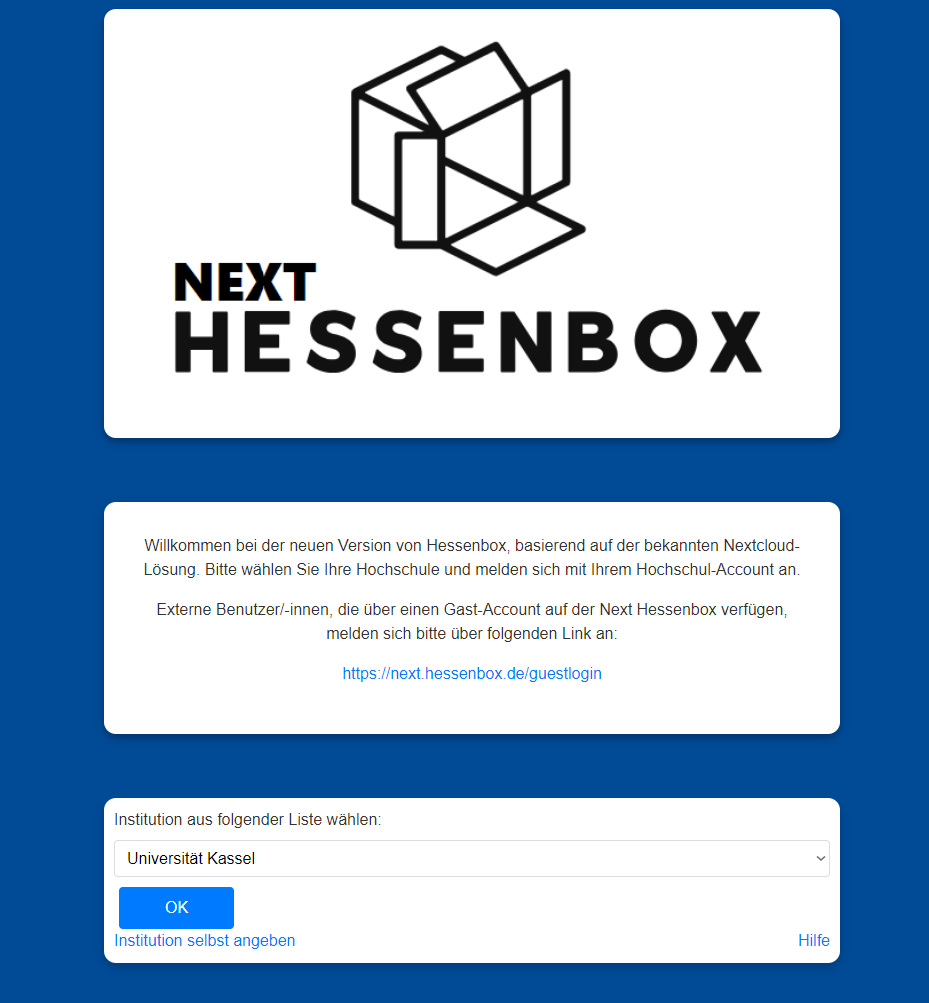
You will be redirected and can now select the institution. You can either use the drop-down menu (small downward-pointing arrow in the text line) to search for Universität Kassel or type in the name manually.
Once you have entered the University of Kassel in the text field, please click on "OK".
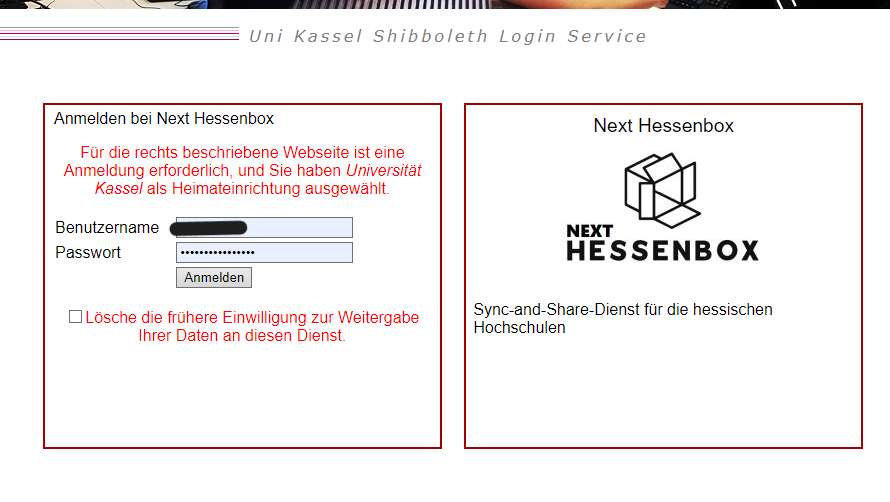
You should be redirected. Log in here with your UniAccount (<ukxxxxxx>) and the corresponding password.
Then click on "Login".
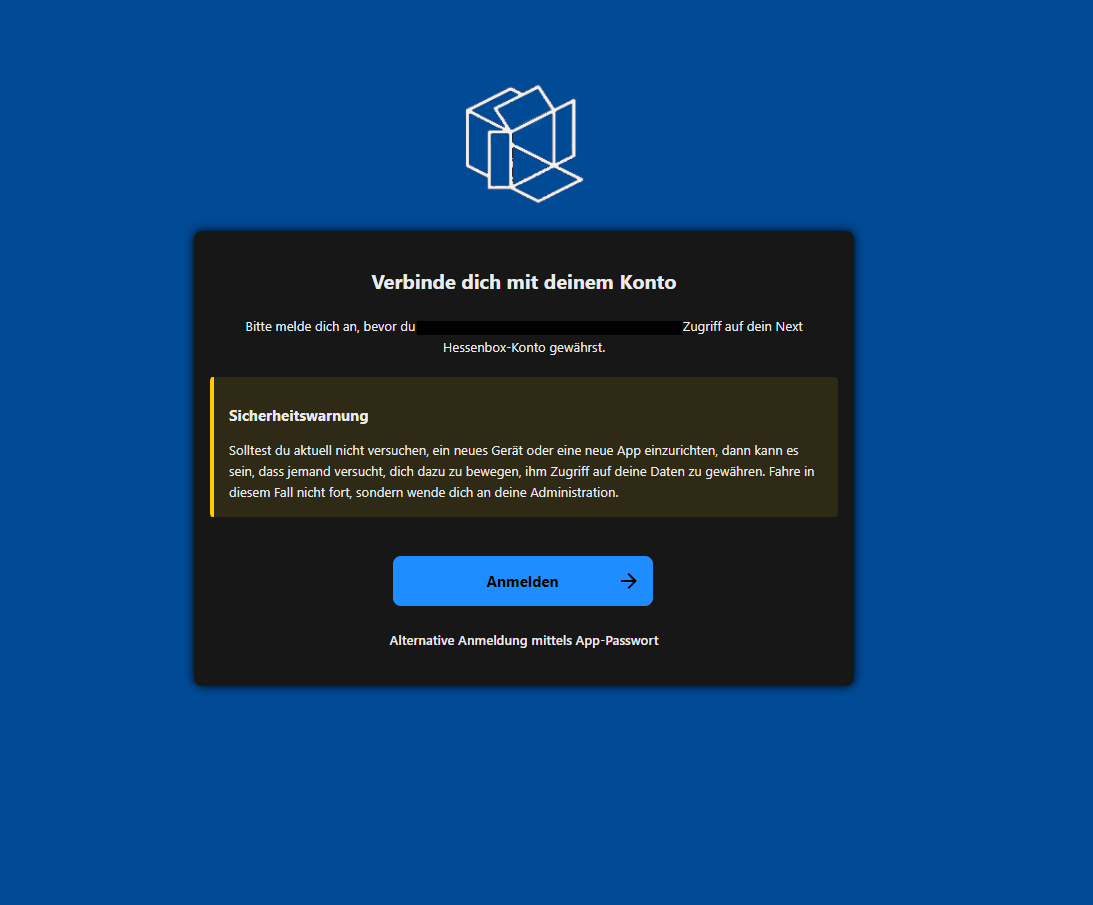
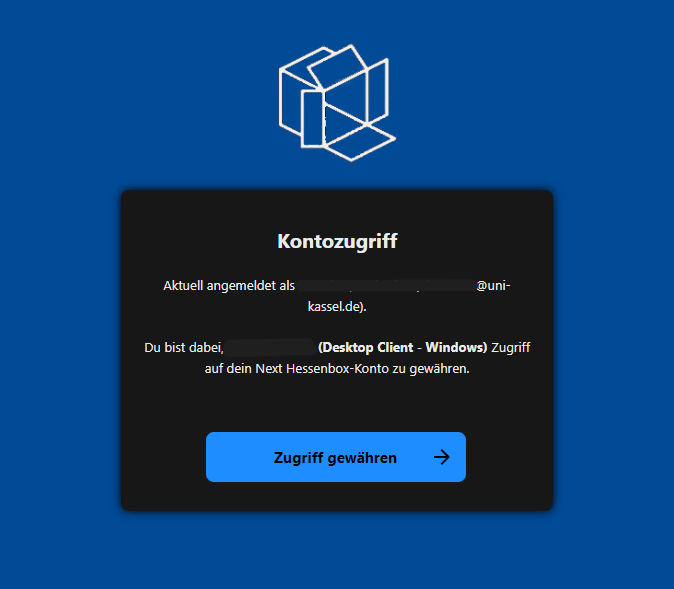
You will now be redirected to another window. You will be shown which account you have logged in with and which client you want to grant access to. Please check the information displayed and if everything is correct, please click on "Grant access". You will then receive a message that the account has been successfully connected and the browser window can be closed and you can continue in the desktop client.
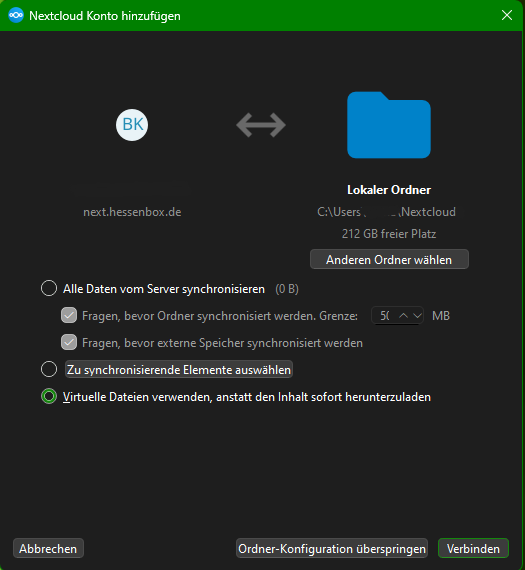
The client will now ask you how your local files on your desktop and your server should be synchronized. Please select your desired option and then click on "Connect".
The desktop client should then be successfully connected to your next.hessenbox and you can synchronize your files.