Team and channel management
Create team
Create team
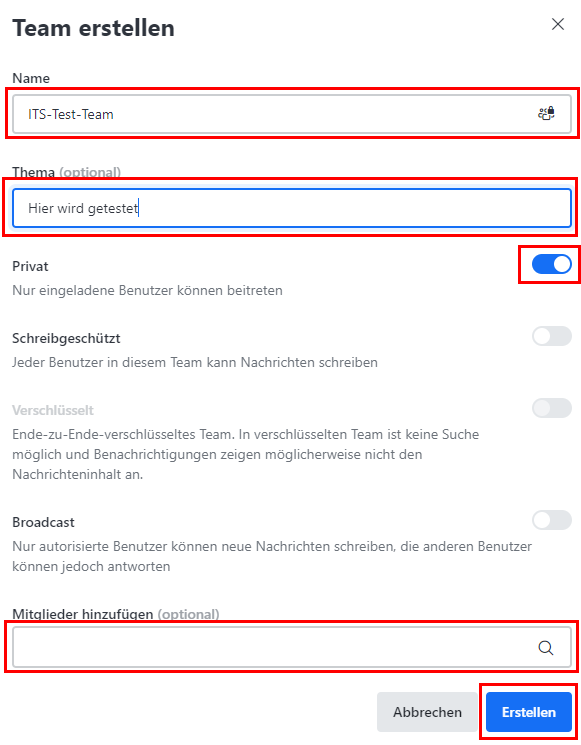
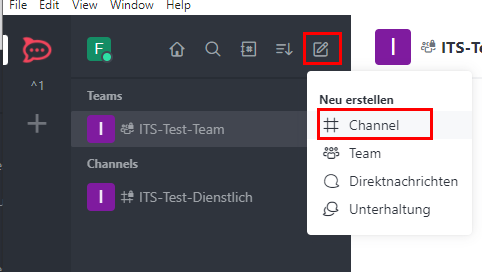
First, go to Rocketchat and select the option to create a new team by clicking on the pencil icon and selecting "Team".
Give the team a meaningful name that represents the topic or group.
Select the "Private" setting so that only people you invite can join the team. This is particularly useful if you want to prevent all users registered via the Uni Kassel Rocketchat server from joining.
Add members
Use "Add members" to add members who have logged in to Rocketchat at least once. You can only select these users.
Once added, the members have access to the team and the associated standard channel.
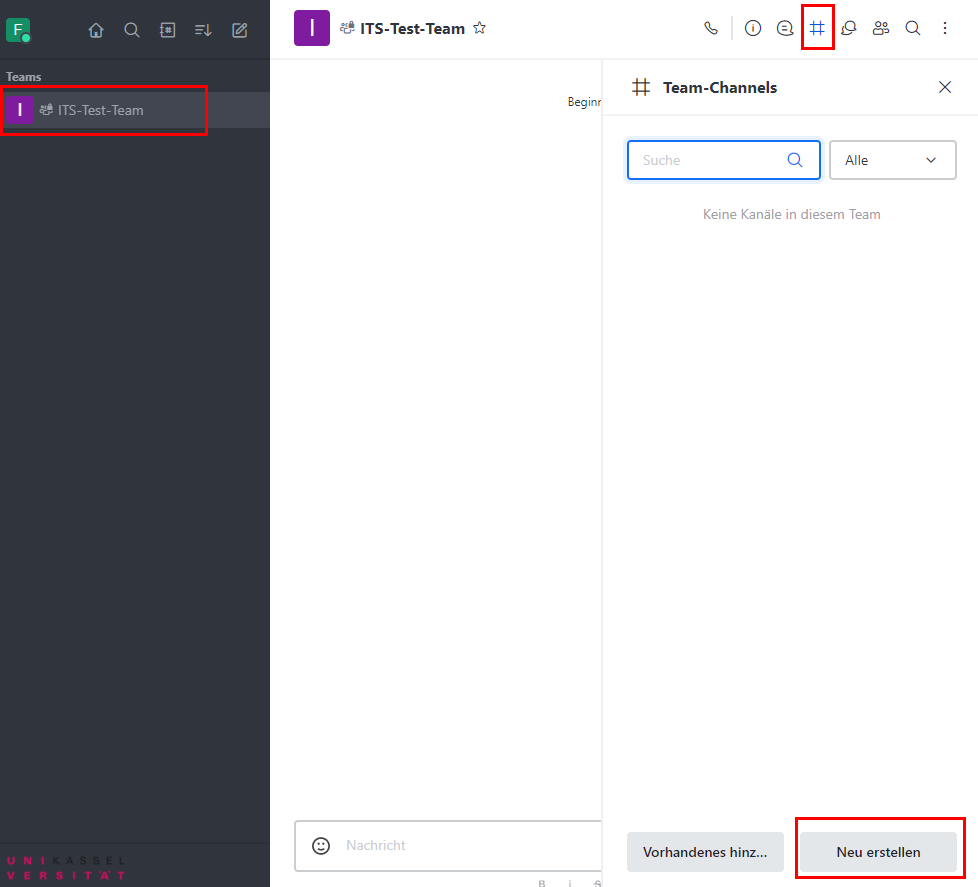
Configure team channel
A new team automatically contains a channel in which all team members can communicate.
Click on the team and select the diamond symbol (#) at the top to open channel settings.
Now select the "Create new" option to create additional channels within the team if you want to organize different topics or departments.
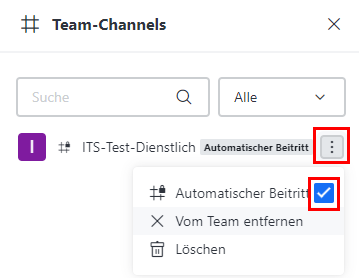
Activate automatic entry
Go to the newly created channel and click on the three dots next to the channel name.
Activate the "Automatic joining" option. This will automatically add all team members you add to the team to this channel. New members of the team will automatically receive access to all of the team's channels.
Set access rights for specific channels
If you need channels with different authorizations, you can create additional channels with differentiated access rights:
Click on "Create new" on the left to create another channel for the team.
Alternatively, you can also create additional teams and configure them separately if strong segmentation is required.
Add people to teams
To add new members to a team, first click on the desired team on the left. Then select the person icon on the right and then "Add". Please note that you can only add people who have already registered with RocketChat at least once.

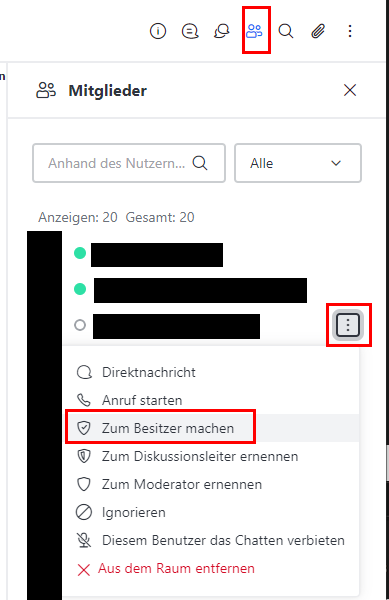
Adding additional members as owners
If certain team members are to be made owners, this can also be done via the person icon in the team. To do this, click on the three dots next to the person's name. Finally, select "Make owner".
Entertainment
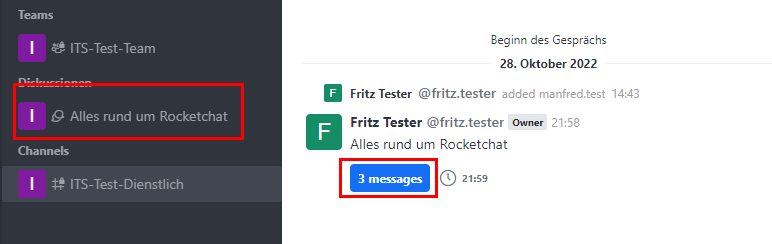
Discussions and conversations are visible in two places. For invited members, the conversation appears both under "Discussions" and in the channel in which it was created. Members of the channel who have not been invited will only see the conversation in the channel. To open the conversation in the channel, click on theblue Messages button.
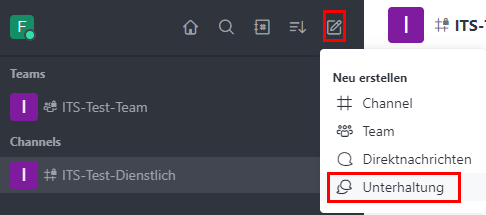
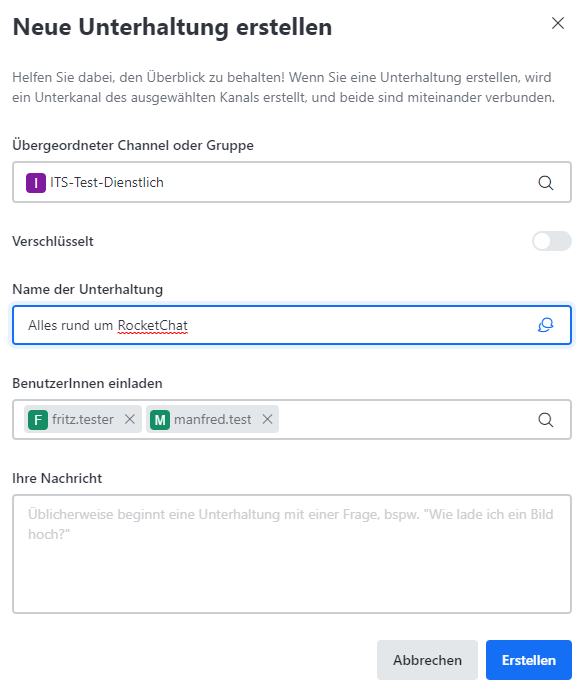
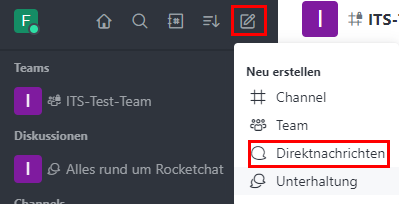
To start a conversation, click on the pen and paper icon and then on "Conversation".
Then select the channel in which the conversation should take place and the people who should take part in it. Also enter a subject or name for the conversation.
Direct messages
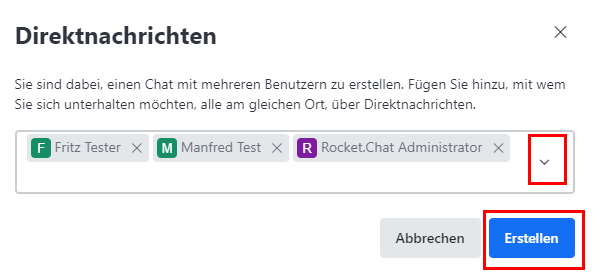
To send a direct message, click on the pen-and-paper icon and then on "Direct messages".
Add the people to whom you would like to send a direct message. To finish, click on "Create".
External users (without university account)
Follow the instructions for creating an external account to use RocketChat.
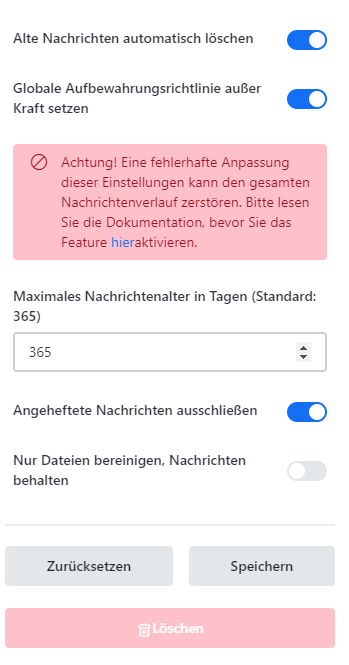
Retention policy
First select the relevant channel in which you would like to adjust the retention policy. Click on the information icon on the left-hand side and on "Edit".

Please scroll down and open the "Delete" area.
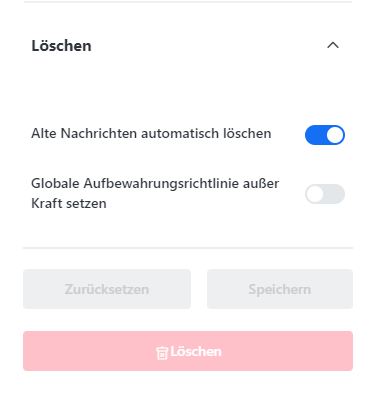
Then select "Override global retention policy" and adjust the desired deletion period using the arrow keys. Finally, click on "Save".