VPN program reinstallation under macOS
The content on this page was translated automatically.
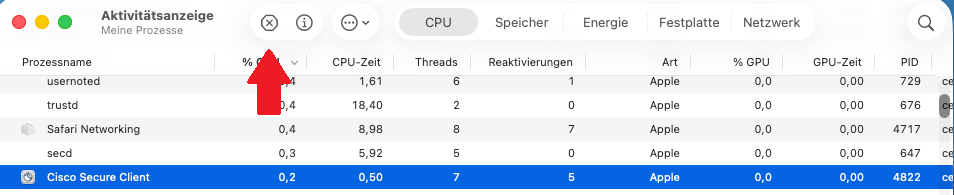
First close all windows of the VPN program. Then check whether the program is really closed: Press cmd + space bar, enter "Activity Monitor" and confirm with Enter. If an entry with "Cisco" appears in the list, select it and close it with the X in the top center.

Now delete all Cisco installation files. To do this, press cmd + spacebar, enter "Finder" and confirm with Enter. Click on "Downloads" on the left and delete all files that contain "Cisco" in their name. Then empty the recycle bin.
Open the terminal: Press cmd + spacebar, enter "Terminal" and confirm with Enter. Enter the following commands one after the other and confirm each one with Enter:
cd /opt/
ls
If no "cisco" entry appears after the "ls" command, the program is not installed. In this case, the next two commands can be skipped.
sudo rm -r -f ./cisco/anyconnect/
sudo pkgutil --forget com.cisco.pkg.anyconnect.vpn
For commands with "sudo" you will be asked for your Mac password. The input remains invisible - this is normal.
Then download the VPN program again, install it and restart your Mac.
If an error message appears after the installation, check under "Programs" (cmd + spacebar → "Programs") whether a folder named "Cisco" exists. If so, you can start the program from there as usual.
If the problem persists, please contact the IT Service Center.
Go-Link of this page: https://www.uni-kassel.de/go/VPN-unter-MAC-Neuinstallation