Access via Apple Mail
The content on this page was translated automatically.
Contents
Setting up the Exchange account
To be able to use your Exchange account under macOS, proceed as follows:
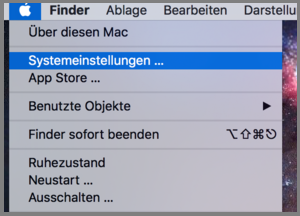
Click on the Apple logo in the top left of the menu bar and then select "System Preferences".
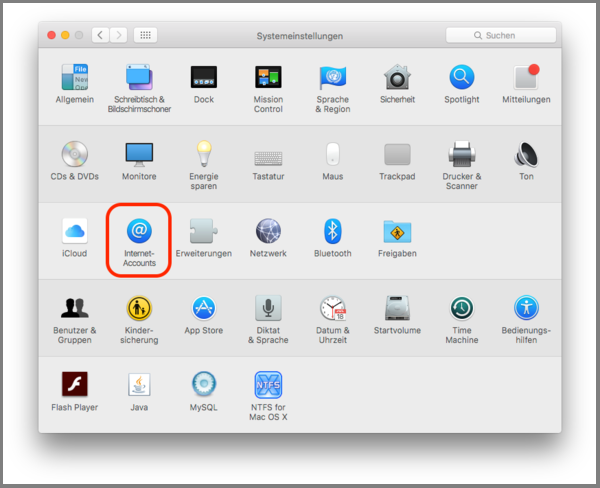
Now select the menu item "Internet accounts".
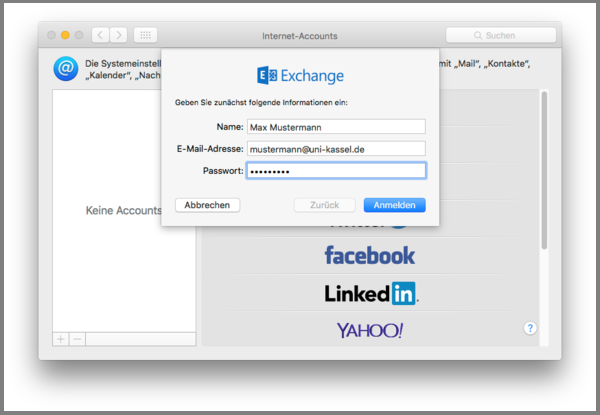
Now enter your name, e-mail address and password in the fields provided and then click on "Log in".
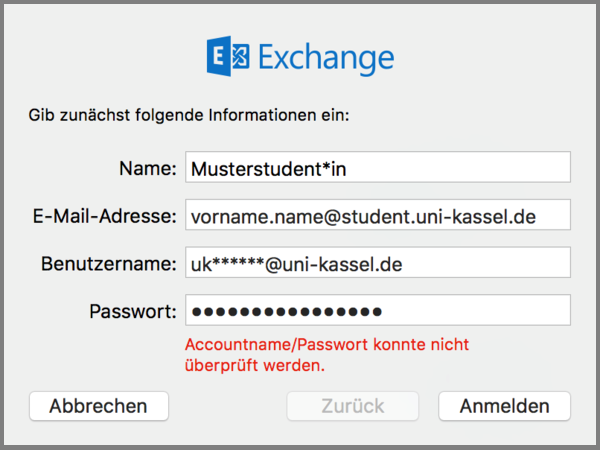
If you have not entered the email address in the form UniAccount@uni-kassel.de but a mail alias, e.g. Vorname.Nachname@uni-kassel.de, the following window will appear. Please enter your UniAccount in the form UniAccount@uni-kassel.de under user name.
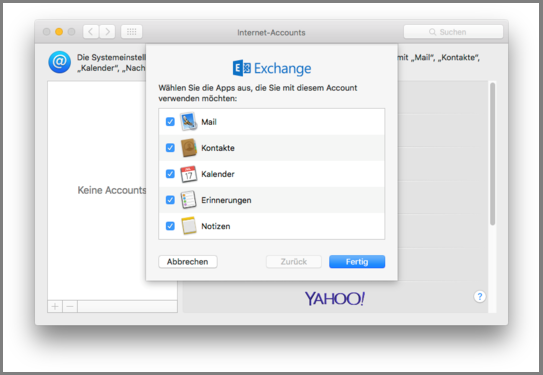
You now have the option of specifying which content should be synchronized with your Exchange account. Complete the Exchange account setup by clicking on the "Done" button.
Using Apple Mail
Open Apple Mail by clicking on the dock icon with the stamp. If "Mail" is not in your dock, press the key combination cmd + space bar and enter "Mail" in the search field, then press the Enter key.

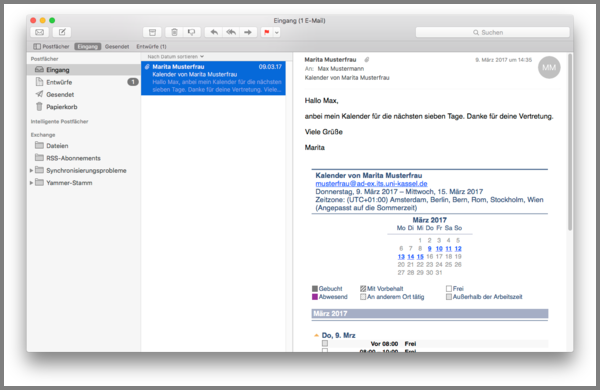
The Mail user interface is divided into 3 columns:
- Left column: Here you will find an overview of all e-mail accounts and mailboxes that have been set up in Mail.
- Middle column: This column displays e-mails from a mailbox that you have previously selected in the left-hand column.
- Right column: Emails that you have selected in the middle column are displayed here.
Compose email
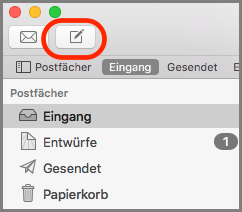
To compose an e-mail, click on the button with the pencil symbol in the top menu bar.
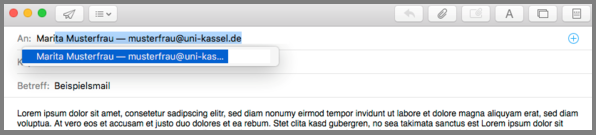
In the newly opened window, enter the recipient's e-mail address in the "To" text field. If your recipient is already in your contacts, simply enter a few letters of their name and a contact suggestion should appear, which you can confirm with the Enter key.
After you have written a subject and email text, you can attach files to your email by clicking on the paperclip icon in the top menu bar of the email window. You can also integrate images directly into the email text by dragging and dropping the desired image to the appropriate position in the text.
Email administration
To organize your emails, you have various action options, these are located above your email list. Select one or more emails and then click on one of the following buttons:
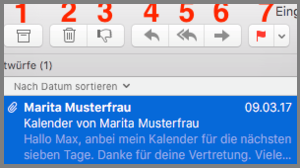
- Archive: Moves the e-mail to an archive folder.
- Delete: Moves the email to the recycle bin.
- Mark as advertising: Marks the e-mail as an advertisement.
- Reply: Opens a window to create a reply to the selected e-mail.
- Reply to all: Write a reply to all recipients of the selected e-mail.
- Forward: to send a copy of the selected e-mail.
- Mark: To organize your e-mails.
Using Apple Calendar
Open Apple Mail by clicking on the dock icon with the calendar symbol. If the calendar is not in your dock, press the key combination cmd + space bar and enter "Calendar" in the search field, then click the Enter key.

There are 2 areas in the Apple Calendar user interface:
- Left column: Here you will find a list of all calendars
- Right column: Here you can display a day/week/month/year view
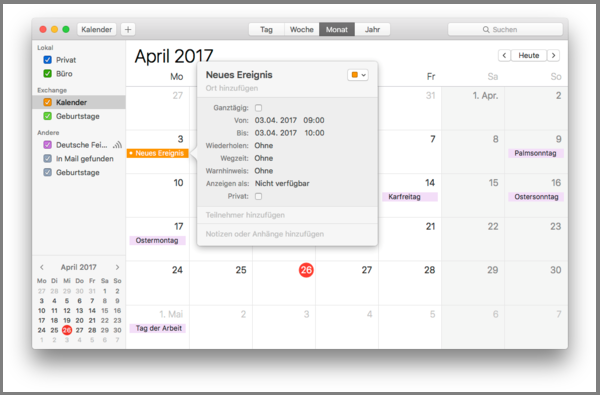
Add appointment
To add an appointment, double-click on the desired position in the calendar view, a small window will open in which you can enter your appointment data.
Add calendar
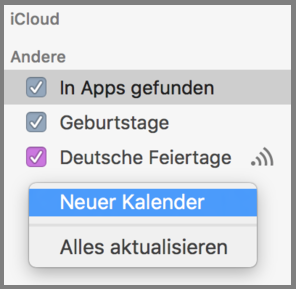
If you want to organize your appointments in different calendars, create a new calendar by right-clicking in the left-hand column and then selecting New calendar.
Manage view
In the left-hand column, you can select which calendars are to be displayed in the calendar view by checking or unchecking the box in front of the respective calendar.
Above your calendar view, you can switch between the 4 views: day, week, month and year.
Go-Link of this page: https://www.uni-kassel.de/go/zugriff-applemail