Adding a shared address book
The content on this page was translated automatically.
Contents
Outlook 2016
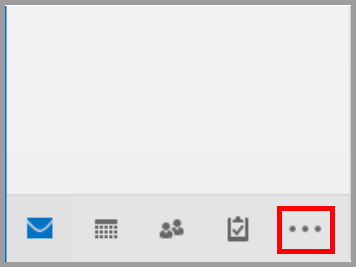
First click on the icon with the three dots in the bottom left-hand corner of the screen and then on "Folder".
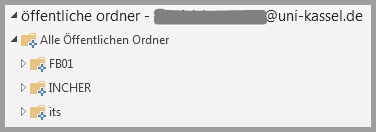
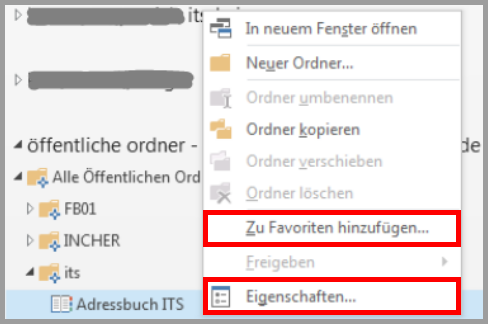
Select the "Public folders" of your Outlook profile on the left-hand side of the screen in the following list. Then click on "All public folders" and open the folder in which the address book is located.
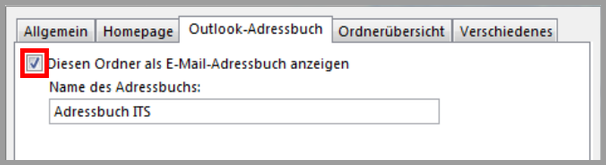
Right-click to open the properties and check the "Outlook address book" tab. Confirm and close the window.
Then add the address book to your favorites by right-clicking on it.
Outlook 2024
To add a shared address book in Outlook, click on the "More apps" box icon at the top left. In the small window that opens, click on the "Folder" button.


The folder view in Outlook opens (similar to the email view). Select the "Public folders" of your Outlook profile on the left-hand side. Then click on "All public folders" and open the folder containing the address book you wish to add.

Right-click on the desired address book to open the context menu. Select "Properties" from this menu and a new window will open.

In this window, go to the "Outlook address book" tab and check the box. You can also customize the name of the address book for you. Then confirm the window.

Finally, add the address book to your favorites. To do this, right-click on the address book again and then click on "Add to favorites" in the context menu that appears.

Mac
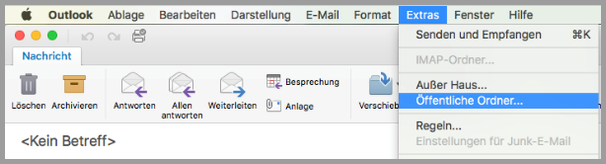
First go to "Extras" and then to "Public folders".
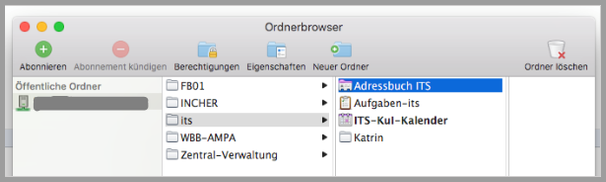
Then select the folder in which the desired address book is located. Select the address book and click on "Subscribe".
Web access
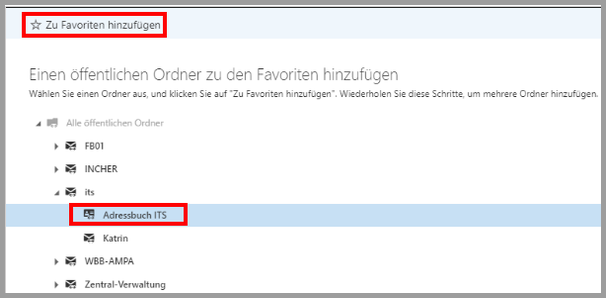
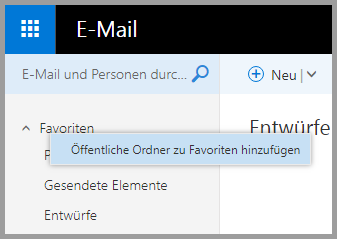
First, right-click on "Favorites" in the top left-hand corner and select "Add public folders to favorites". It is important that you are in the "E-mail" area!
Next, select the folder in which the address book is located and then highlight it. Now click on the star at the top with the label "Add to favorites".