Set registry value
The content on this page was translated automatically.
If you are using Office 365 (for Office 2019 users), a registry value must be entered before you continue with the instructions on the manual page. This can be done in two ways:
- With the registry editor or
- with Powershell.
Registry Editor
Search for "regedit" in the program search. A new window will open.

Navigate to the path
"HKEY_CURRENT_USER\SOFTWARE\Microsoft
\Office\16.0\Outlook\AutoDiscover".
Create a new key by right-clicking -> "New". Select "DWORD value (32-bit)" here.

Enter "ExcludeExplicitO365Endpoint" as the name for the new key. Then double-click on the entry and enter "1" as the value.

Confirm the entry with "OK".
You can now close the registration editor and continue with the integration of your mailbox.
Powershell
This entry can also be made with Powershell.
To do this, open the program search and enter "powershell". Then open the program.
Now enter the following command and confirm with the Enter key:
Set-ItemProperty -Path "HKCU:\Software\Microsoft\Office\16.0\Outlook
\AutoDiscover" -Name "ExcludeExplicitO365Endpoint" -Value 1 -Type DWORD
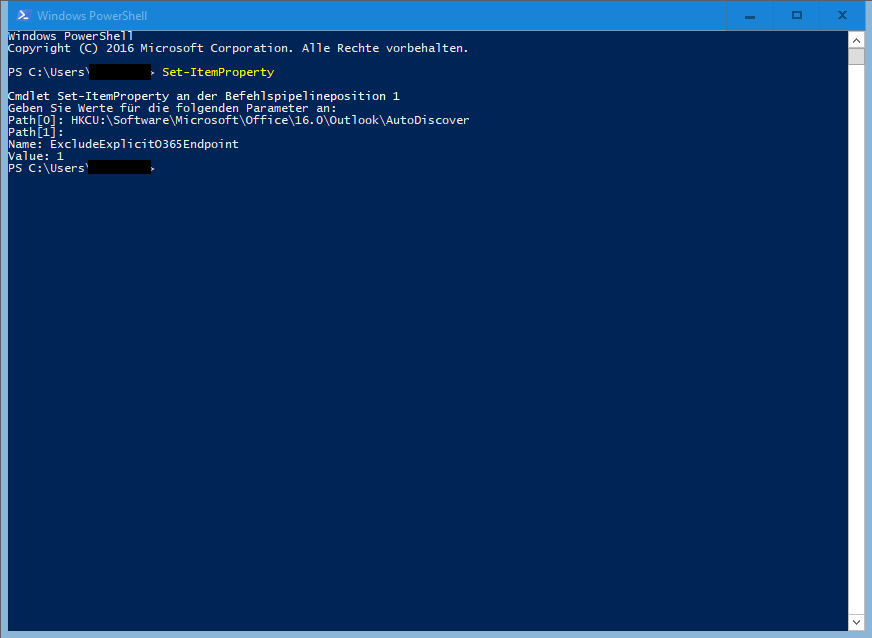
The registry entry is now created automatically. You can now close the Powershell and continue with the integration of your mailbox.
Go-Link of this page: https://www.uni-kassel.de/go/outlook-registrywert