Registration (form)
The content on this page was translated automatically.
What should be protected?
You can use the registration form to offer access protection for entire pages or individual page content so that only certain user groups have access. This is useful if, for example, information is only to be made available within the university.
Centrally created user groups
- Create the page to be protected (if none exists) and click on the pencil icon.
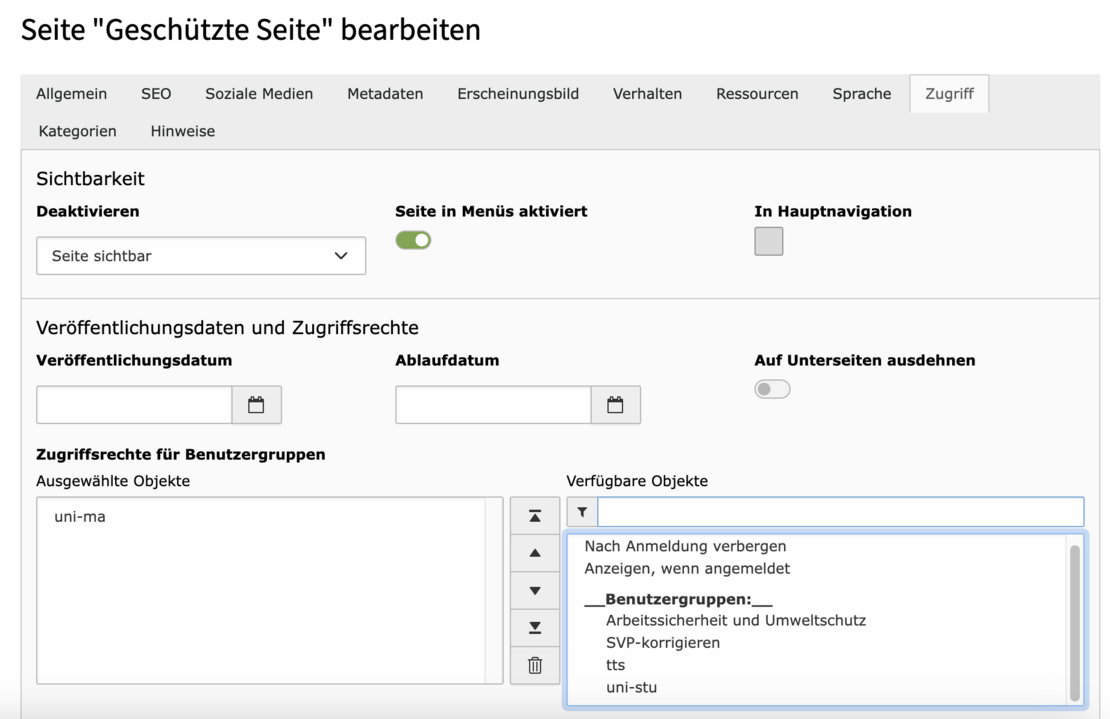
- Select the Access tab and under Available objects select the folder in which the user group was defined, save and close.
The Typo3 administration has created central user groups, such as all employees (uni-ma) or all students (uni-stu). These are located in the "All FE users (LDAP)" folder. Users log in here with their university access data.
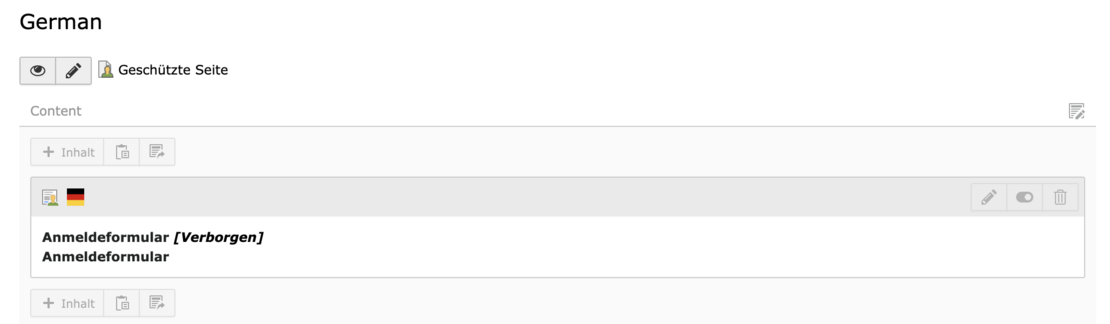
The registration form for your protected page is usually integrated on an upstream page. The protected page is then usually a subpage.
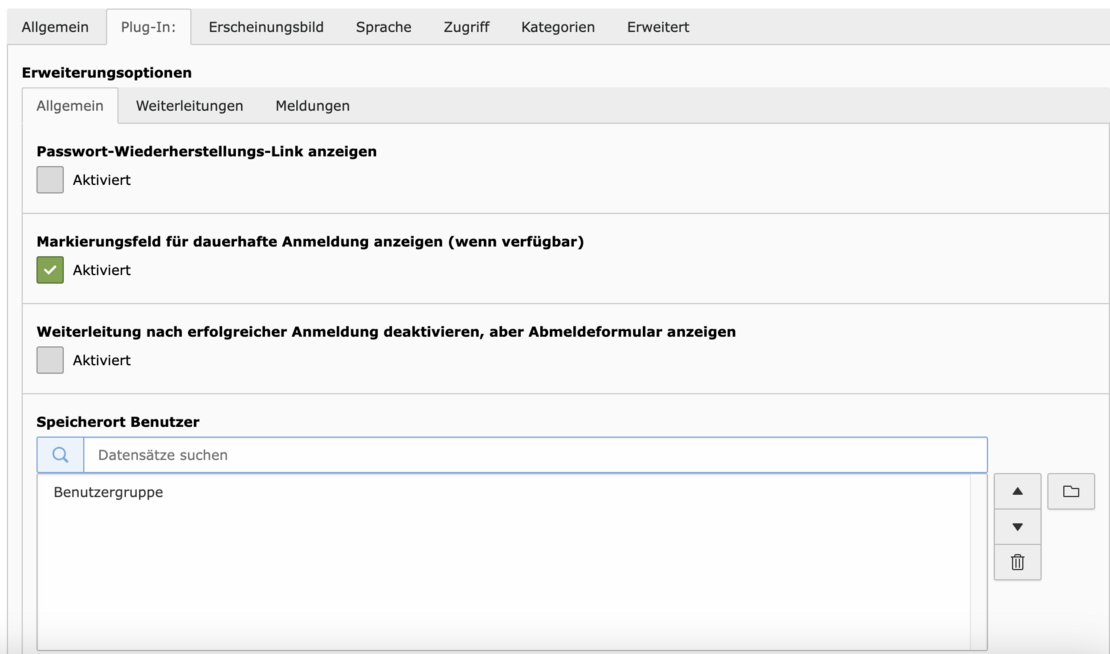
Select the content element on the page where you want the login form to appear.

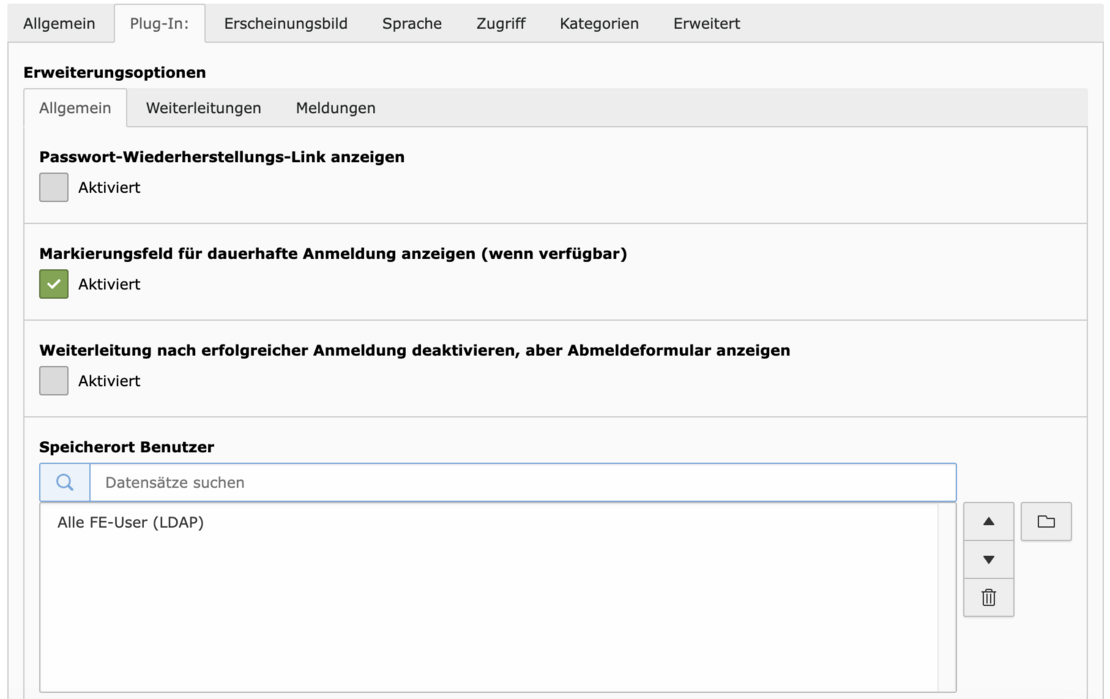
- In the General tab, select the "All FE users (LDAP)" folder as the storage location for the users, as this is where the centrally managed user groups are located. The folder can usually be found at the top of the page tree.
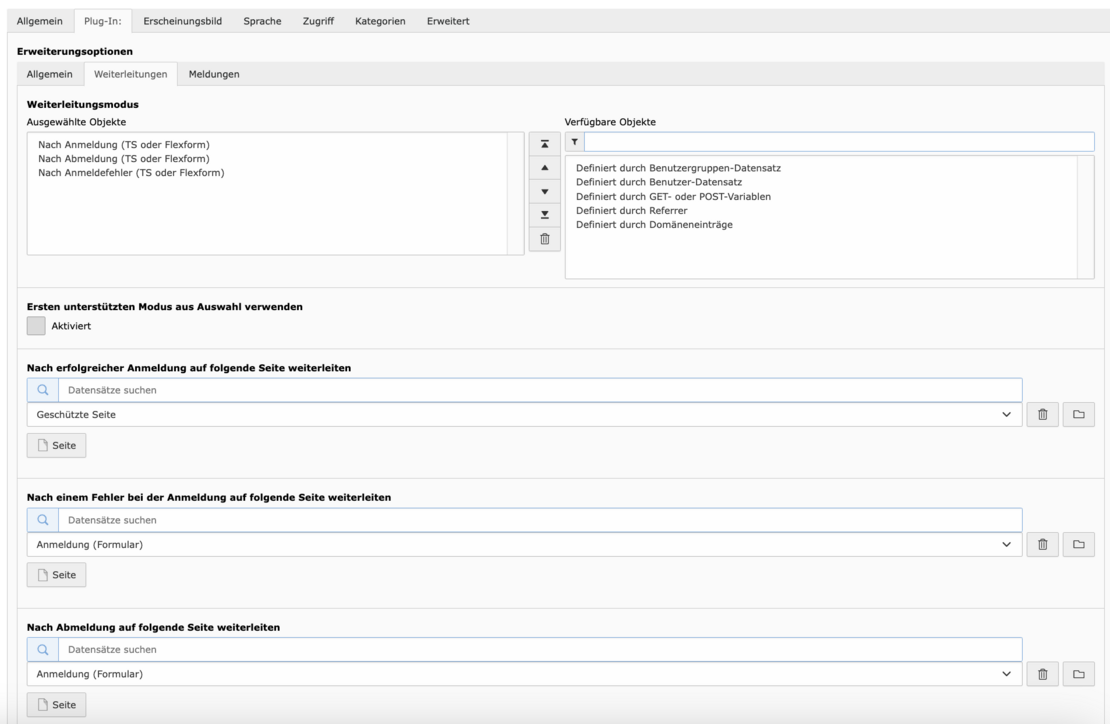
- In the Redirects tab, you define where users are redirected to after a successful login (select your protected page here).
- You also define pages to which users are redirected in the event of an incorrect login or logout (the page on which you embed the login form is a good choice here).
- Under "Forwarding mode", select the objects as shown in the image below.
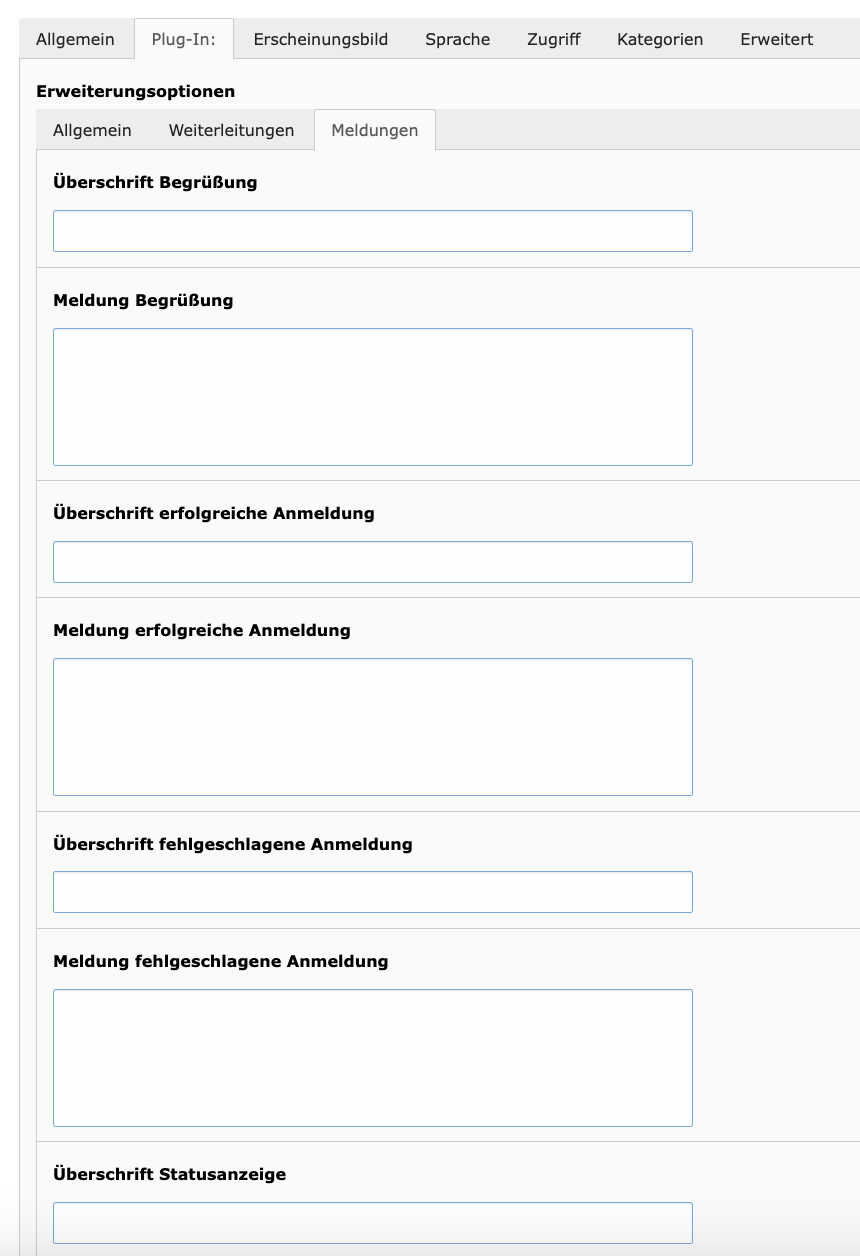
- In the Messages tab, you have the option of setting notifications and messages for users, such as "You have successfully logged in". This is optional.
- Then copy the registration form and paste it onto the protected page. The purpose of this is to allow users to log out again on the page. After logging out, they are automatically redirected to the page where they logged in.
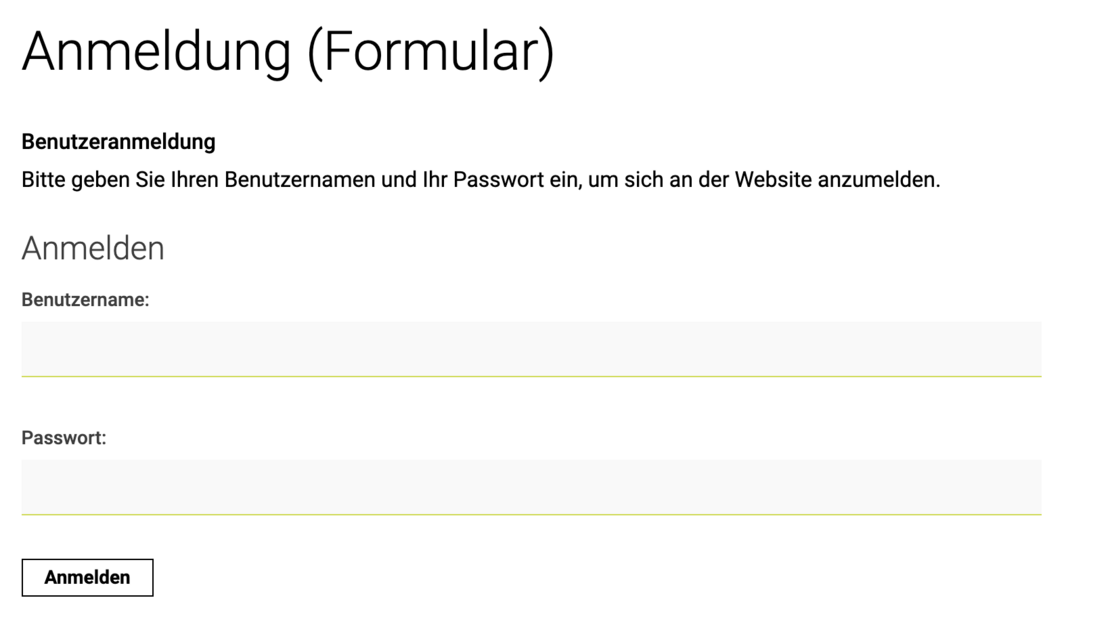
- After successful configuration, the login screen for your protected page appears.
Independently created user groups
- Create a new folder and activate it.
- Go to the list view and use the "+" to add a new "Website user group" data record.

- Assign a group name for your individual user group.

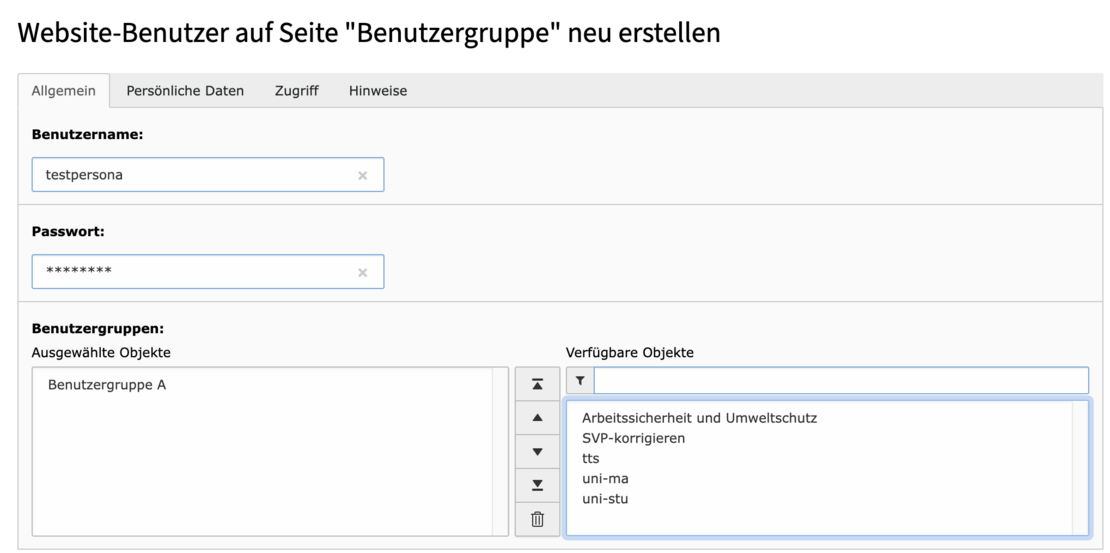
- Create a website user (via "+", then select "Website user").
- Assign a user name and password. Then assign the user to your newly created user group.
Important: Share the access data with the people who are to have access via the user group.
- View of the folder in the backend, after creating the user group and user.

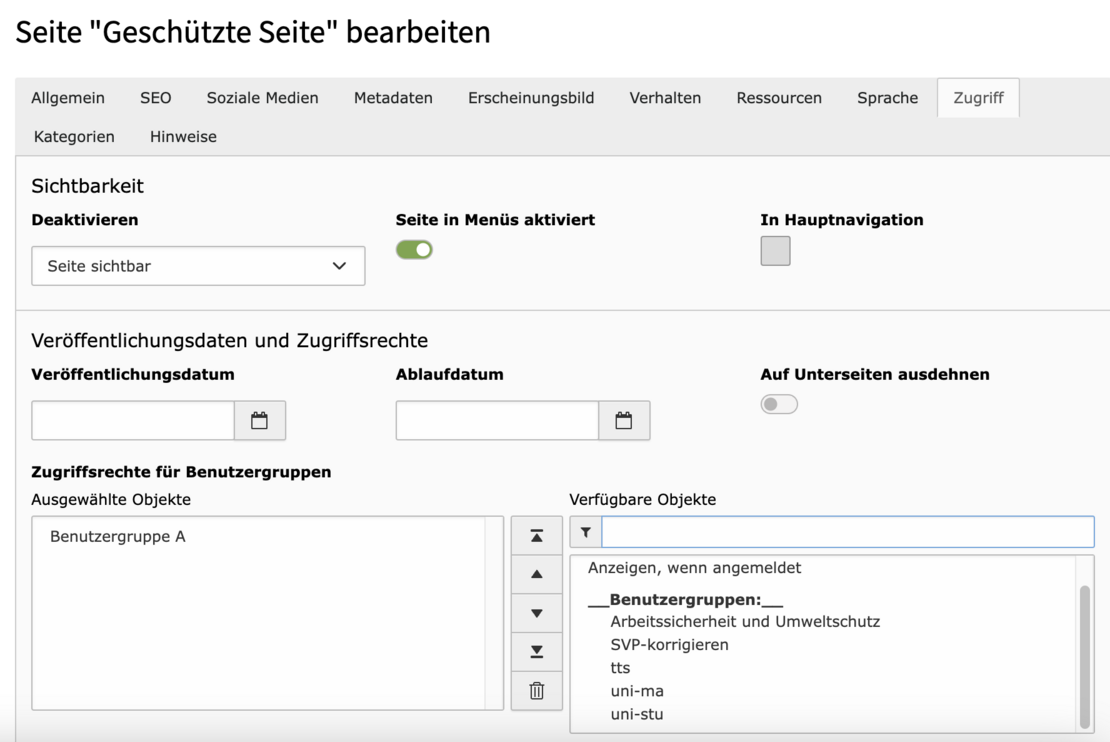
- Create the page to be protected (if none exists) and click on the pencil icon.
- Select the Access tab and under Available objects select the folder in which the user group was defined, save and close.
The registration form for your protected page is usually integrated on an upstream page. The protected page is then usually a subpage.
Select the content element on the page where you want the login form to appear.
- In the General tab, select the folder you have created as the storage location for the users.
- In the Redirects tab, you define where users are redirected to after a successful login (select your protected page here).
- You also define pages to which users are redirected in the event of an incorrect login or logout (the page on which you embed the login form is a good choice here).
- Under "Forwarding mode", select the objects as shown in the image below.
- In the Messages tab, you have the option of setting notifications and messages for users, such as "You have successfully logged in". This is optional.
- Then copy the registration form and paste it onto the protected page. The purpose of this is to allow users to log out again on the page. After logging out, they are automatically redirected to the page where they logged in.
- After successful configuration, the login screen for your protected page appears.