Cryptomator
What is Cryptomator?
Cryptomator is a free application that allows you to easily and conveniently encrypt data and store it securely locally, on a network drive or in the cloud. You can find out how to encrypt data using Cryptomator in the following instructions.
What you need to consider
- You need administrator rights on your computer for the installation. If you do not have this, please contact your IT administrator.
- If you want to share a folder encrypted with Cryptomator with someone, this person must also have Cryptomator installed on their computer in order to be able to open the encrypted folder.
- When using a shared encrypted folder (e.g. in HessenBox), it is not possible to work on the files stored there at the same time.
- Even if you use the secure AES-256 encryption method, the file is only as secure as your password allows it to be. Keep this in mind when choosing your password! You can find tips on creating secure passwords on our password security page.
- It is possible to create a recovery key. If you forget the password, this key is the only way to regain access to your encrypted data. It is important that you keep this key safe and inaccessible to third parties.
Download & Installation
Step 1: Download Cryptomator
You can download and install Cryptomator from the following link: cryptomator.org/downloads/
Important: Please note that you need administrator rights on your computer for the installation. If you do not have these rights, please contact your IT administrator.
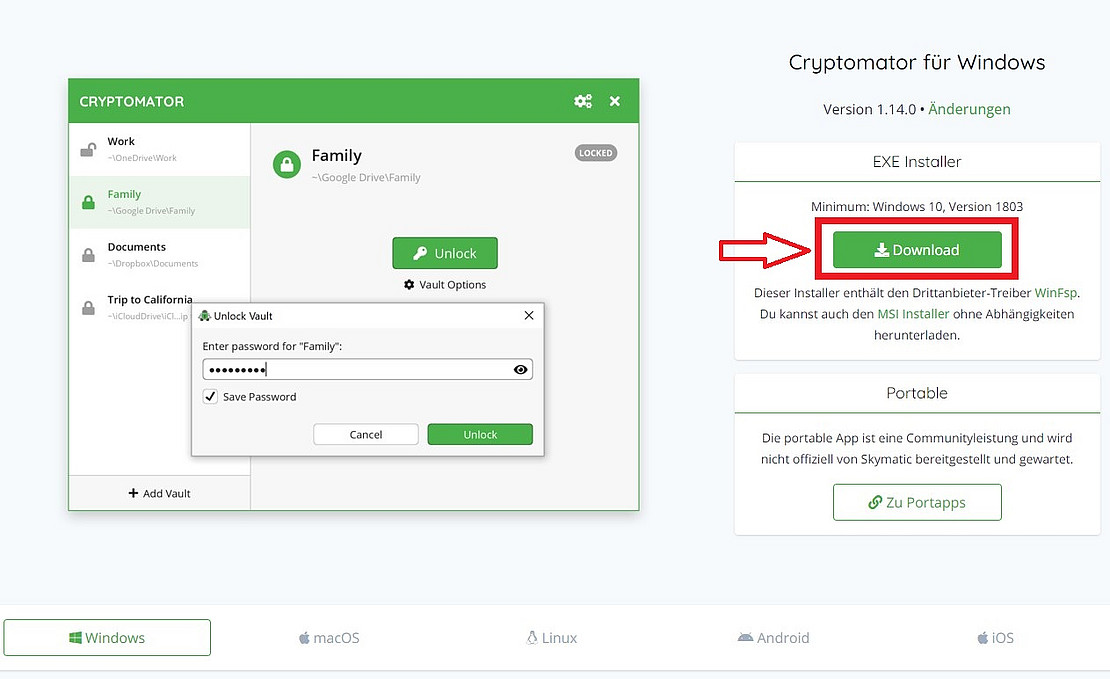
In addition to Windows, you will also find versions for other operating systems such as MacOS or Linux under the link.
Step 2: Install Cryptomator
Open the downloaded EXE file to start the installation of Cryptomator.
After successful installation, you can start Cryptomator directly.
Create a new safe
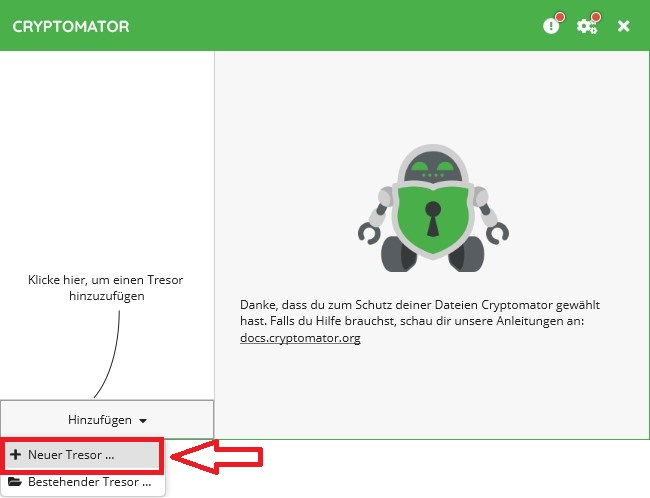
Step 1: Add a safe
If not already done, start the Cryptomator.
Select “Add” and “New safe ...”.
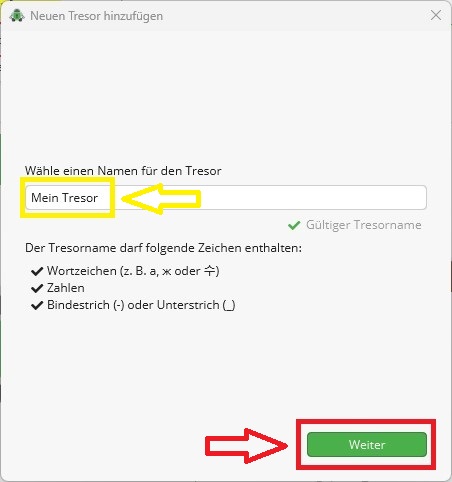
Step 2: Define the safe name
Enter a name for your safe and confirm this with “Next”.
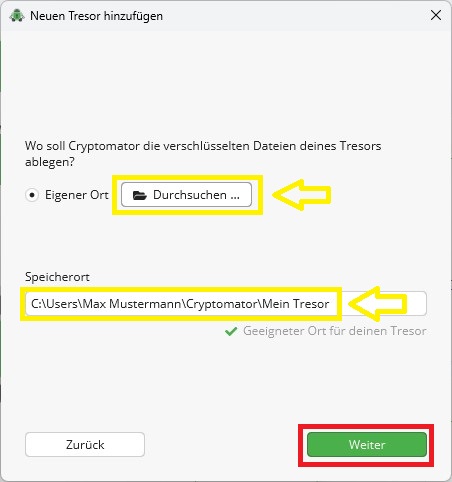
Step 3: Select storage location
You can select the desired storage location for your safe via “Browse...”. Then confirm your selection with “Next”.
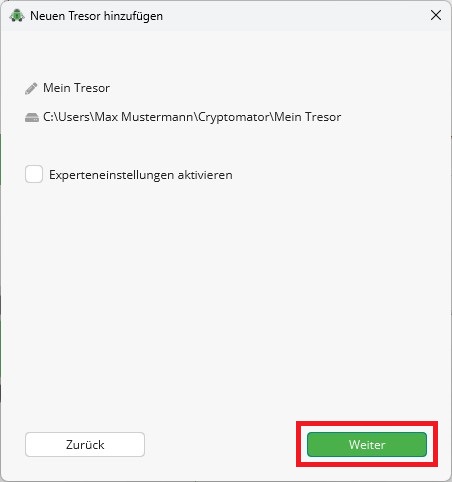
Step 4: Expert setting
Skip the next window directly with “Next”.
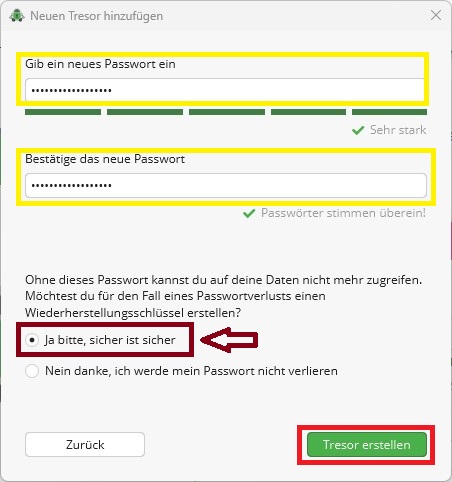
Step 5: Set password
You must then enter a password for your safe. Choose a secure password with at least 12 characters. You can find tips on creating secure passwords on our password security page.
You also have the option of creating a recovery key. If you forget your password, this key is the only way to decrypt your safe again.
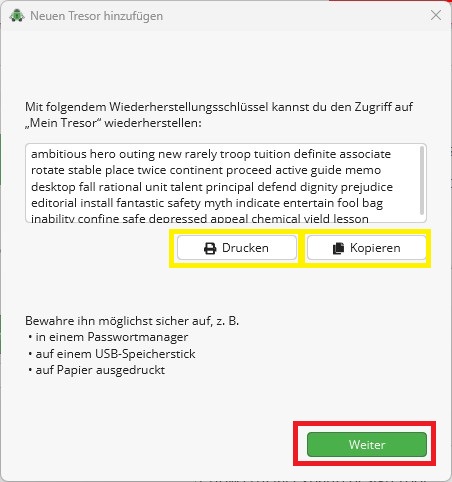
Step 6: Recovery key
Print out the recovery key or copy it into a password manager or onto a USB stick, for example. The key must not be accessible to third parties; in particular, the key must not be kept together with the encrypted safe.
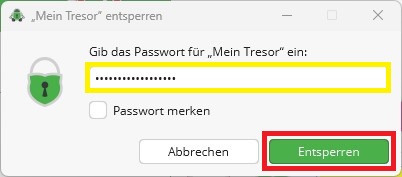
Step 7: Unlocking the safe
Immediately after creating the new safe, you can unlock it by entering the password.
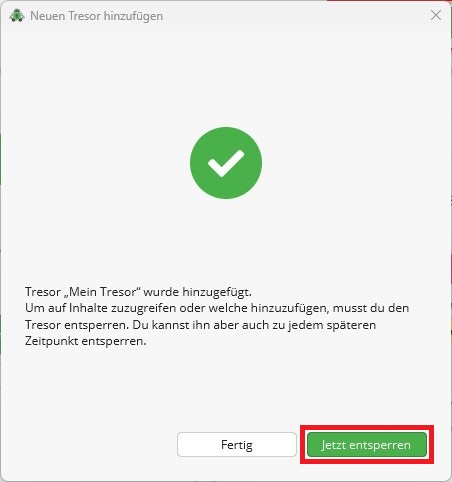
Step 8: Manage files
After unlocking the safe, you can display it directly.
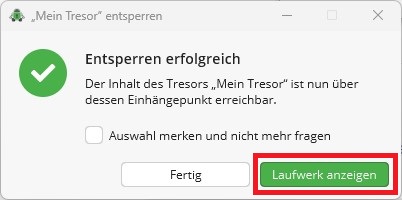
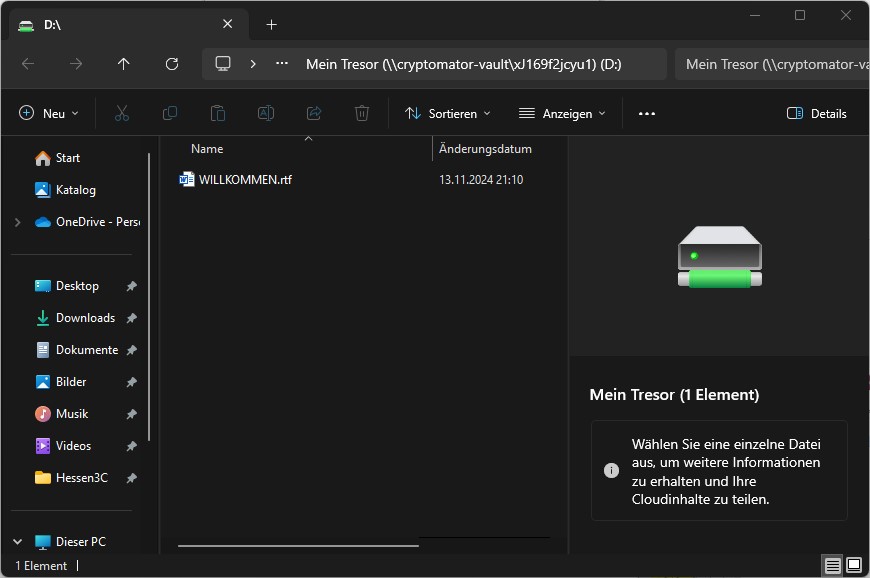
Here you can now easily insert, edit or delete files.
The file “WELCOME.rtf” contains brief information about the vault. You are welcome to delete it after reading.
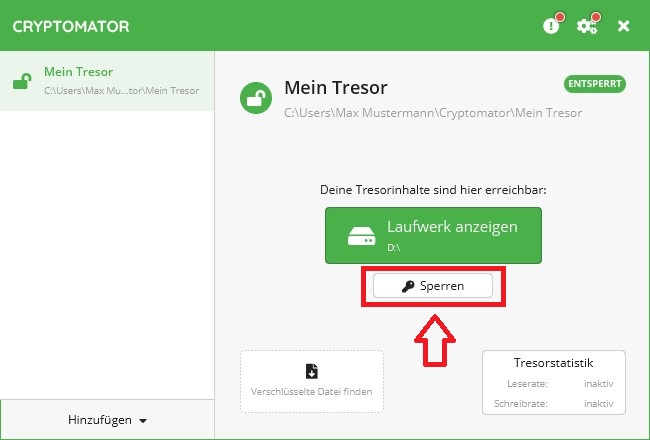
Step 9: Locking the safe
Lock the vault when you have finished editing the files.
Open an existing safe
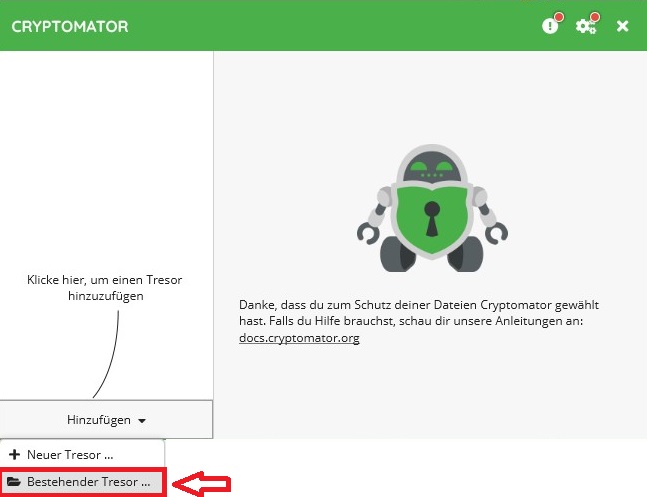
Step 1: Open existing safe
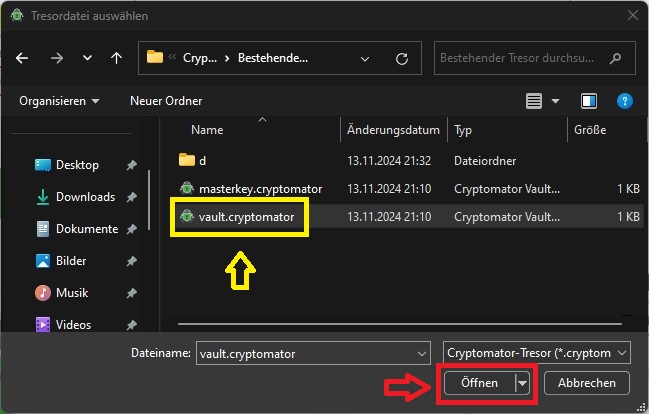
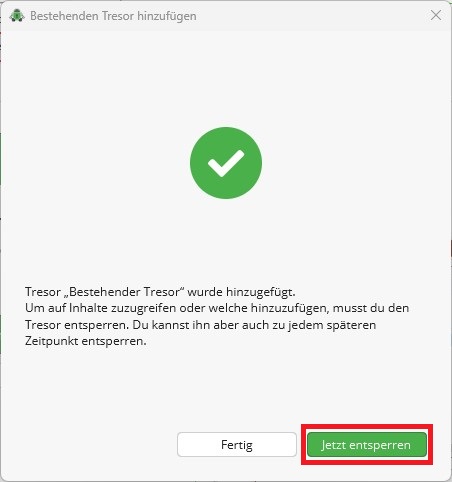
To integrate an existing vault, click on “Add” and “Existing vault ...”.
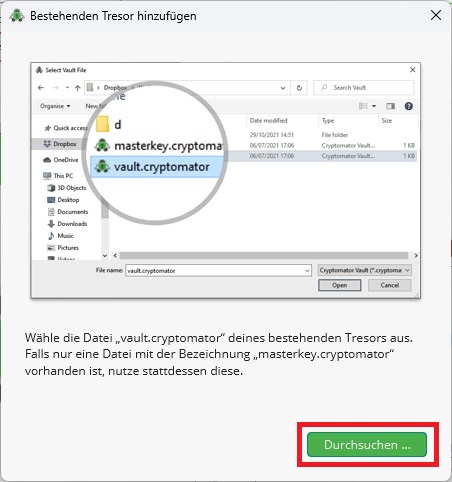
Step 2: Select the “vault.cryptomator” file
Open the desired vault and select the file “vault.cryptomator”.
Step 3: Unlock existing safe
By entering the password, you can unlock the safe and display it.
You can then open, edit, delete or add new files.
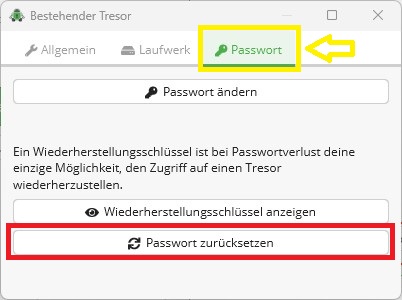
Recover password
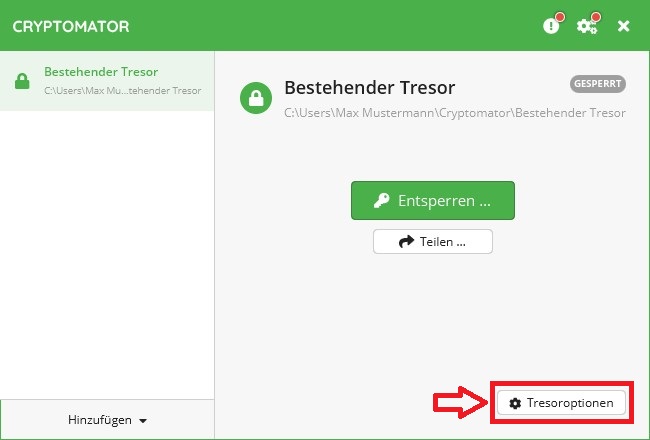
Step 1: Safe options
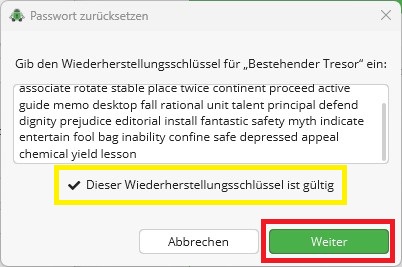
If you have forgotten your password, you will need the recovery key to reset your password.
To do this, select “Vault options” in the corresponding folder.
Step 2: Recover password
You can recover your password under the “Password” tab.