Configuration under Windows
The content on this page was translated automatically.
- Setting up the software
- Creating a new configuration file
- Which node name should be used?
- Which transmission method should the ISP or TSM client use when communicating with the backup server?
- What is the TCP/IP address of the TSM server?
- Recommended inclusion/exclusion list
- General file exclusion selection
- Domain for backup
- Log in to the backup server
- Importing an existing option file
- Customization of the include/exclude options
Setting up the software
Start the backup client (up to version 7 "Tivoli Storage Manager Client", from version 8 "IBM Spectrum Protect Client" or "IBM Storage Protect"). It is called up via
Start menu -> All programs -> IBM Storage Protect -> Backup-Archive -> GUI
or from Windows 10 or Windows Server 2012 via the Windows emblem at the bottom left, then
IBM Storage Protect -> Backup-Archive -> GUI
If no configuration file(dsm.opt) exists yet, the wizard for ISP or TSM client configuration is now started, which guides you conveniently through the configuration of the backup software. The wizard helps you to set up a new configuration file (client option file dsm.opt) for configuring the backup client.
Creating a new configuration file
This item is already selected the first time it is called up (if no configuration file(dsm.opt) is available) and you click on "Next".
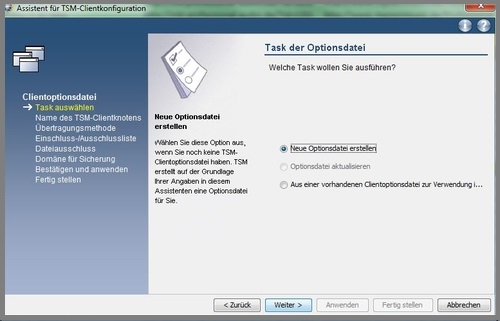
You will be asked for the following settings:
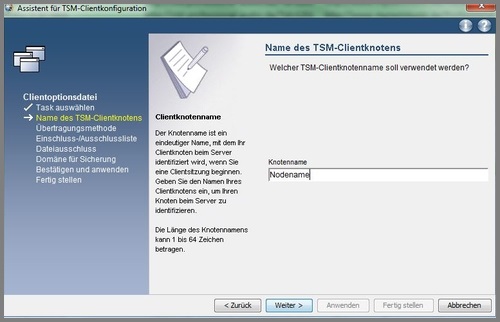
Which node name should be used?
Please enter the node name of your computer. The wizard suggests the Netbios name of your PC.
This should always be the node name that you received from the ITS on your user registration for the backup service.
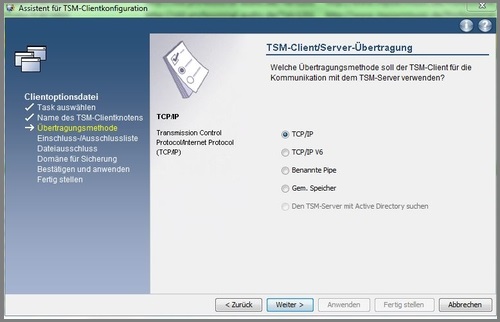
Which transmission method should the ISP or TSM client use when communicating with the backup server?
Use the TCP/IP transmission method.
This is usually already selected here.
What is the TCP/IP address of the TSM server?
Enter here:
tsm44.its.uni-kassel.de
Enter the following for connection:
1500
Recommended inclusion/exclusion list
The wizard recommends a predefined include/exclude list here.
You should configure the backup in such a way that not the entire hard disk, if the PC has one, is backed up, but mainly only the changeable data. The operating system files and programs should be excluded from the backup. The include/exclude options are used to include specific directories or individual files in the backup (include) or exclude them from the backup (exclude).
As a new user of the ISP or TSM software, you should leave it at the recommendations for the time being and possibly add more later; you can find out how to do this under Customization of the include/exclude options.
Please continue for now.
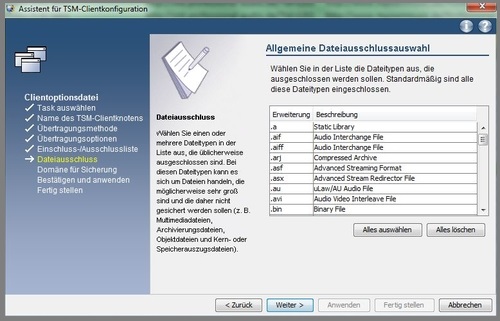
General file exclusion selection
You will be given a selection of file types that you can exclude from the backup. E.g. all files with the extension.core
You can obtain a selection of several types by pressing the "Ctrl" key at the same time
Domain for backup
Here you select the drives to be backed up. You have the option of ticking the box "Back up all local file systems" or specifically selecting one or more file systems, i.e. drives.
If your PC is organized in such a way that the system and data are located on different drives, the best option here is to select only the data disk.
This completes the configuration.
Now click on "Apply".
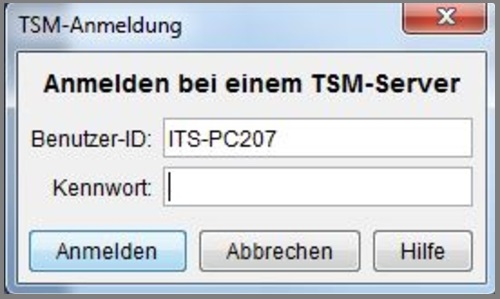
Log in to the backup server
After "Finish" or"Apply" you will see the login window.
The node name should already be entered. Please now enter the password that you were given by the ITS to use the backup service.
Importing an existing option file
If you have already installed ISP or TSM in an earlier version and
have saved the dsm.opt option file, you should copy it directly to
the installation directory: Programs\Tivoli\TSM\baclient.
The new backup client then automatically adopts the settings when called up.
Customization of the include/exclude options
Clarification of terms
- Exclude:
Use Exclude to specify which directories and files are to be excluded from the data backup, - Include:
Use Include to specify the directories or files to be backed up.
Example of the setting
Exclude D:\...\*
Include D:\Documents and settings\Mustermann\Own files\...\*
Here '...' stands for all directories and subdirectories,'*' stands for all files. In this example, nothing is backed up except the directory 'My Documents'. Please note that'\...\*' must be added and that the software processes the individual attributes from bottom to top (bottom up).
The entry in the above example is made as follows
Call up the TSM client via Start -> Programs -> IBM Tivoli Storage Manager -> Backup -> Archive -> GUI .
In the top menu bar, click on Edit, on Preferences, then on the Include/Exclude tab. Here you can insert, remove and change include and exclude options and change their order.
Exclude:
Select the Backup category and then Exclude type.
Click on Browse to select the drive (here D:\) and any file there. Then change this to what you want to exclude from the backup. In this example, this would be D:\...\*. However, you can also enter D:\...\* directly in the window.
Then click on Add. The exclude option should then appear in the statement list, but it will probably be added at the bottom if there are already several options. However, as we are dealing with bottom-up processing here, you must move this option to the top of the list by clicking on Move up. (Bottom-up means that options are processed from bottom to top).
Include:
You do the same with Include: Select the Include type on the left, use Browse to go to the relevant directory (here D:\Documents and Settings\SampleMan\OwnFiles), select any file and change your entry on the left-hand side of the window to what you want to save. In this example, this would be D:\Documents and Settings\Mustermann\My Documents\...\*. Then select Add again. Both entries should now be visible in the instruction list.
If you want to add another directory, repeat the procedure accordingly. These options can be at the end of the list.
This procedure is a little cumbersome, but unfortunately you can only select files and not directories with Browse.
You can also write your entries directly in the small window on the left (don't forget to add/add). Click on "Ok" .
The backup client must now be restarted.
A word about the exclude.dir option
With exclude.dir the specified directory including subdirectories and files are excluded from processing. All exclude.dir commands are executed by the client first, regardless of their location in the include/exclude list.
Files or subdirectories can no longer be included in a directory excluded with exclude.dir.
Other important options:
To speed up the backup a little, you should set the snapshot options:
In the backup client, go to Edit(edit), Preferences then Snapshot tab and set both options to VSS for the snapshot image preferences. Then click ok at the bottom right.
If you prefer to edit the dsm.opt file yourself, enter the following option there:
SNAPSHOTPROVIDERFS VSS
SNAPSHOTPROVIDERIMAGE VSS
Please note that the scheduler must be stopped before the automatic backup and then restarted (Windows services).